![]()
If you follow my Facebook page for The Magic Brush (click here if you don’t) you’ll know I was on a morning show this week called “Kansas City Live”. They had me on the program to demonstrate different ways to paint pumpkins……one of my favorite things to paint!!!!
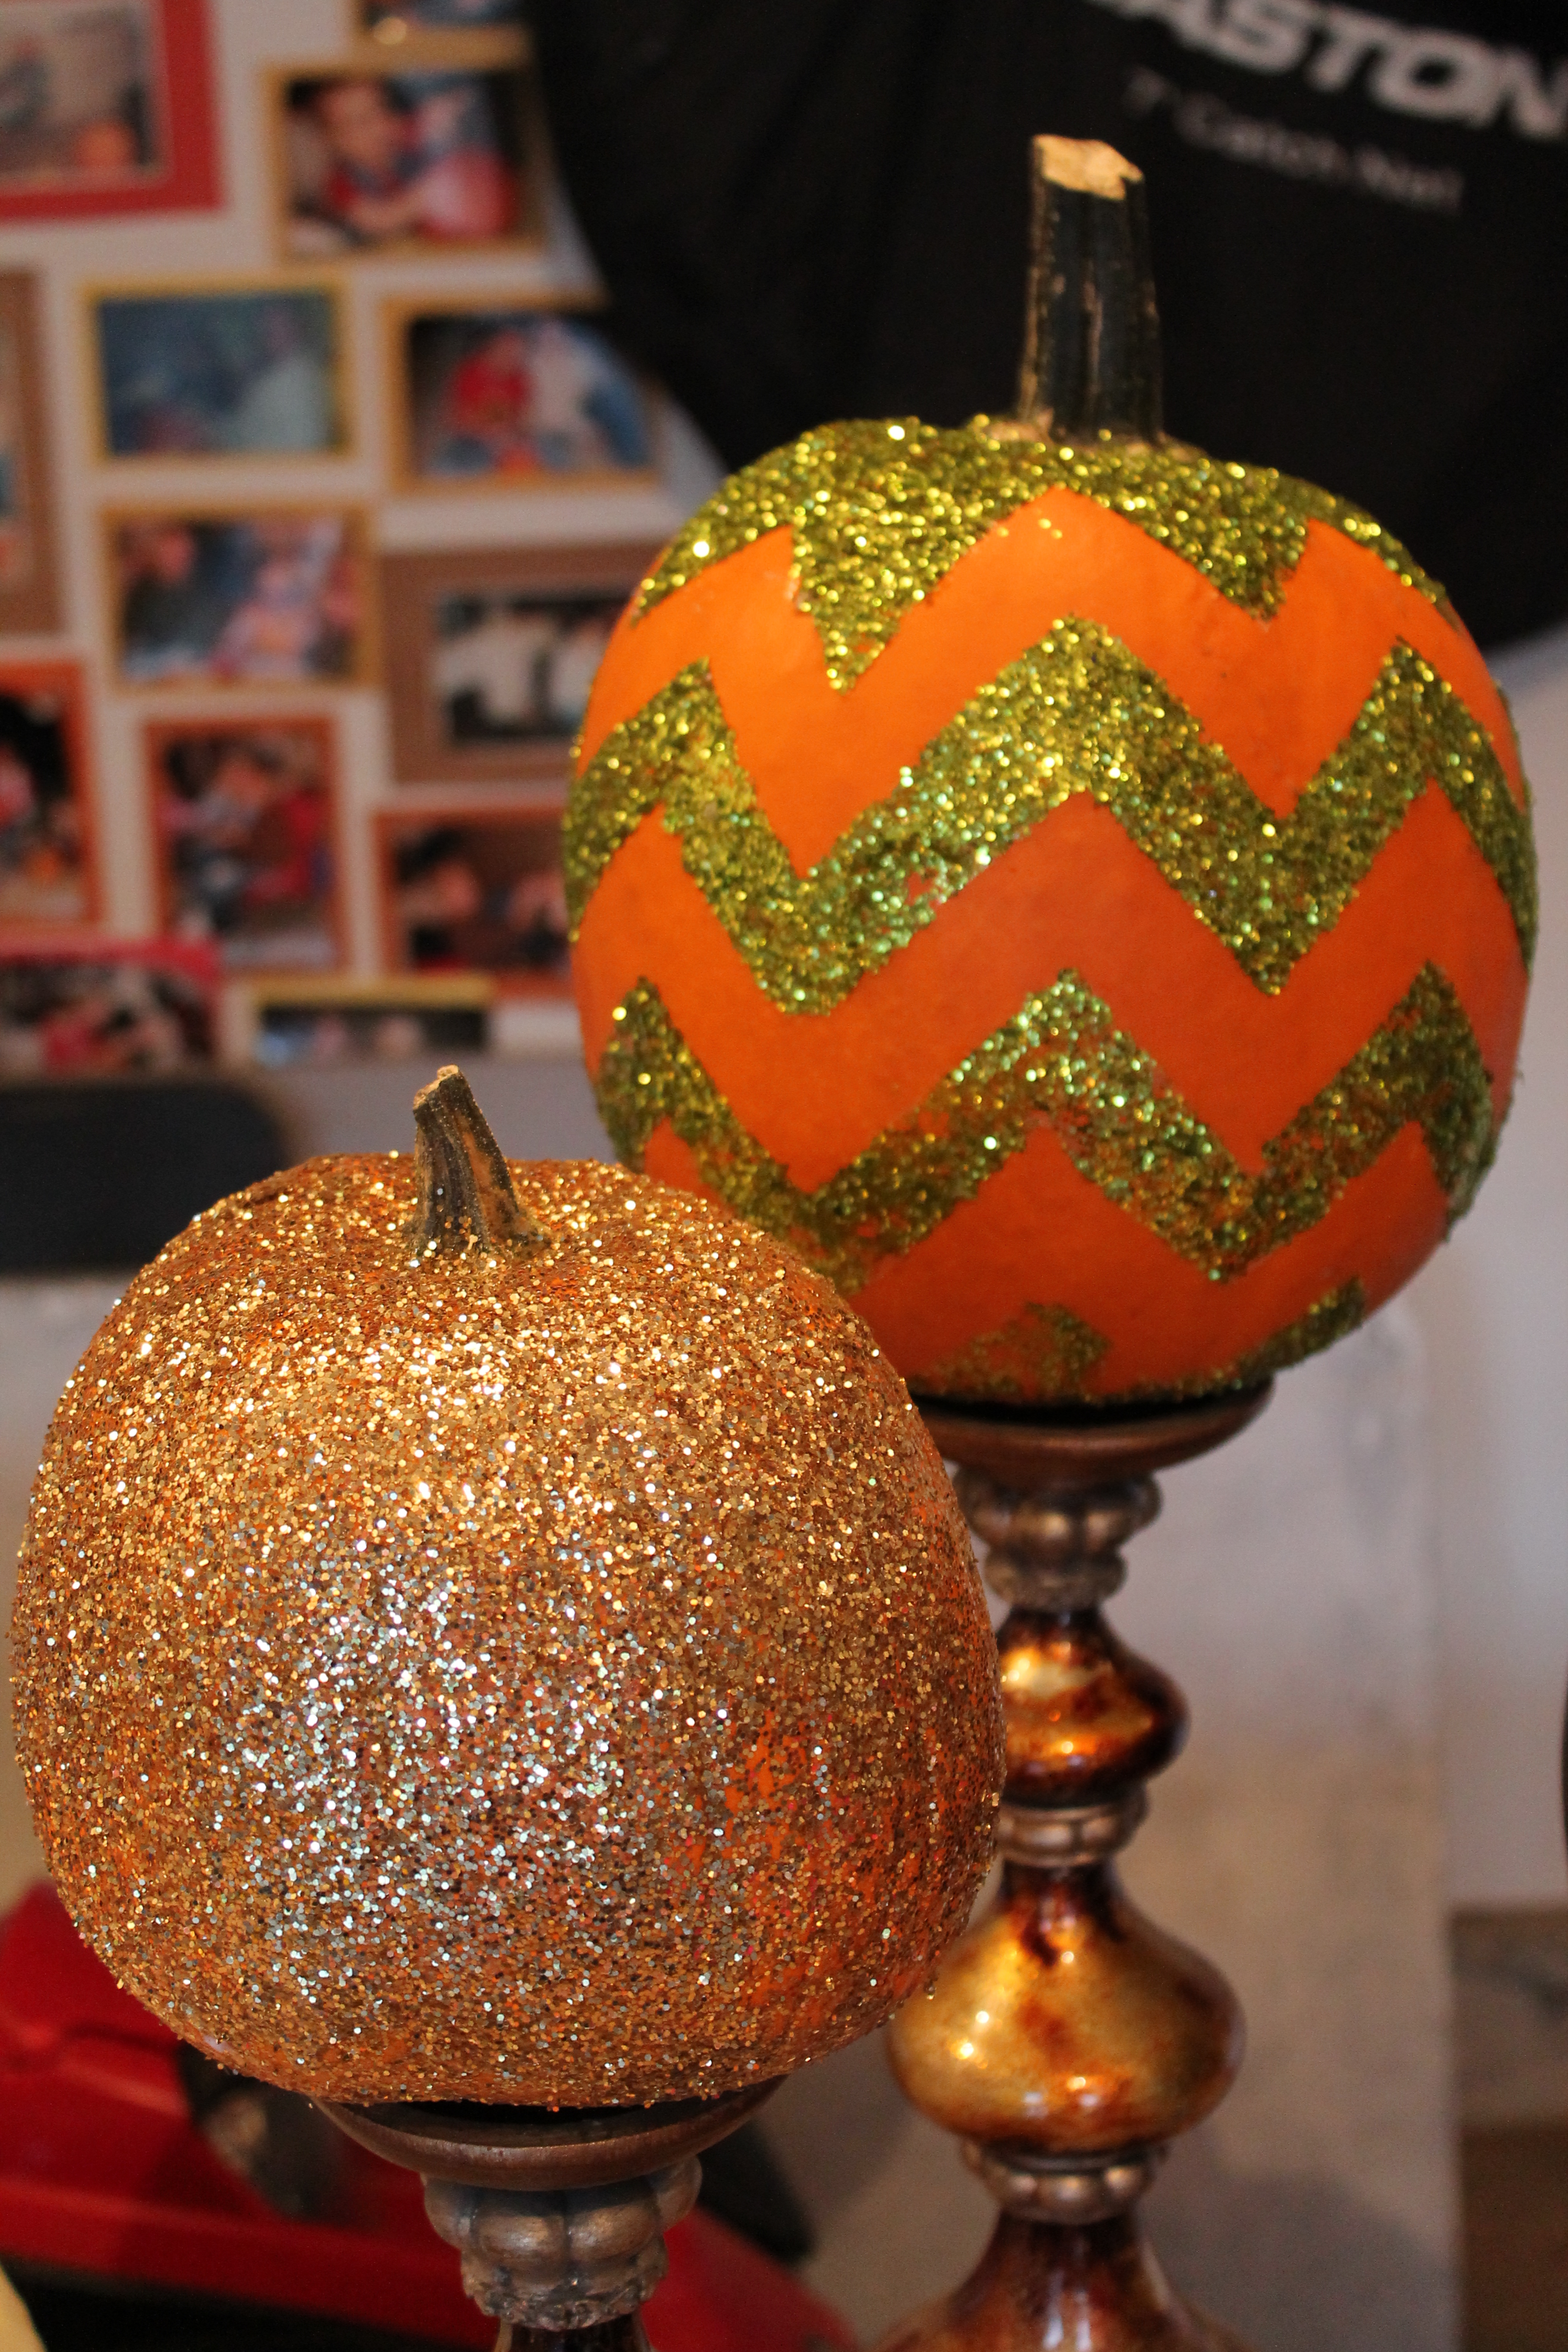
Several of my Facebook fans asked me about painting a chevron pumpkin….so I did one just for you!
Chevron is easy enough to lay out on a cabinet like this one we painted previously:

But…… chevron on a pumpkin is IMPOSSIBLE to measure out because its an uneven, round surface. And you cannot use a stencil. Trust me on this.
So, I started the project by cutting about 50 pieces of 3 inch long painter’s tape. I used the 1″ wide tape because my pumpkin was on the smaller side.
I started with one zigzag across the top first and just kept playing with it until it seemed to meet up on the other side of the pumpkin.
Once I got the top chevron row taped….I just eyeballed the 2 rows below it. Again….there is no way to measure this on a round surface.
![]()
You can see how the tape is not perfect. There were odd overlaps and lines that weren’t straight. And, I had to make a few lines longer in places.
![]()
After the tape was all on, I just used an exacto knife to try to “clean up” the taped pattern and make the lines….. for the most part….even and straight.
![]()
My friend Shauna pulled up to my garage on the day before the tv show this week. I was in serious crunch time and I must have had that glazed over look in my eye. So she jumped in to help me bust out the glittered pumpkins. Anyone who knows my dear friend Shauna Utz knows “glitter” is her middle name. LOL!
![]()
We painted the pumpkin with Modge Podge everywhere first. It went all over the tape…..and that is fine.
We set the pumpkin inside of a tray liner and literally just dumped glitter all over it.
As soon as the glitter covered all of the Modge Podge, we used an exacto knife to dig the tape off before the Modge Pode began to set up and dry.
And we were done!
![]()
I do want to include a few warnings about this chevron, glittered pumpkin so that if you try this at home…you won’t hate me later.
#1) if you are OCD…..the taping on this project could push you over the edge. It will never be perfect! Yikes! I know thats hard for some people!
#2) if you are a clean freak….the way that glitter seems to multiply may drive you to drink. In my case, the glitter was on Shauna, on me, on my garage floor (even tho we put it in a pan liner), we tracked it into my house, it was ground into the rugs, I got it in my truck during transport,etc. I didn’t mind the glitter being everywhere cuz’ the sparkle in my carpet going up the steps to my bedroom is fun….but I am just giving you fair warning!
#3) Use a lot of Modge Podge.
#4) As soon as the glitter is on….get the tape off. Or, the Modge Podge sets up and pulls the glitter off with the tape in spots.
#5) And did I mention that the glitter multiplies???
![]()
This is a super fun pumpkin that is not that hard to do!!!
If you would like to see my video segment from Kansas City Live with all of my pumpkins…..click here.
![]()
See more pumpkin inspiration in my Top 15 Pumpkin Decorating Ideas slideshow!
love it, jennifer! you know i love my chevron!
HI! I found you on Debbie- Doos Newbie party! LOVE these pumpkins!!! Awesome!!!!! =))
Love your chevron pumpkins girl!
I’m am totally going to try this! You hare so creative. Love this idea!
Lately I’ve been loving all things Glitter an Gold. So this is right up my alley!