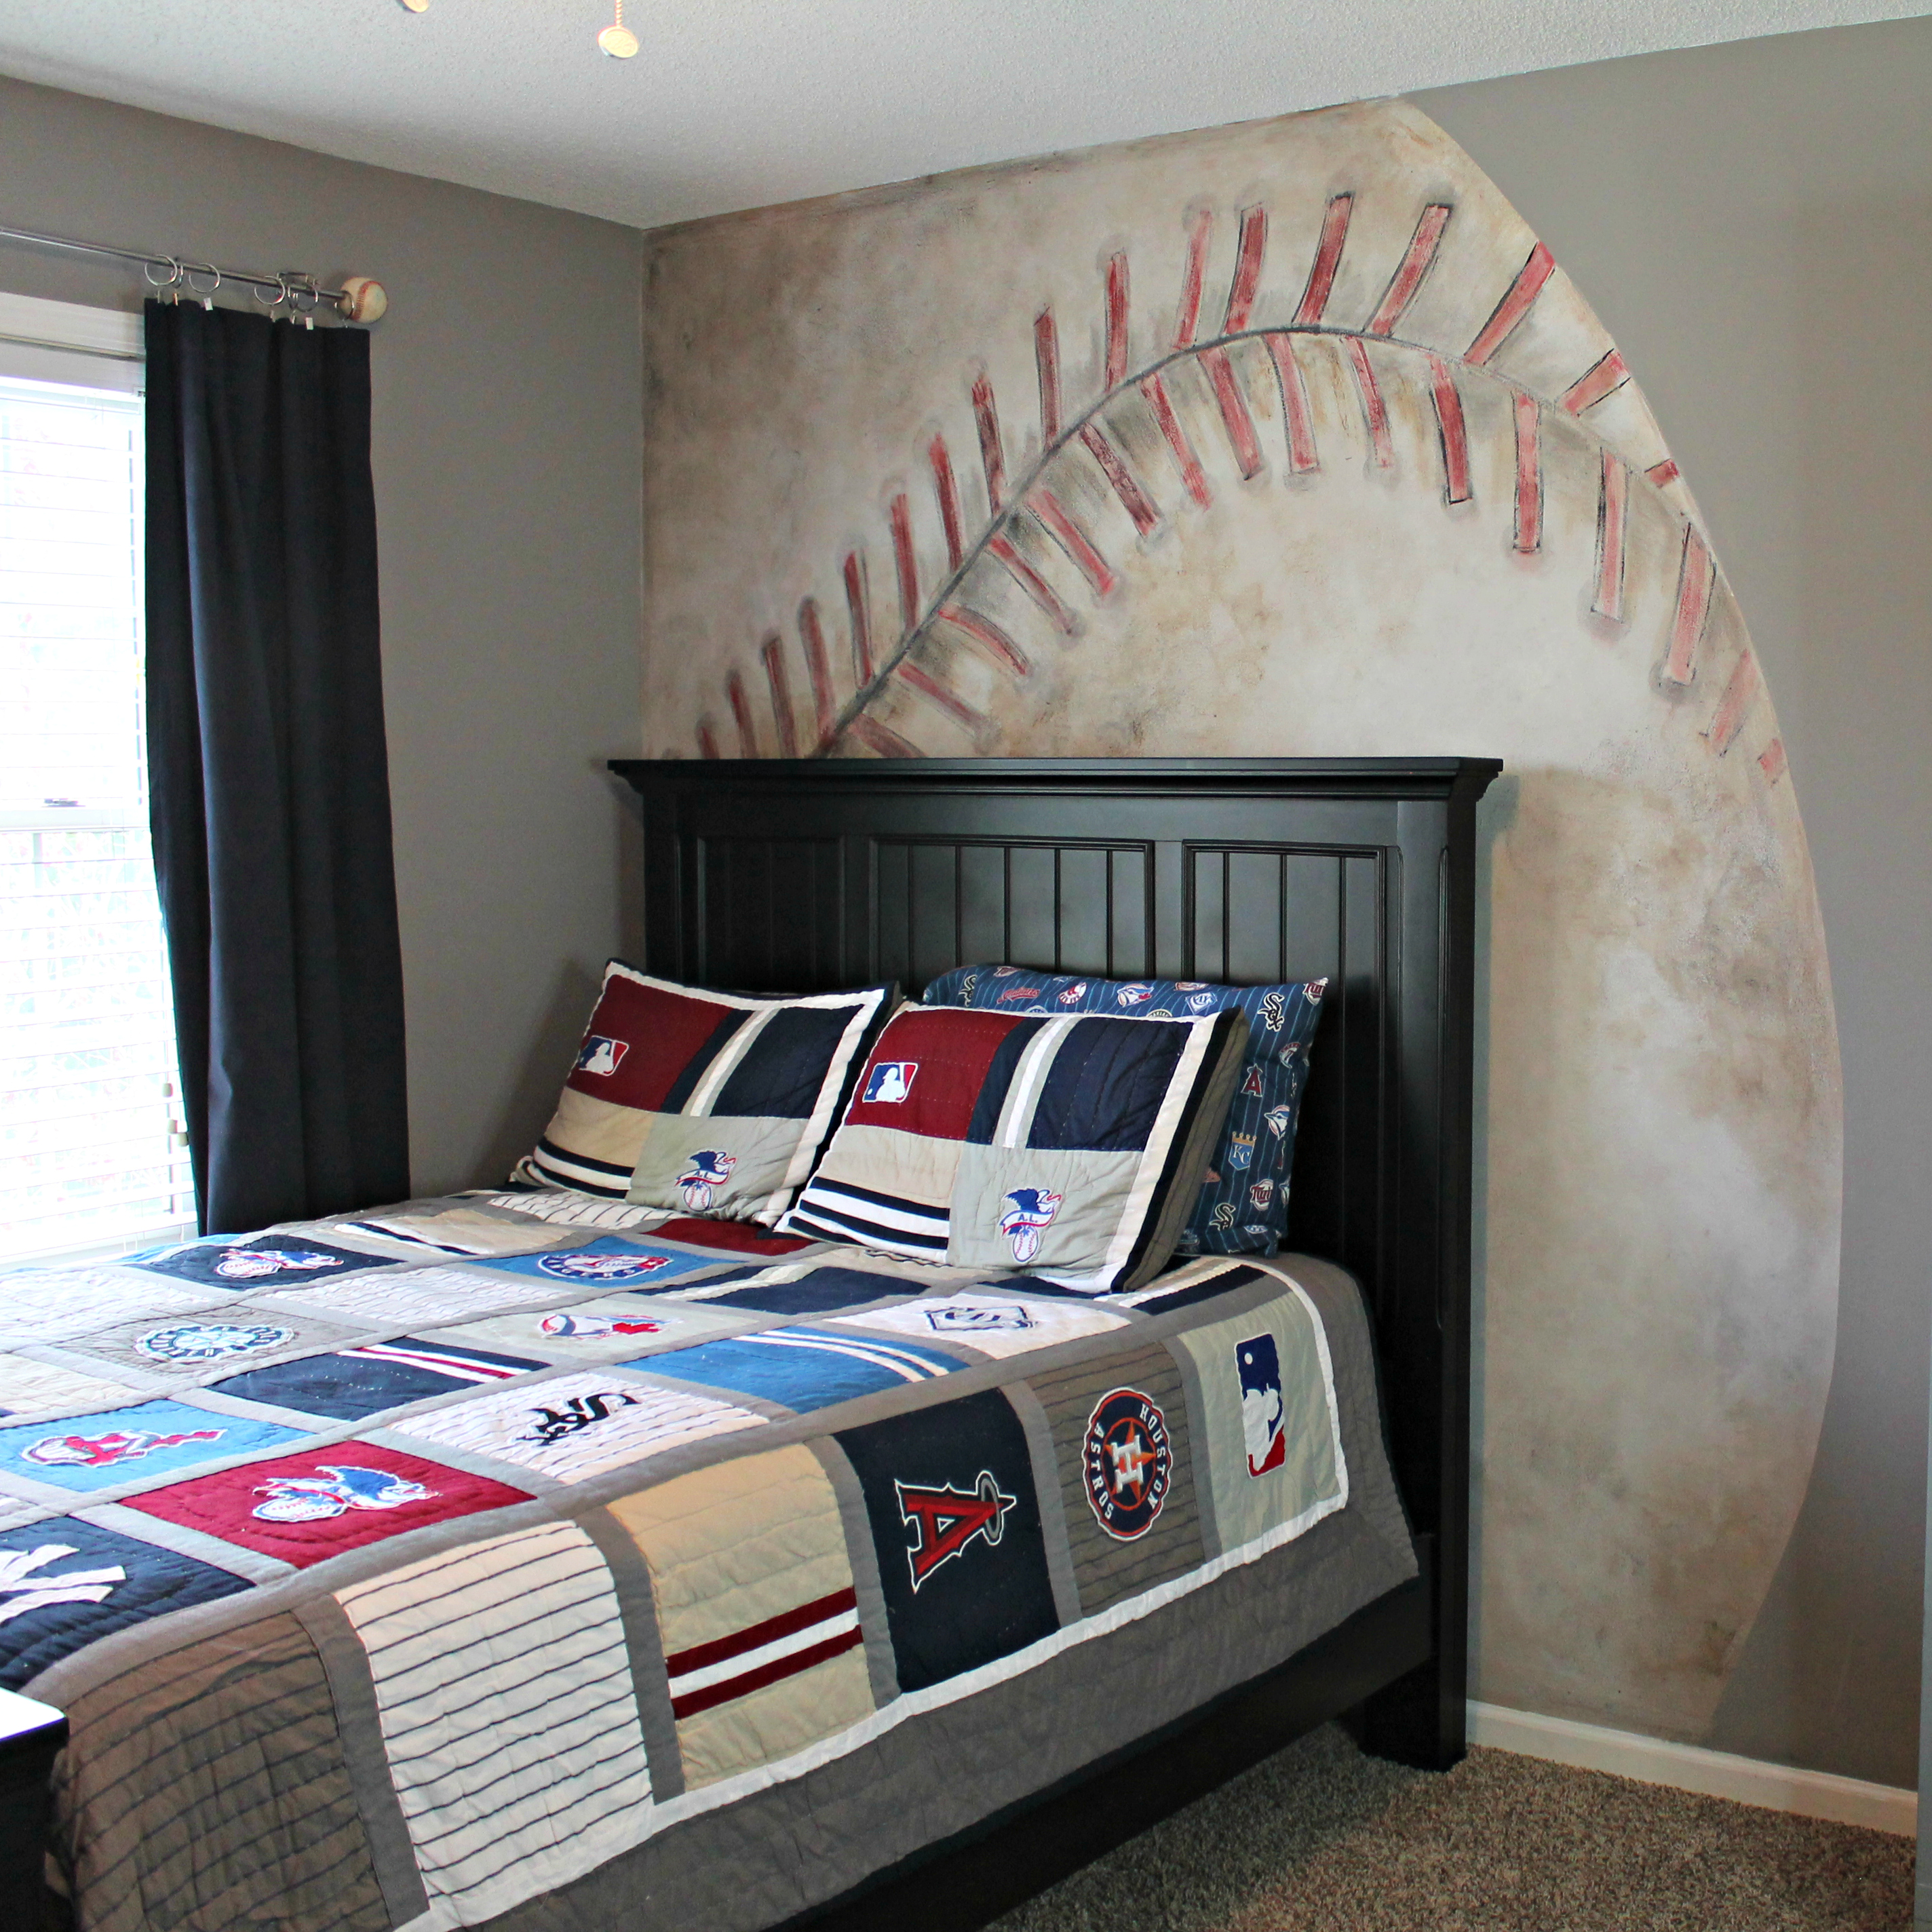

The redoing of our teen son’s bedroom continues…. last week I added these baseball finials to his curtain rods.
And this week I finaaaaaaaally finished painting this baseball mural on his wall!
I stretched this project out over the course of a week because sometimes I get irritated in the middle of a project and if I kind of put them “in time out” for a few days, I figure out what’s bugging me about it. Does anyone else do that?
I probably spent less than 8 hours total on this project and you can do it too!
This post does contain affiliate links referring you to products that I use and love!

You don’t need a lot of supplies to start:
- A baseball to keep looking at like 5,389 times
- A tape measure
- Jute
- chalk
- paint- I used Sherwin Williams Latte
- roller
- tape for the edge and the side wall/trim
- brush for edging

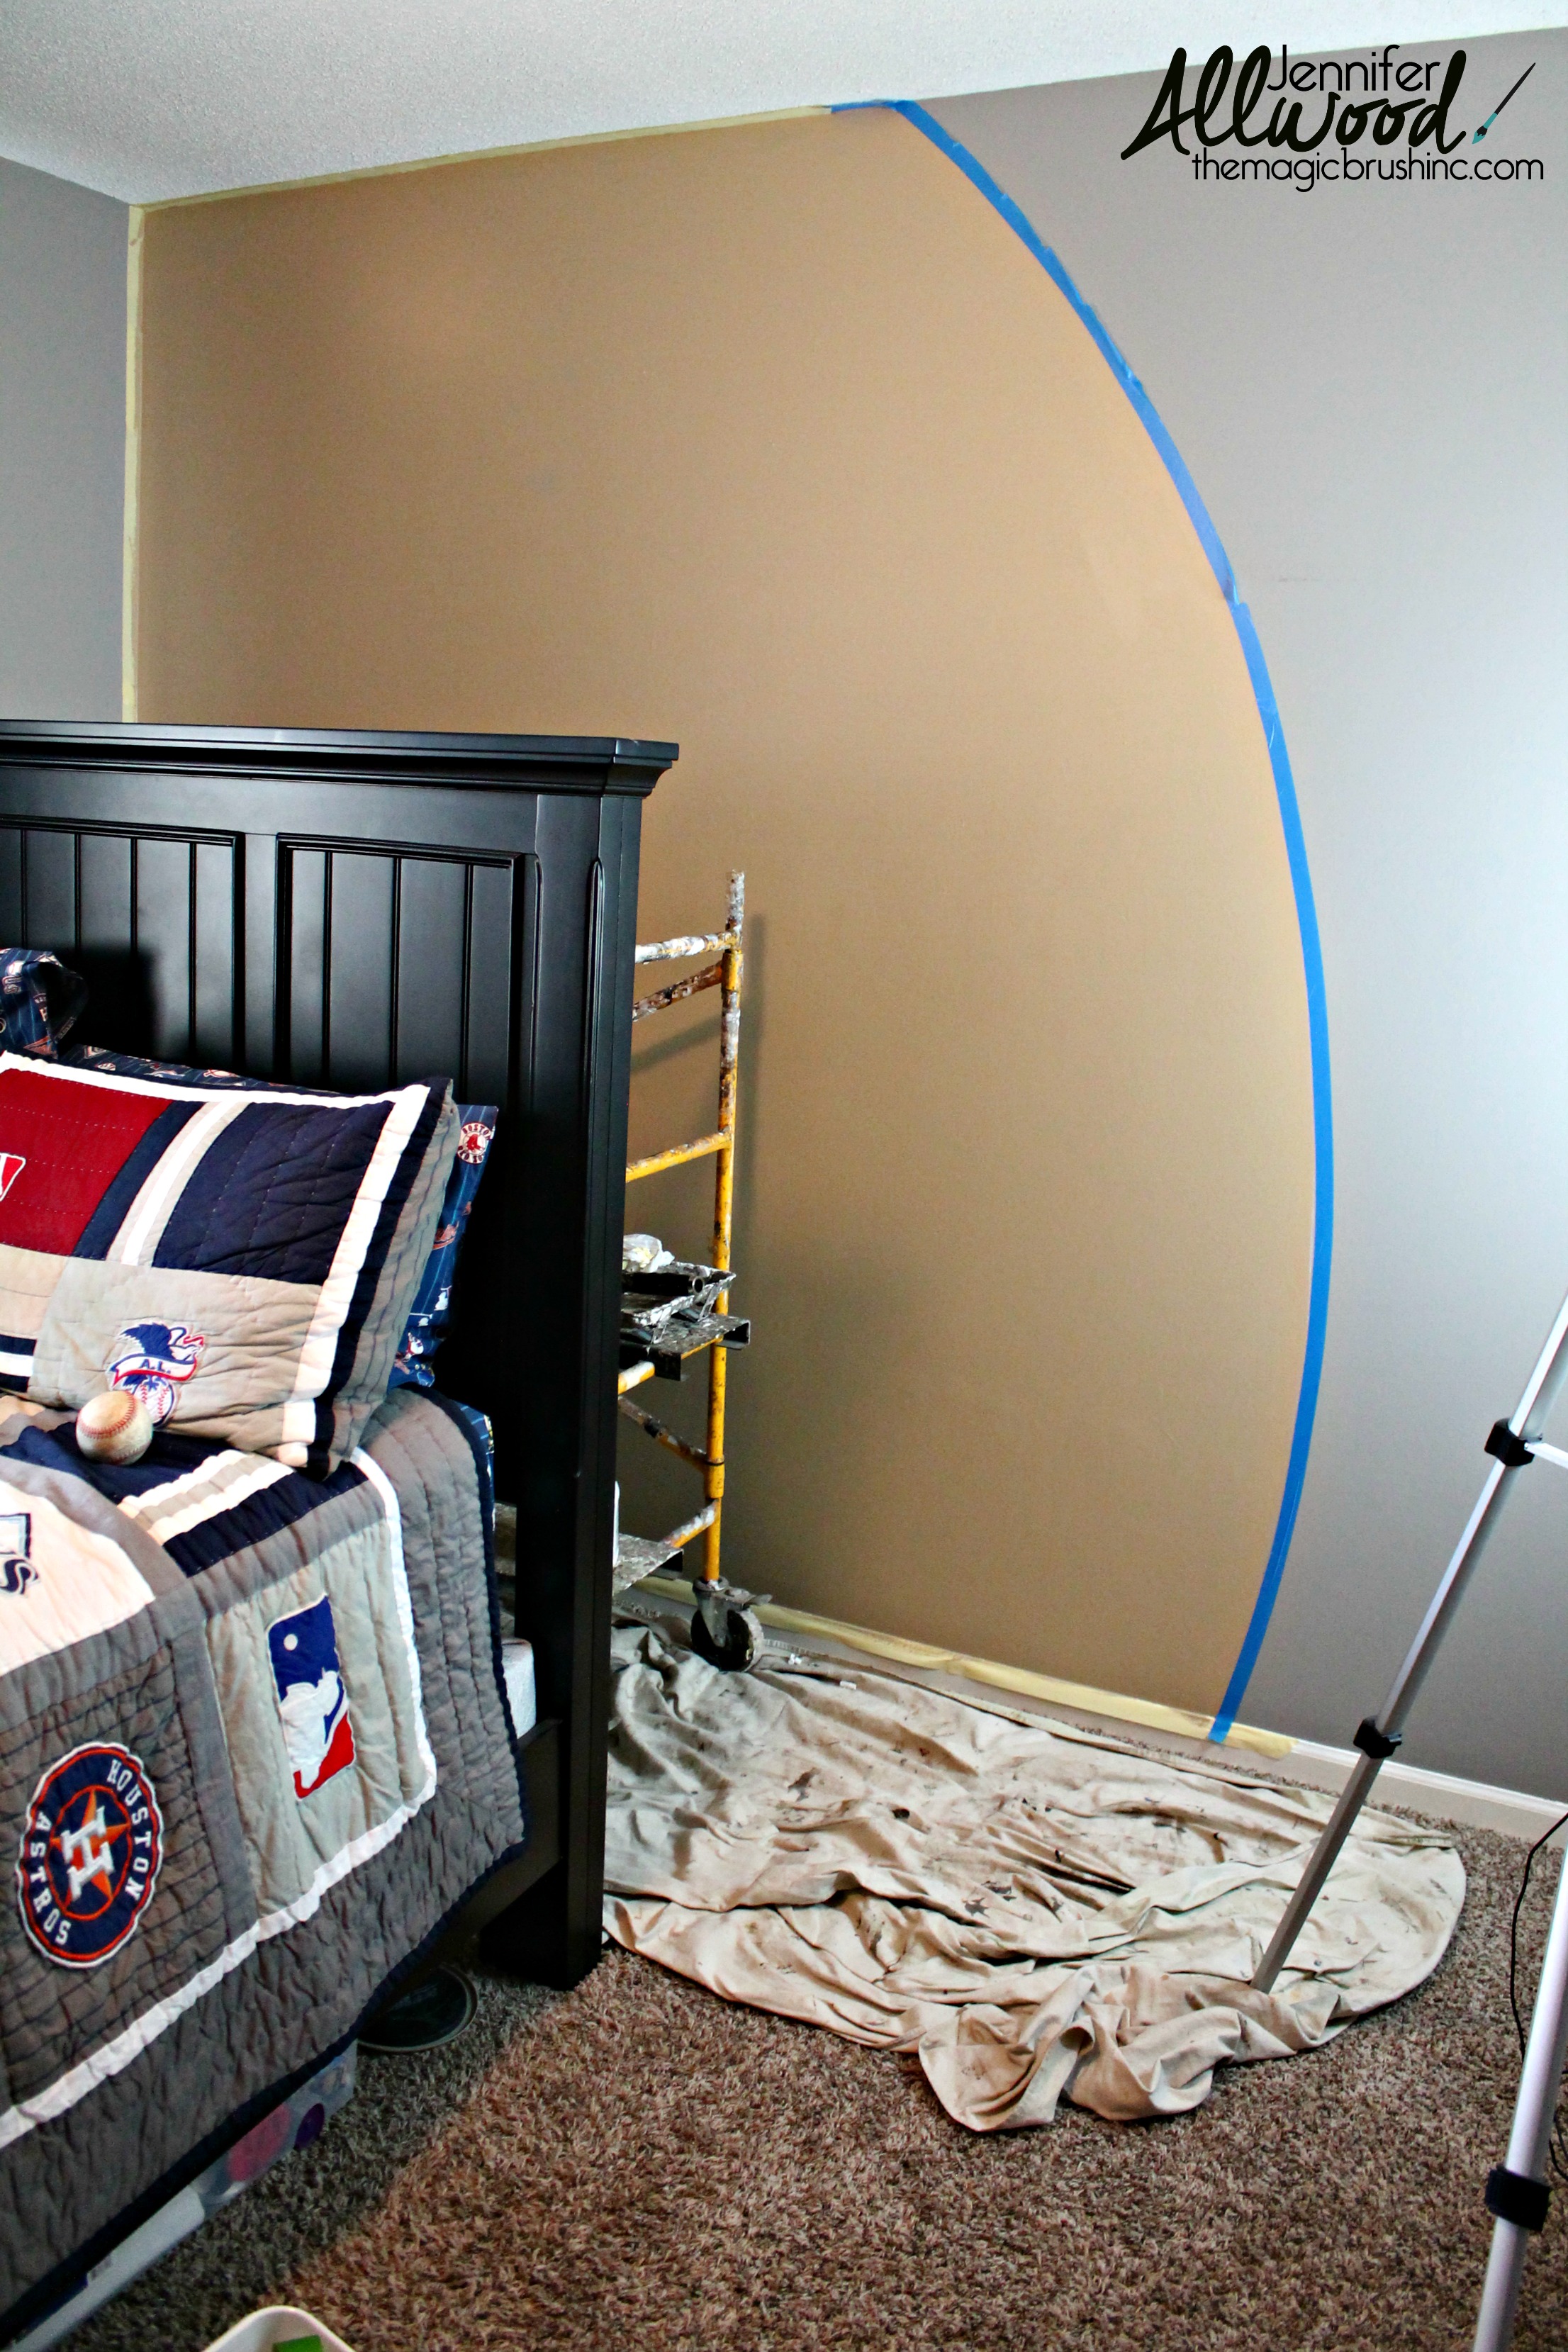
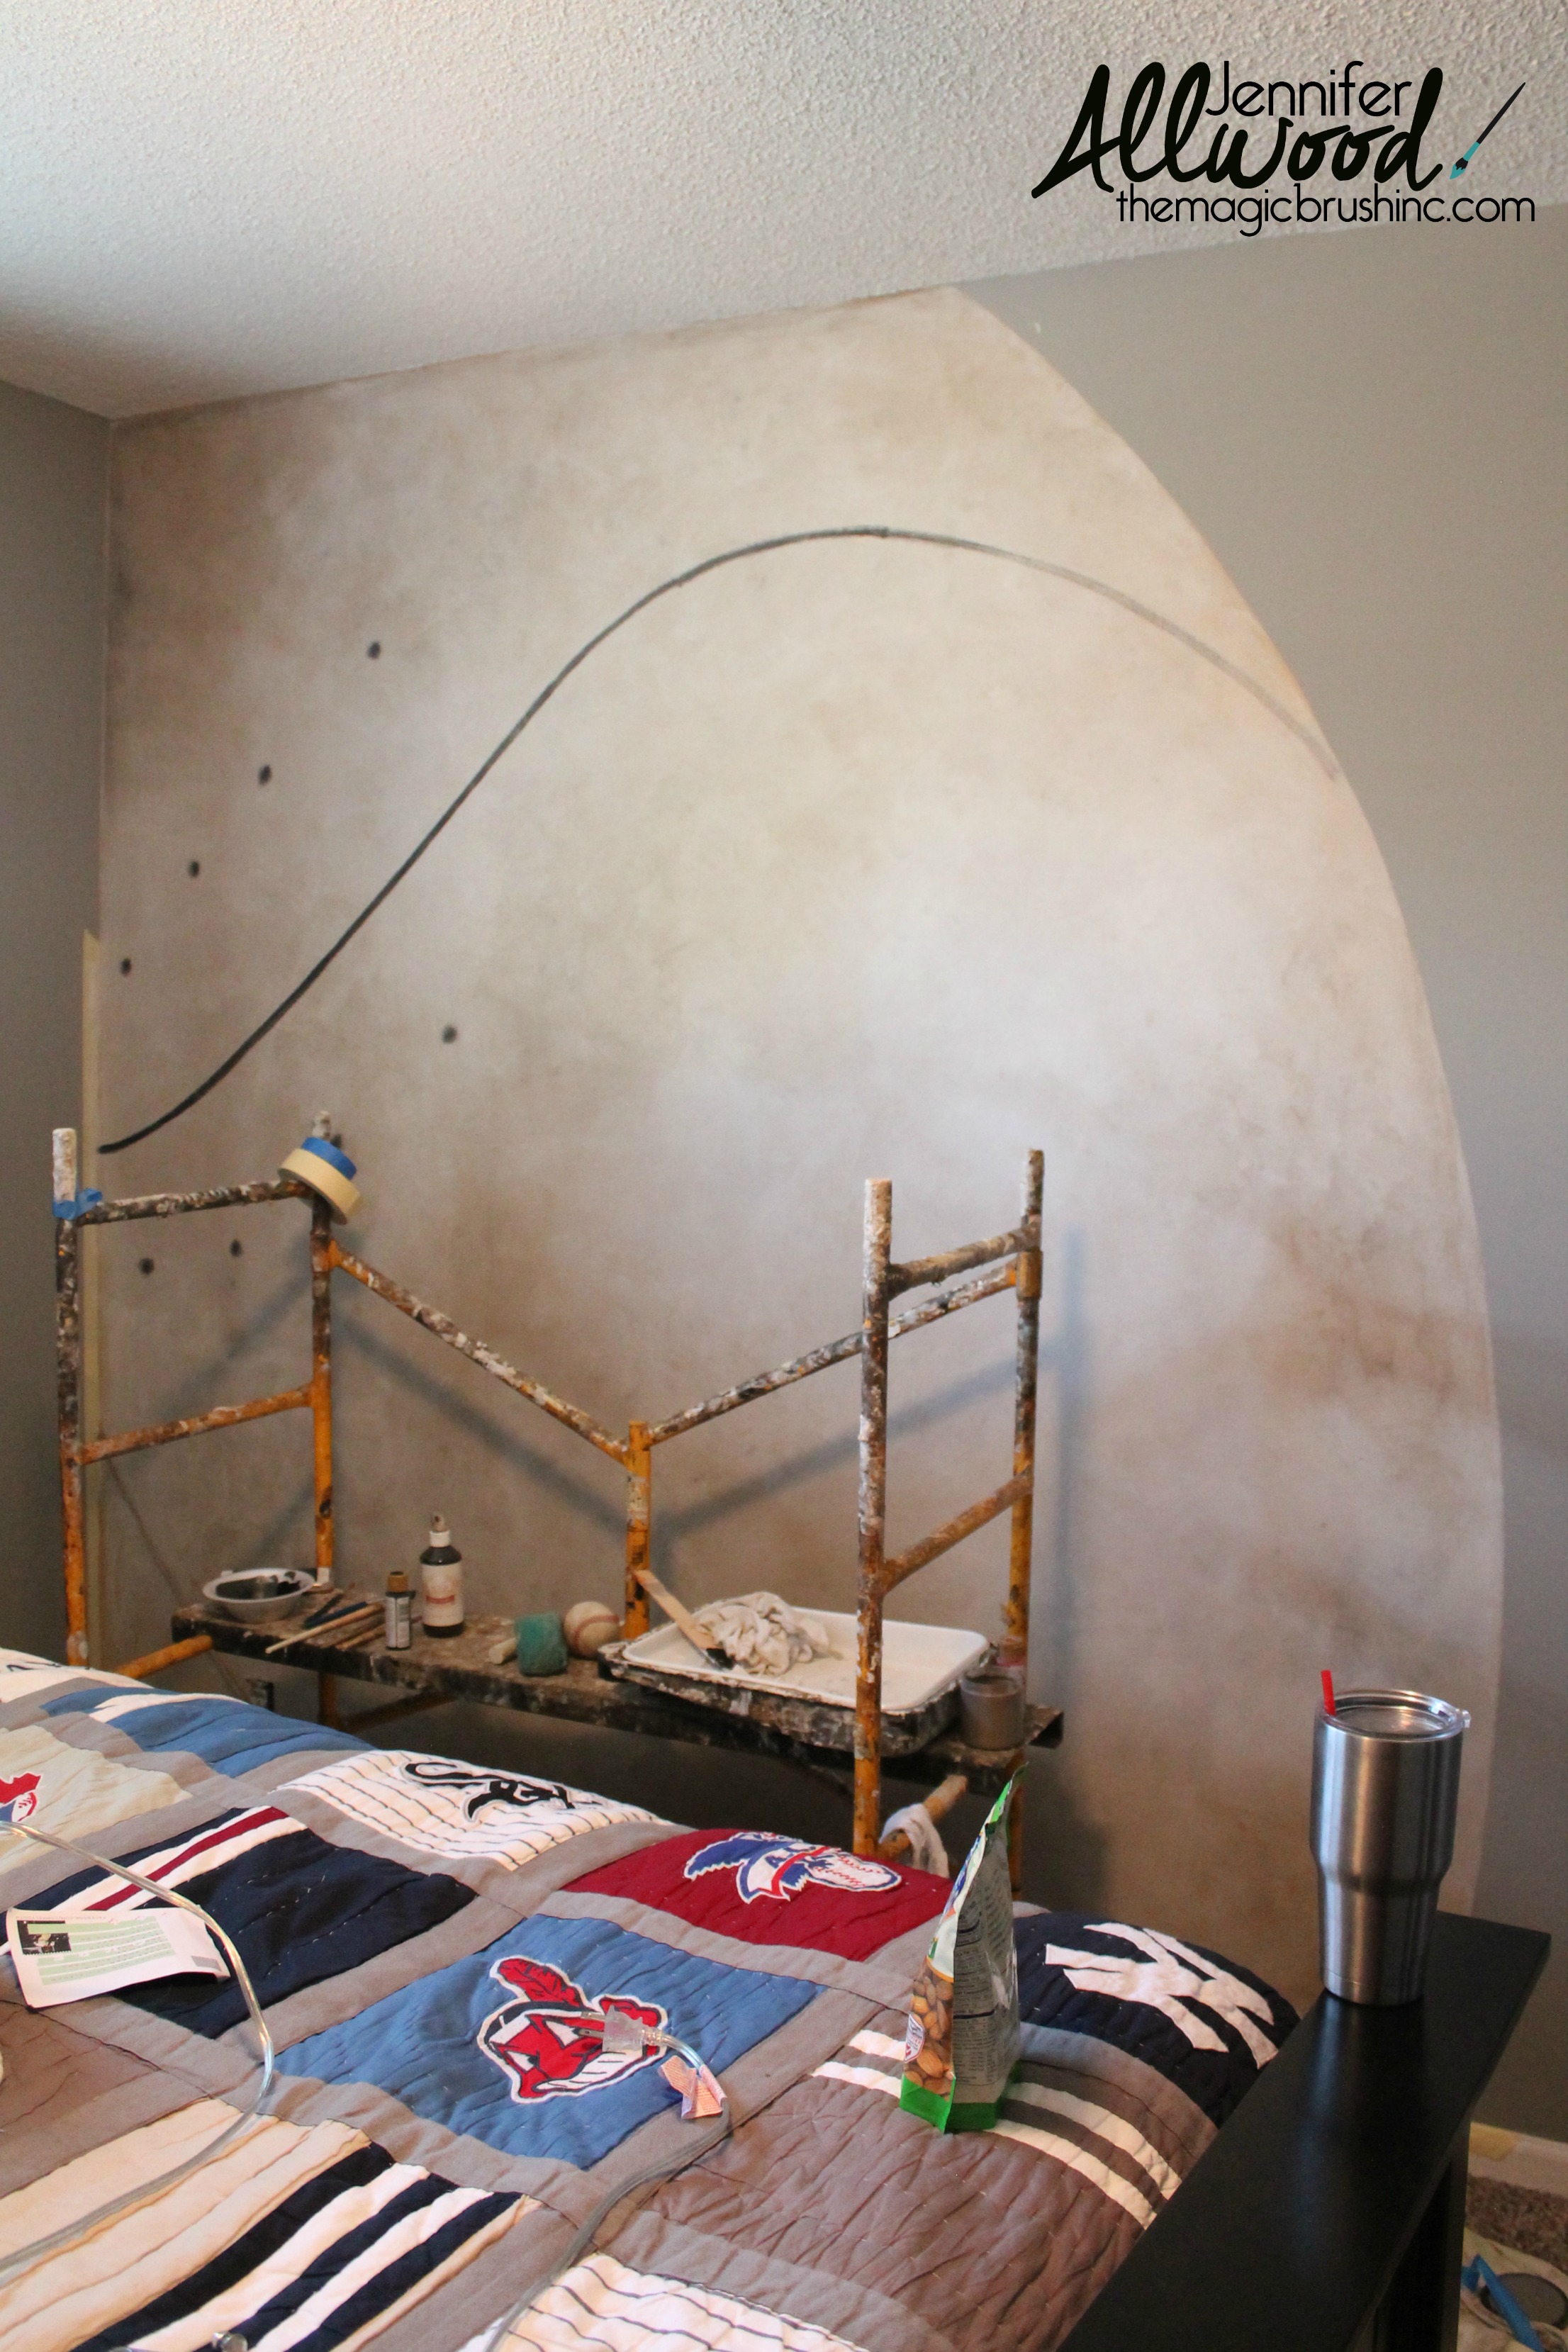
The very first thing we did was find the height of the wall and put a nail in the corner about half way up the wall.
Then we tied a piece of jute to the nail and tied a piece of chalk to the other end of the jute.
We used that chalk to go from ceiling to floor to chalk the outline of the baseball so that it was perfectly round. (note: raising or lowering the nail and jute will make the shape change!)

I taped off that chalk line (sorry I forgot to take the pic BEFORE it was taped) and see how I ripped the tape in spots so that the tape would curve? That’s a little trick for you so you don’t have to buy expensive, bendable tape! Just rip what you have!
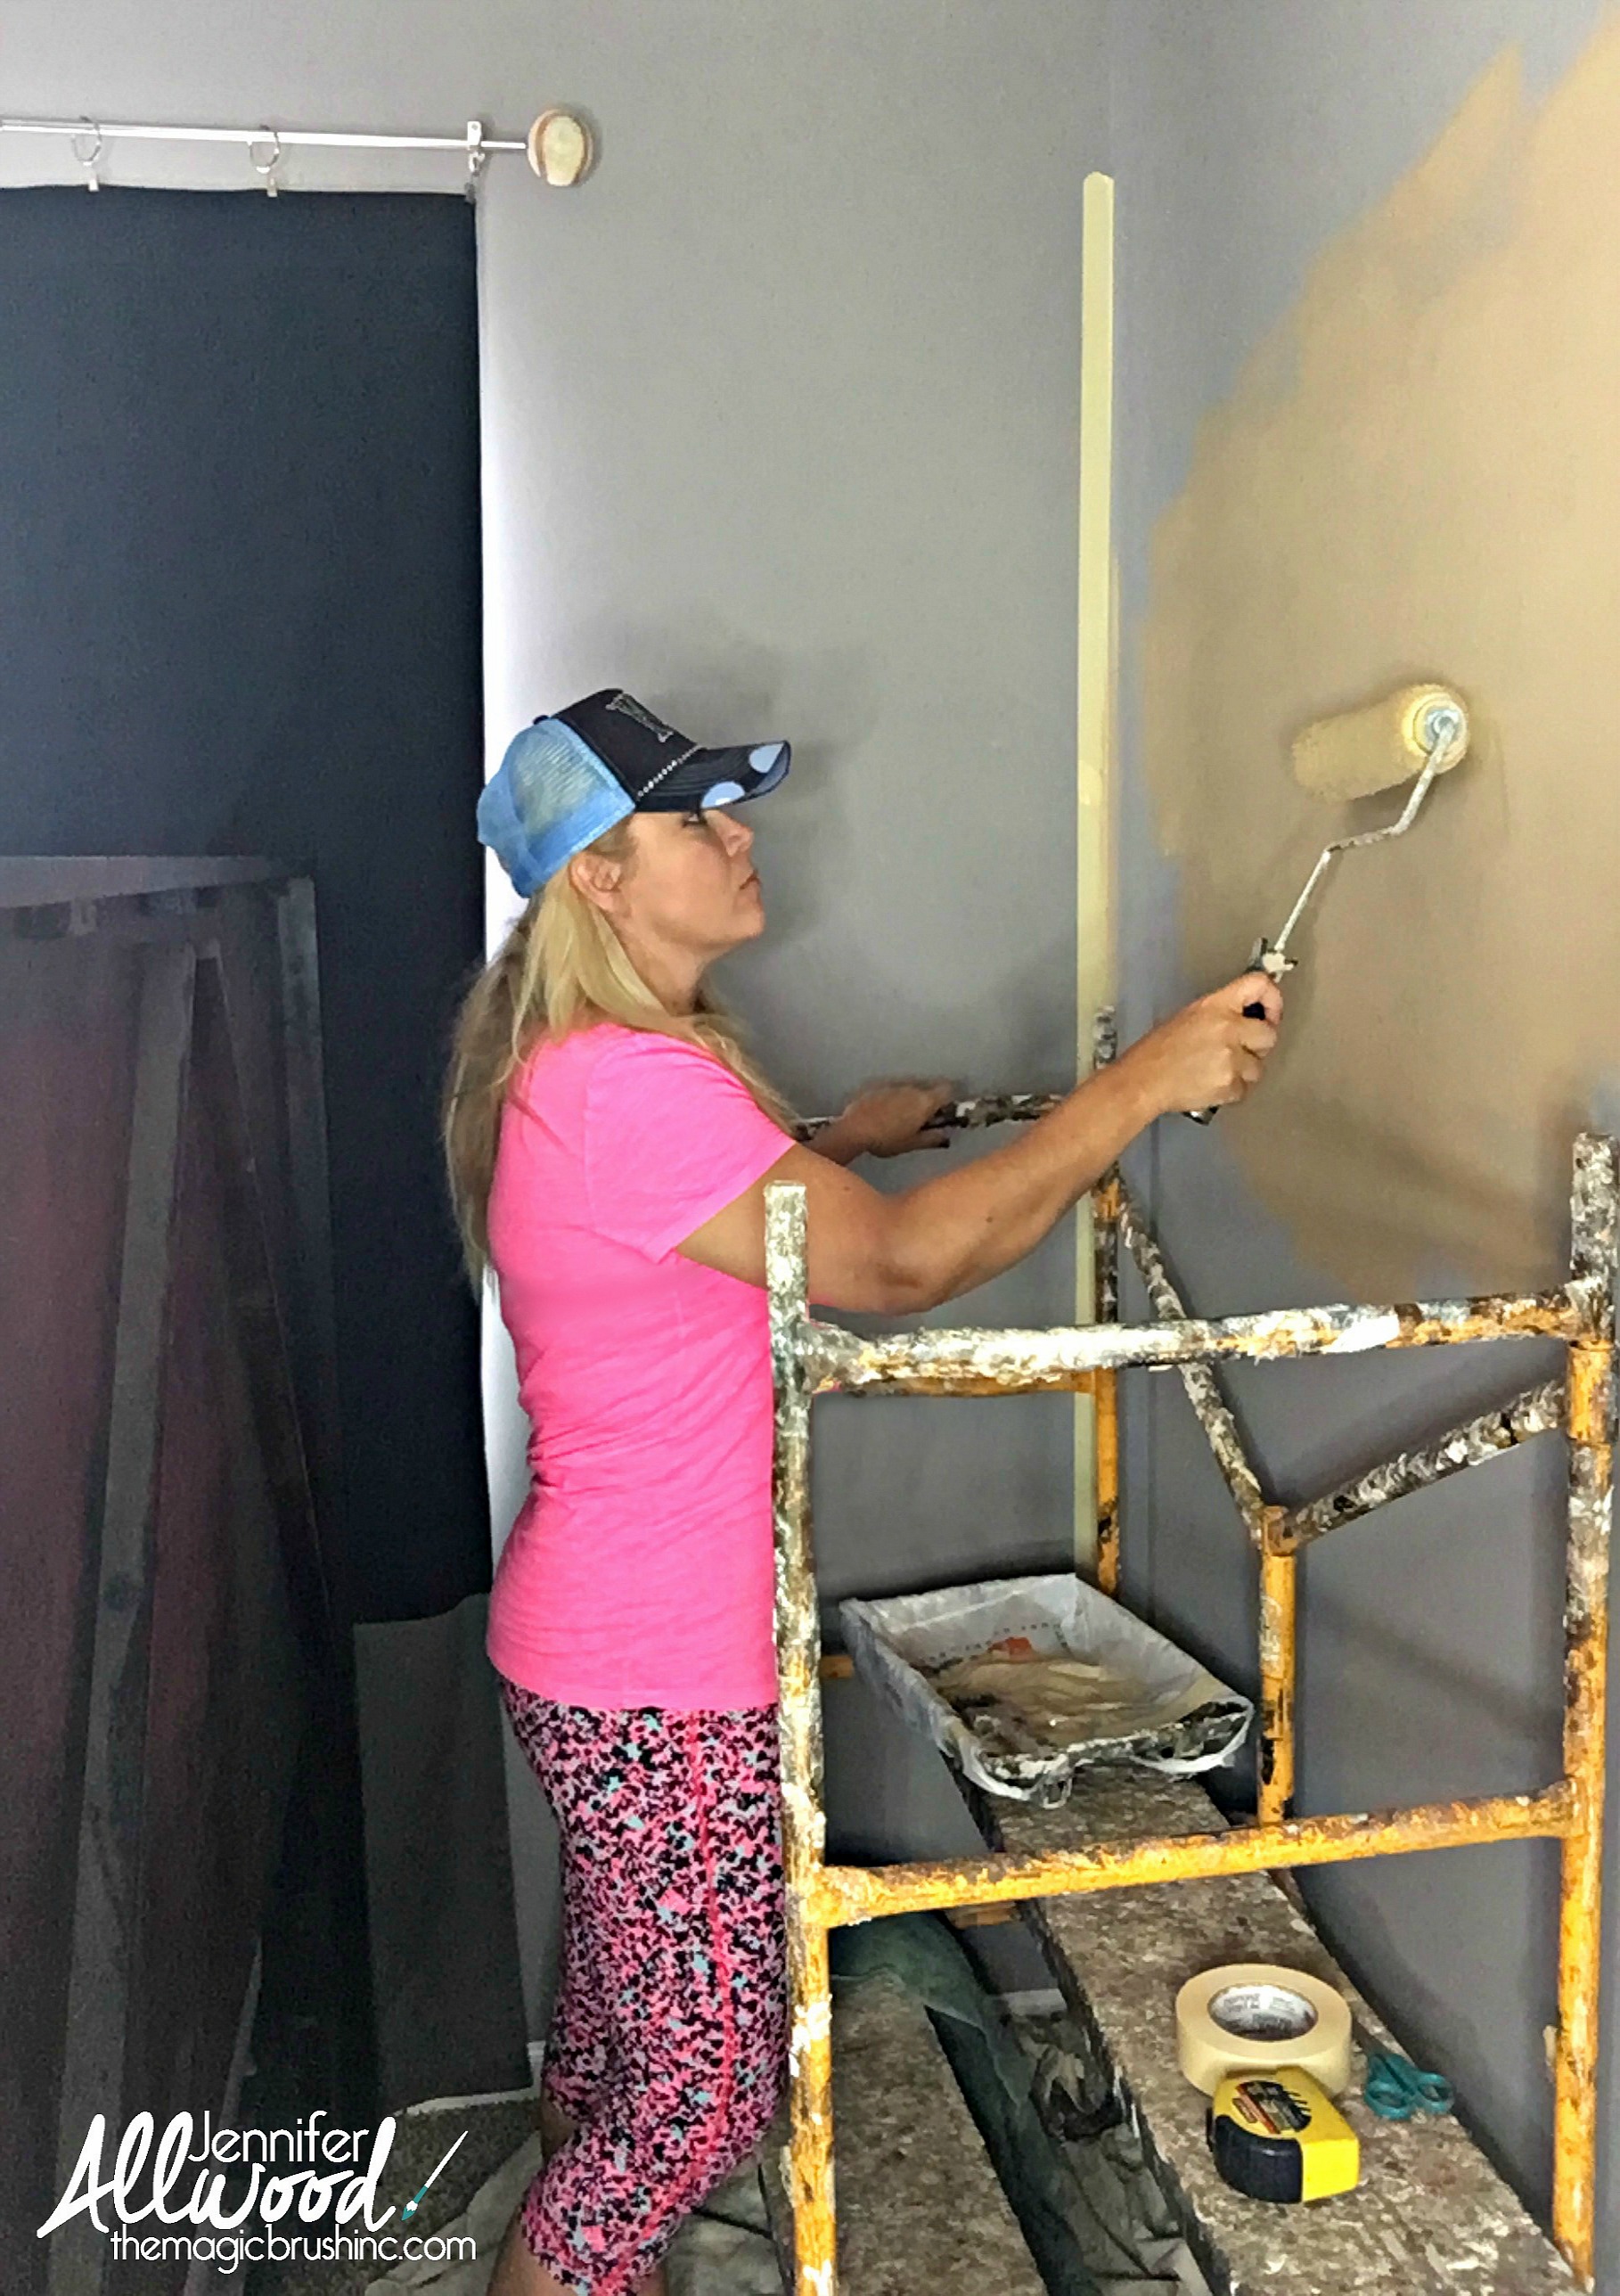
Then I painted the whole wall in the Sherwin William’s “Latte”. ( The gray wall colors is Pewter Cast and is on my list of 50+ Favorite Paint Colors ) I just used one of their cheap $6 sample quarts. One coat. It doesn’t need to be perfect… just done. Any beige paint would work for this. Use what you have or mix some colors together!
The wall looked like this when it was done. Notice I DID use a drop cloth on this project. Mr Magic was so proud of me!

I had decided I wanted to use all chalk-type paint products on this mural to see what I thought of using furniture paint on a wall. So, I used Heirloom Tradition’s French Vanilla mixed with water and sponged it in circles on the wall. I showed how to do this on this Facebook LIVE video. I am listing all the chalk-type paints and waxes for you at the end of this post to make it easy on you. =)
The color seemed way too light for me, so I went back over the whole thing with another coat of the that French Vanilla plus water by ragging it over the whole thing. Yes, I felt like I was fauxing back in the 90s again with doing a “ragging” finish, but it worked perfect!!!
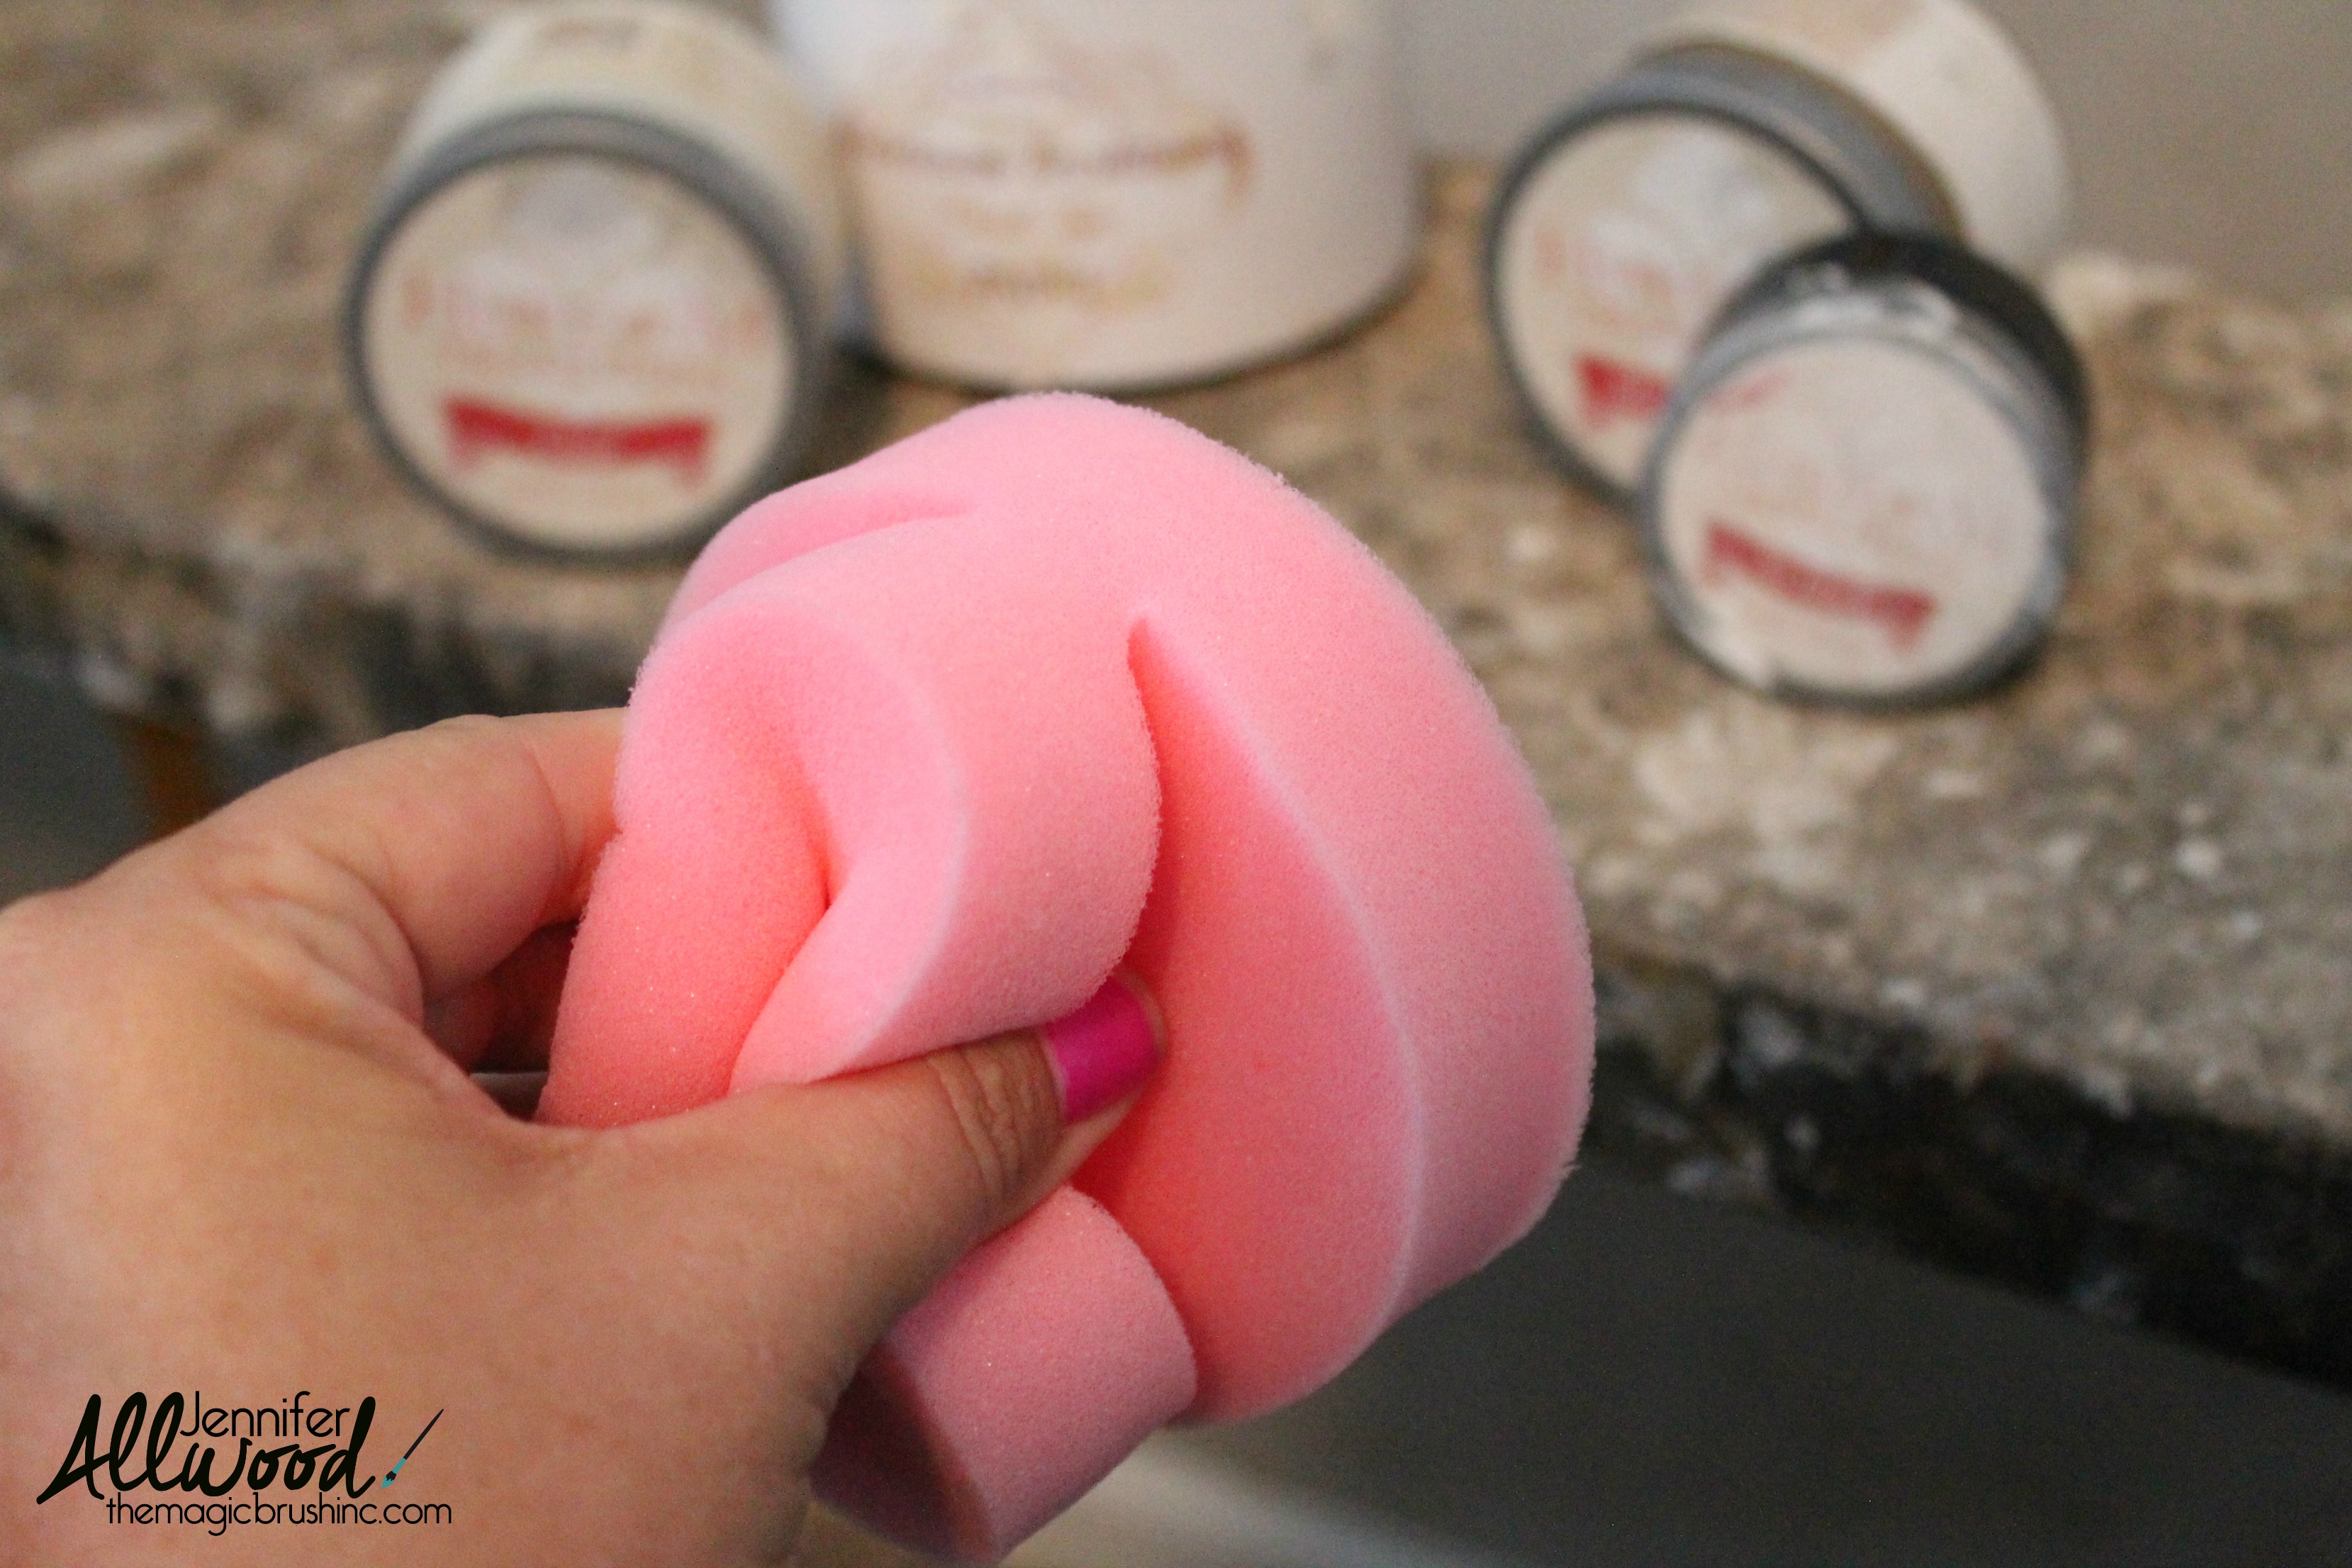
Chalk-type paint is super porous…. almost like parched dry skin. So, it has to have SOMETHING over it to seal it like a lotion. I coated over the white with Clear Soft Wax applied with the True Sponge Applicator in a circular motion. Took me about 4 minutes to cover the whole baseball.
Then I was able to start the super fun stuff. I used a sponge and applied both Muddy Pond Soft Wax (the brown color) over the majority of the ball… leaving it super heavy in spots so that the brown color was darker in areas. That is what makes the wall look 3 dimensional… the light and dark areas! Plus I wanted the ball to look old and worn and the brown really makes that effect. Just look at a baseball and try to copy the dirty, roughed up areas…. that helps!
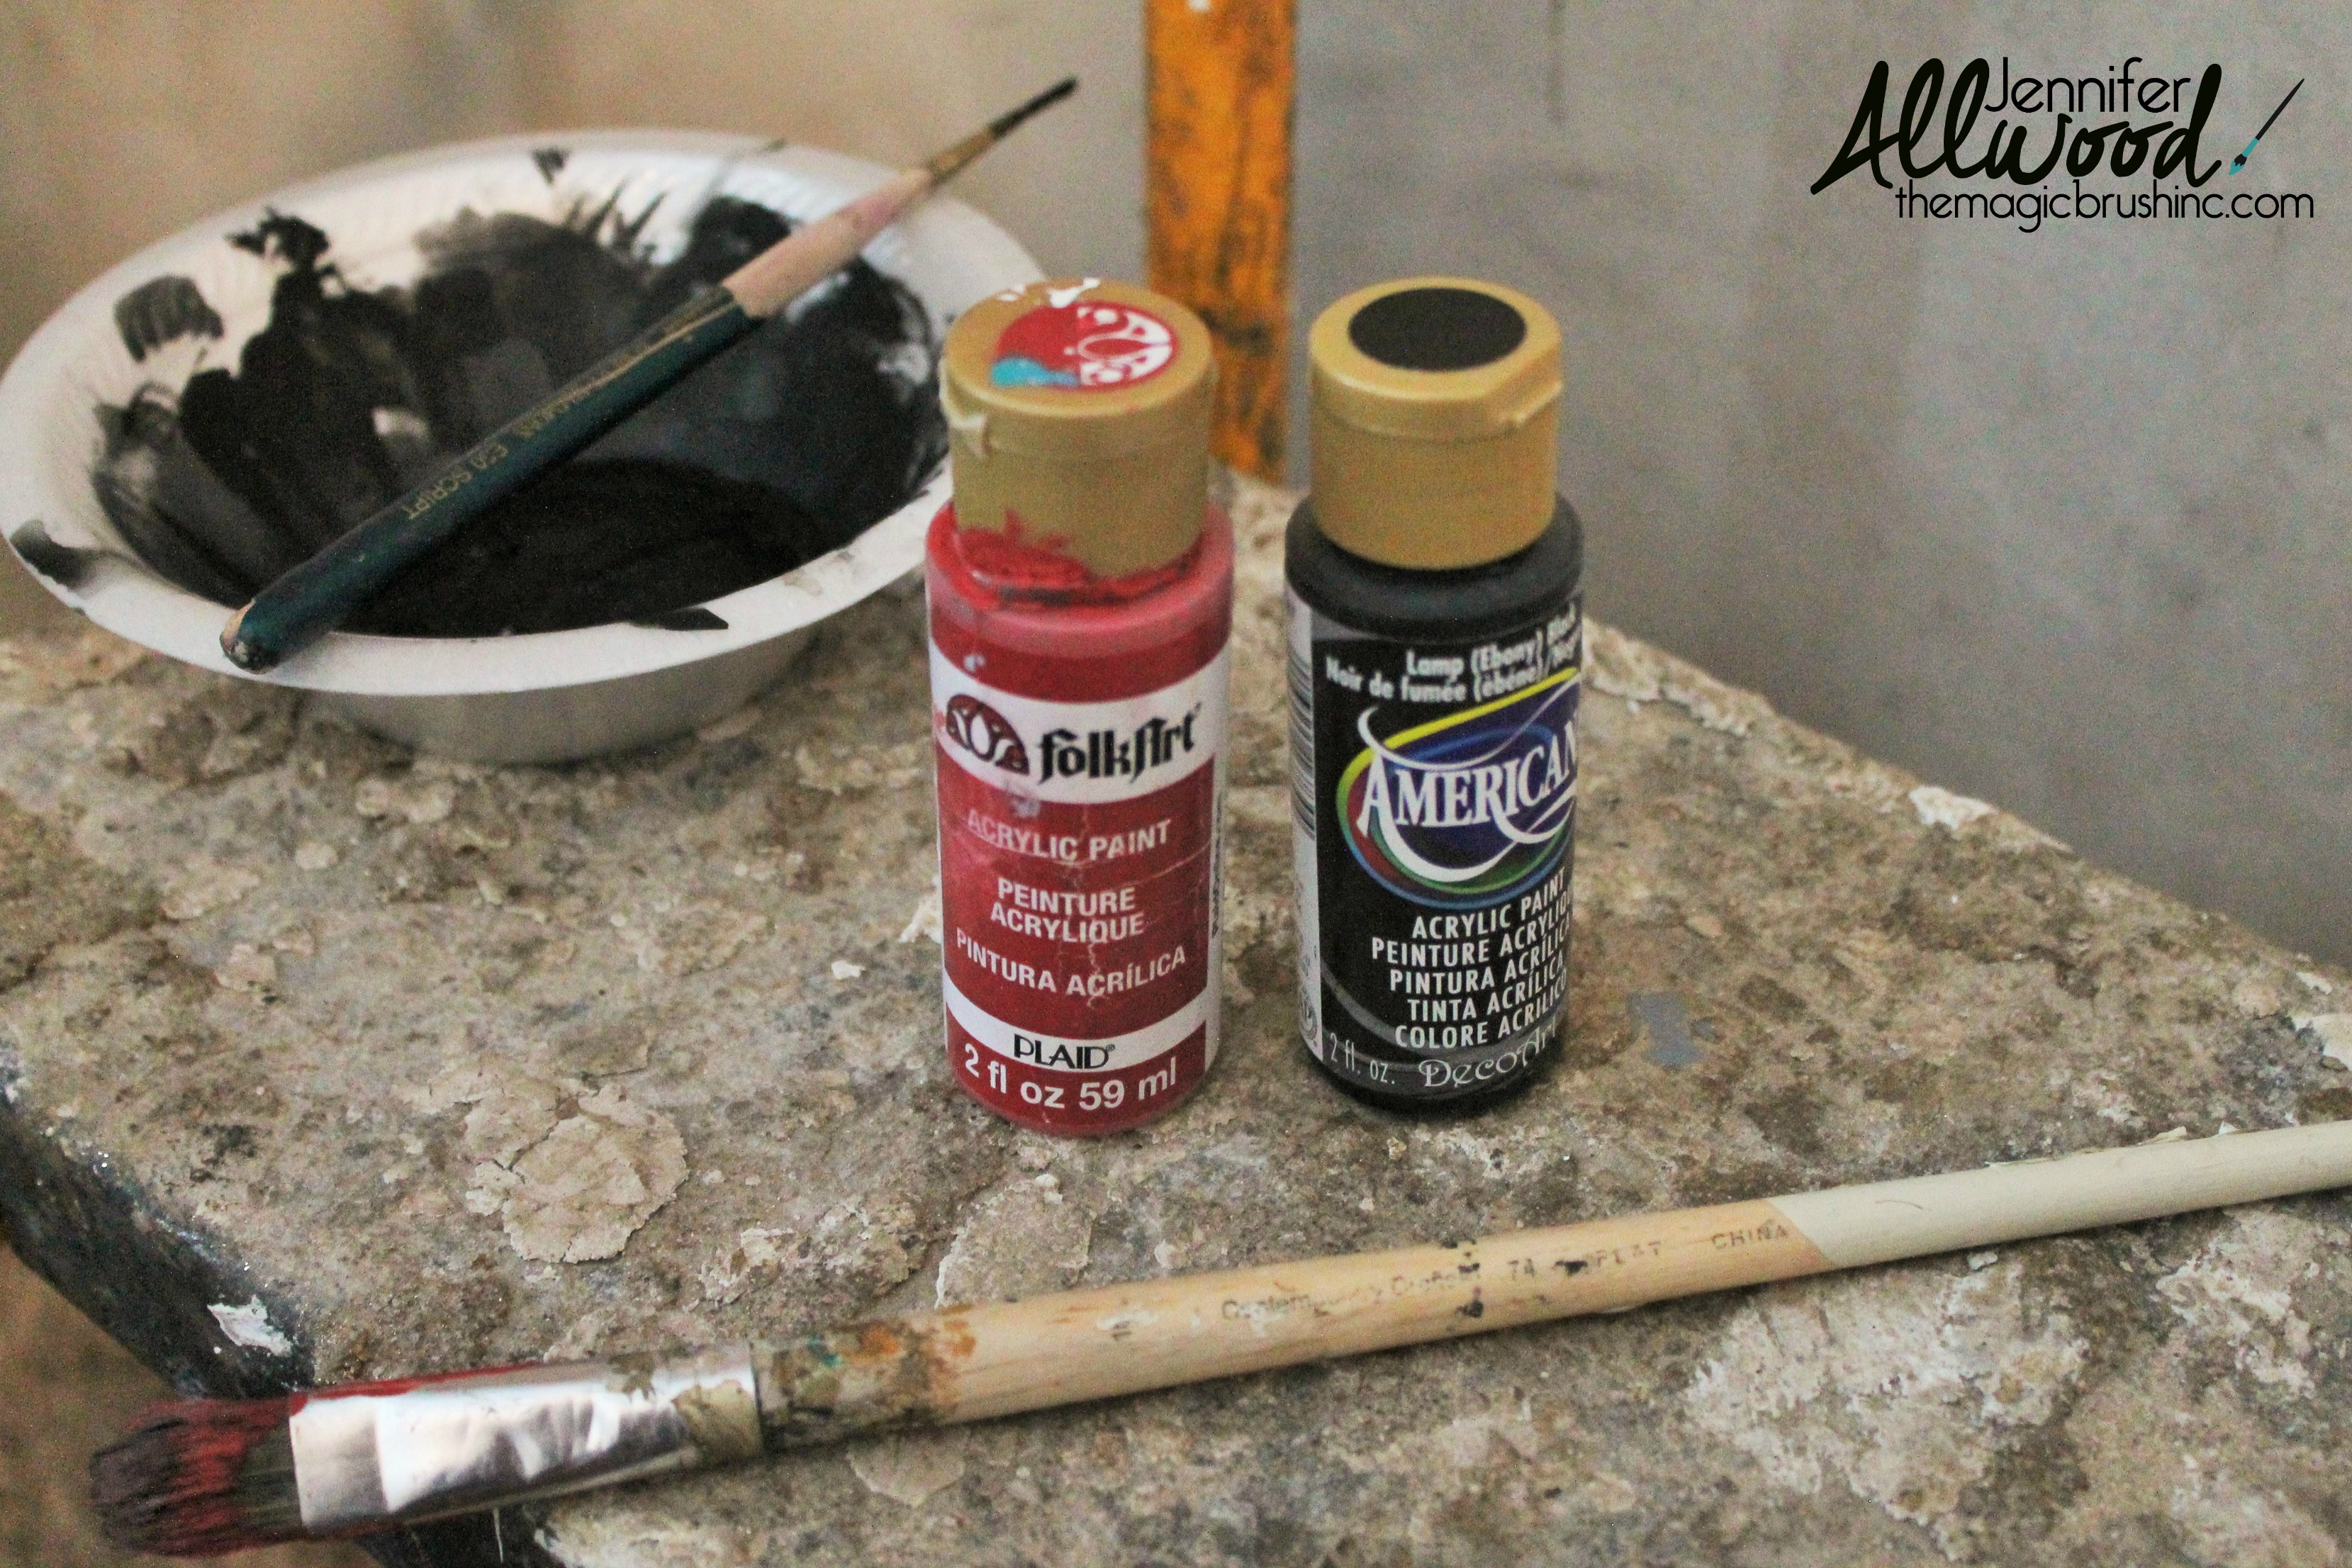
I used these cheap acrylics to draw the seam and laces on the ball.
I started like this but ended up hating the round black polka dots at the end of the laces. So, the next morning I scrubbed them off. One nice thing about painting over a waxed wall is that I was able to redo several things by scrubbing what I had done off the wall…. even the next day. The wax is really a sealer, so the paint sits on top of it and can be scrubbed off with some pressure. In other words, it was all really fixable and forgiving!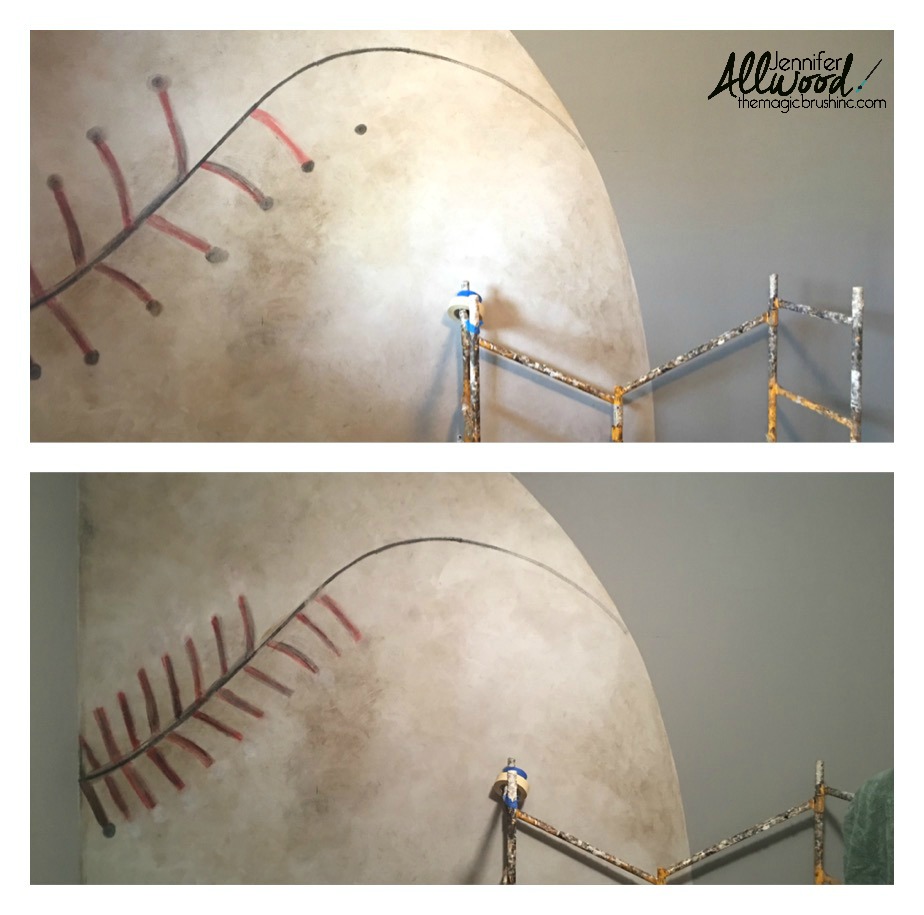 Those laces were about the death of me tho’. I started out with them spread out like on top and then decided to add double the number of laces like on the bottom photo.
Then I decided the laces were all too skinny so I fattened them up. I used Jet Black Wax to put shadows where the laces go “into” the ball. I still can’t decide if I like how that looks, but I am definitely NOT a muralist and at this point I was ready to throw a fit and just be done. Hence the mask that Mr Magic brought home from the store that day. Lol.
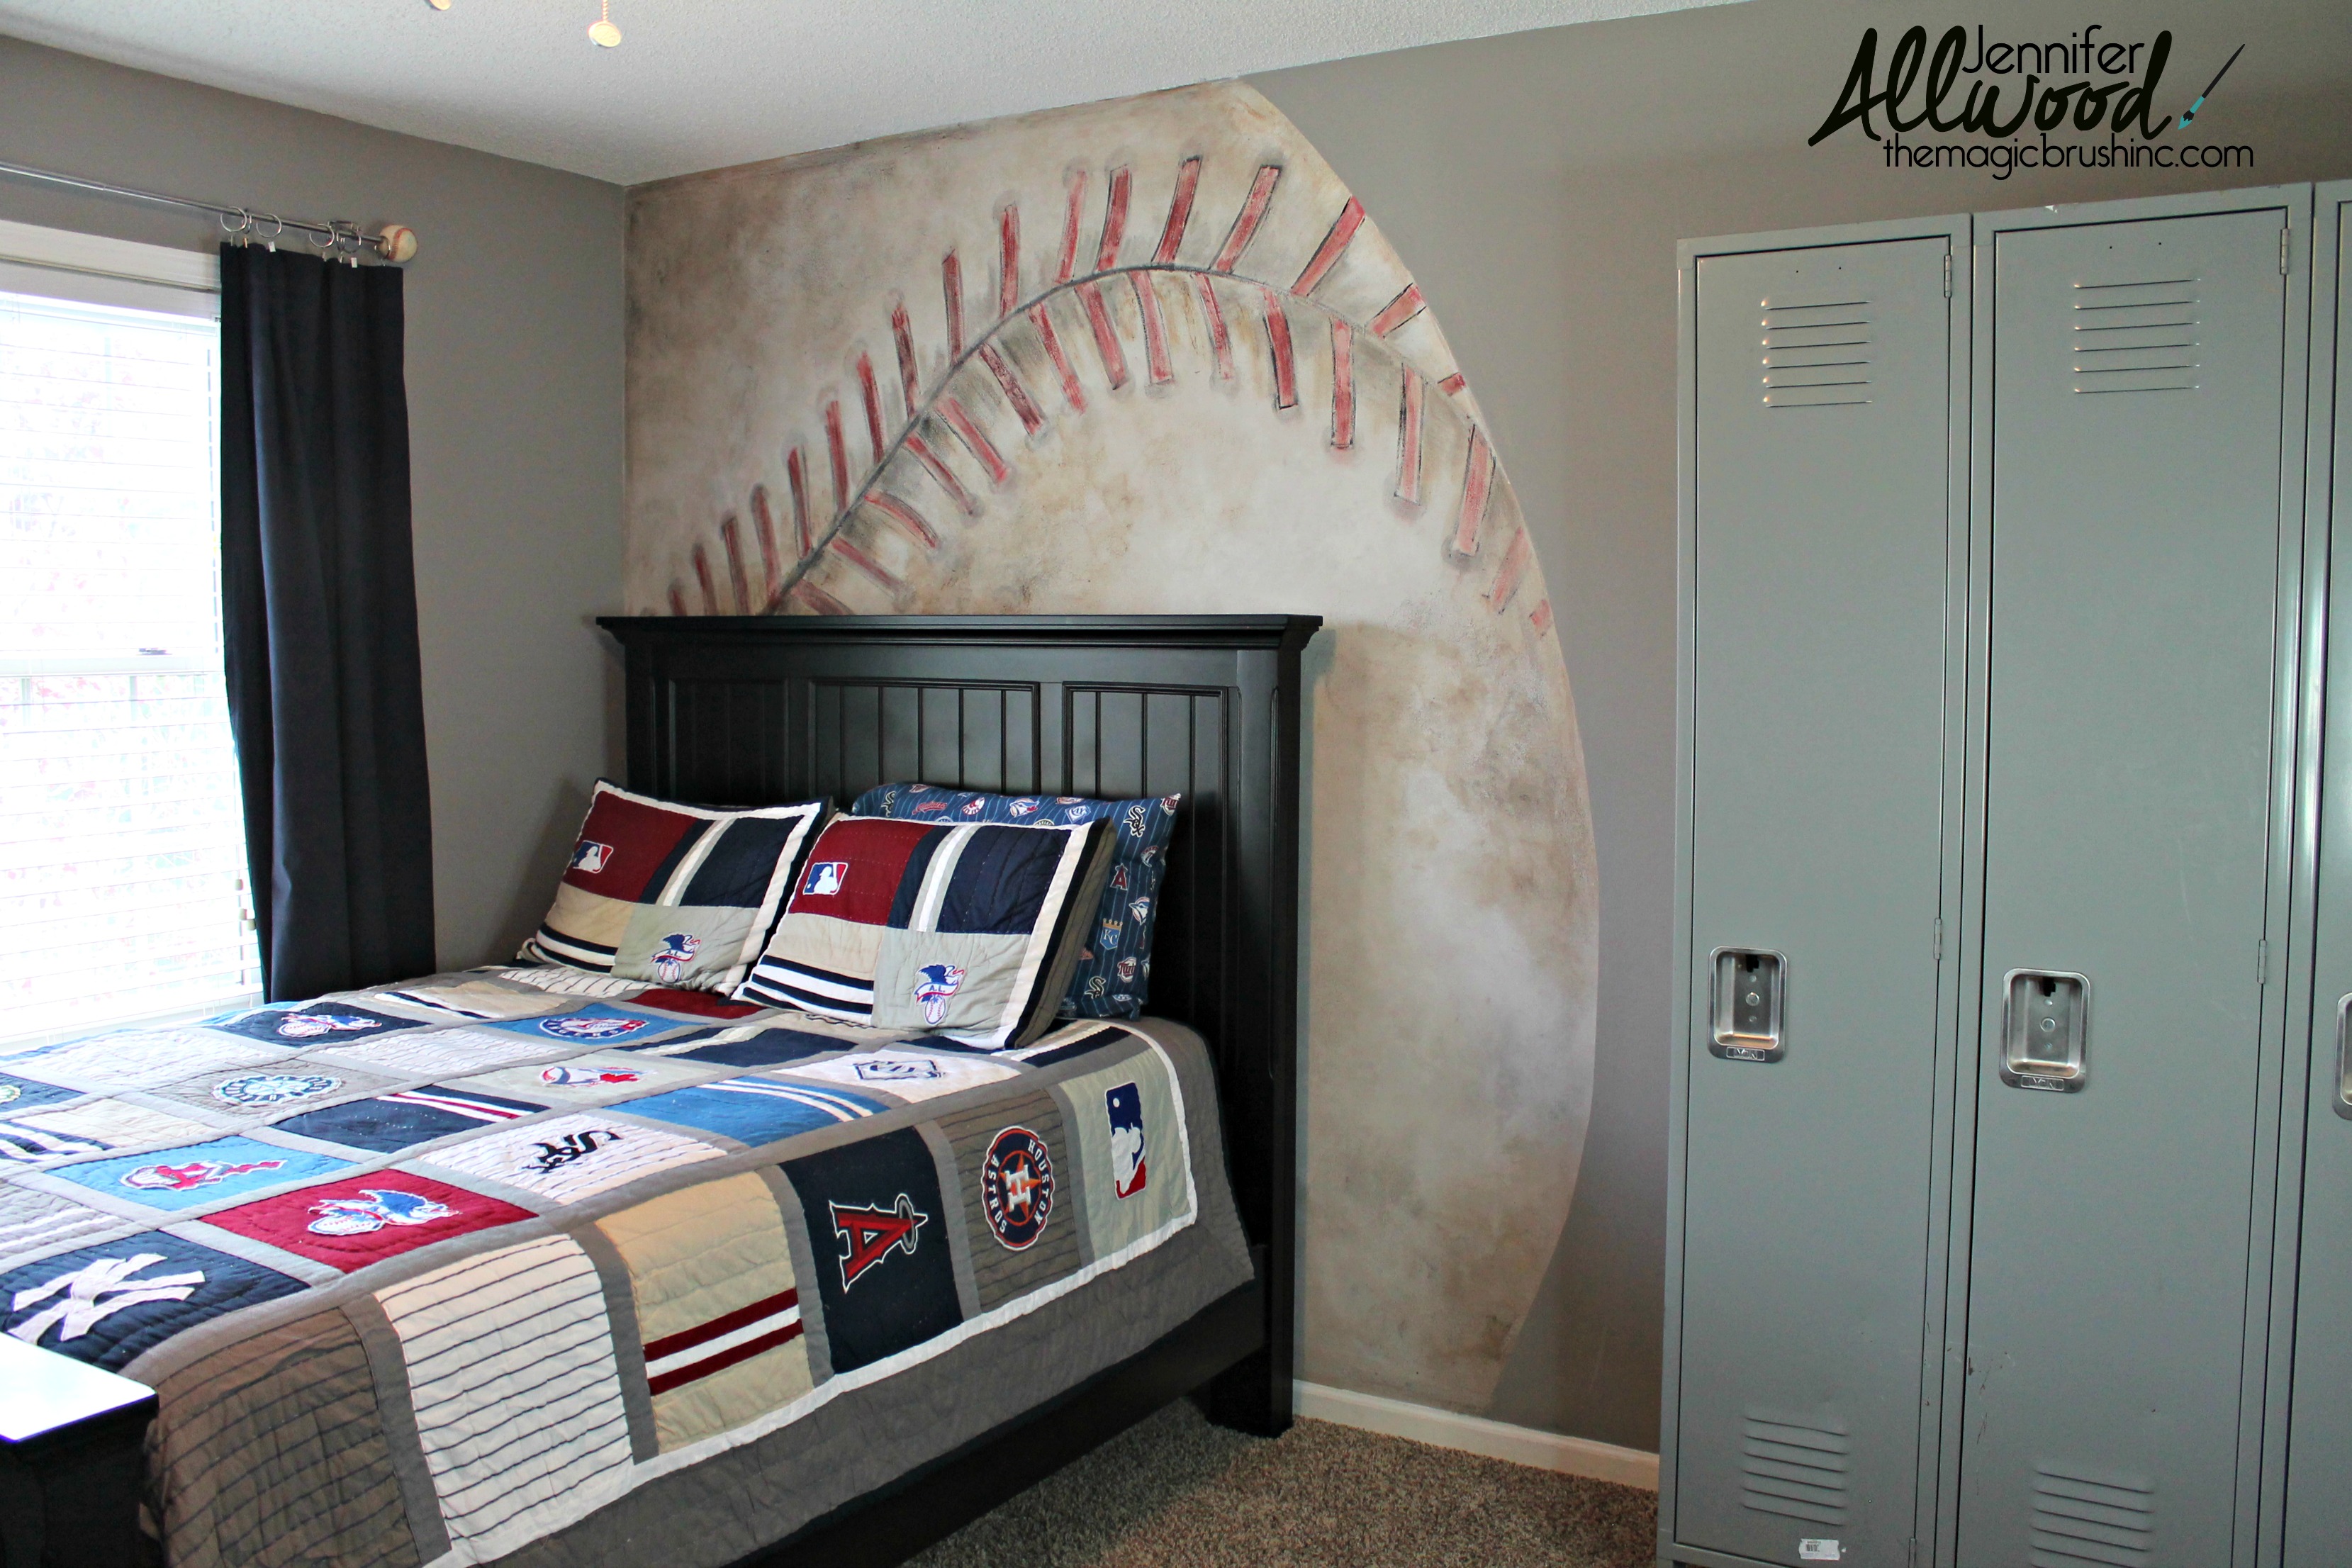
And here is how the wall turned out! I am so happy with it ……especially when looking at it from a distance. Lol.
PS….. Because I know some of you will ask, Noah’s bedding in the photos can be found HERE for sale. =)
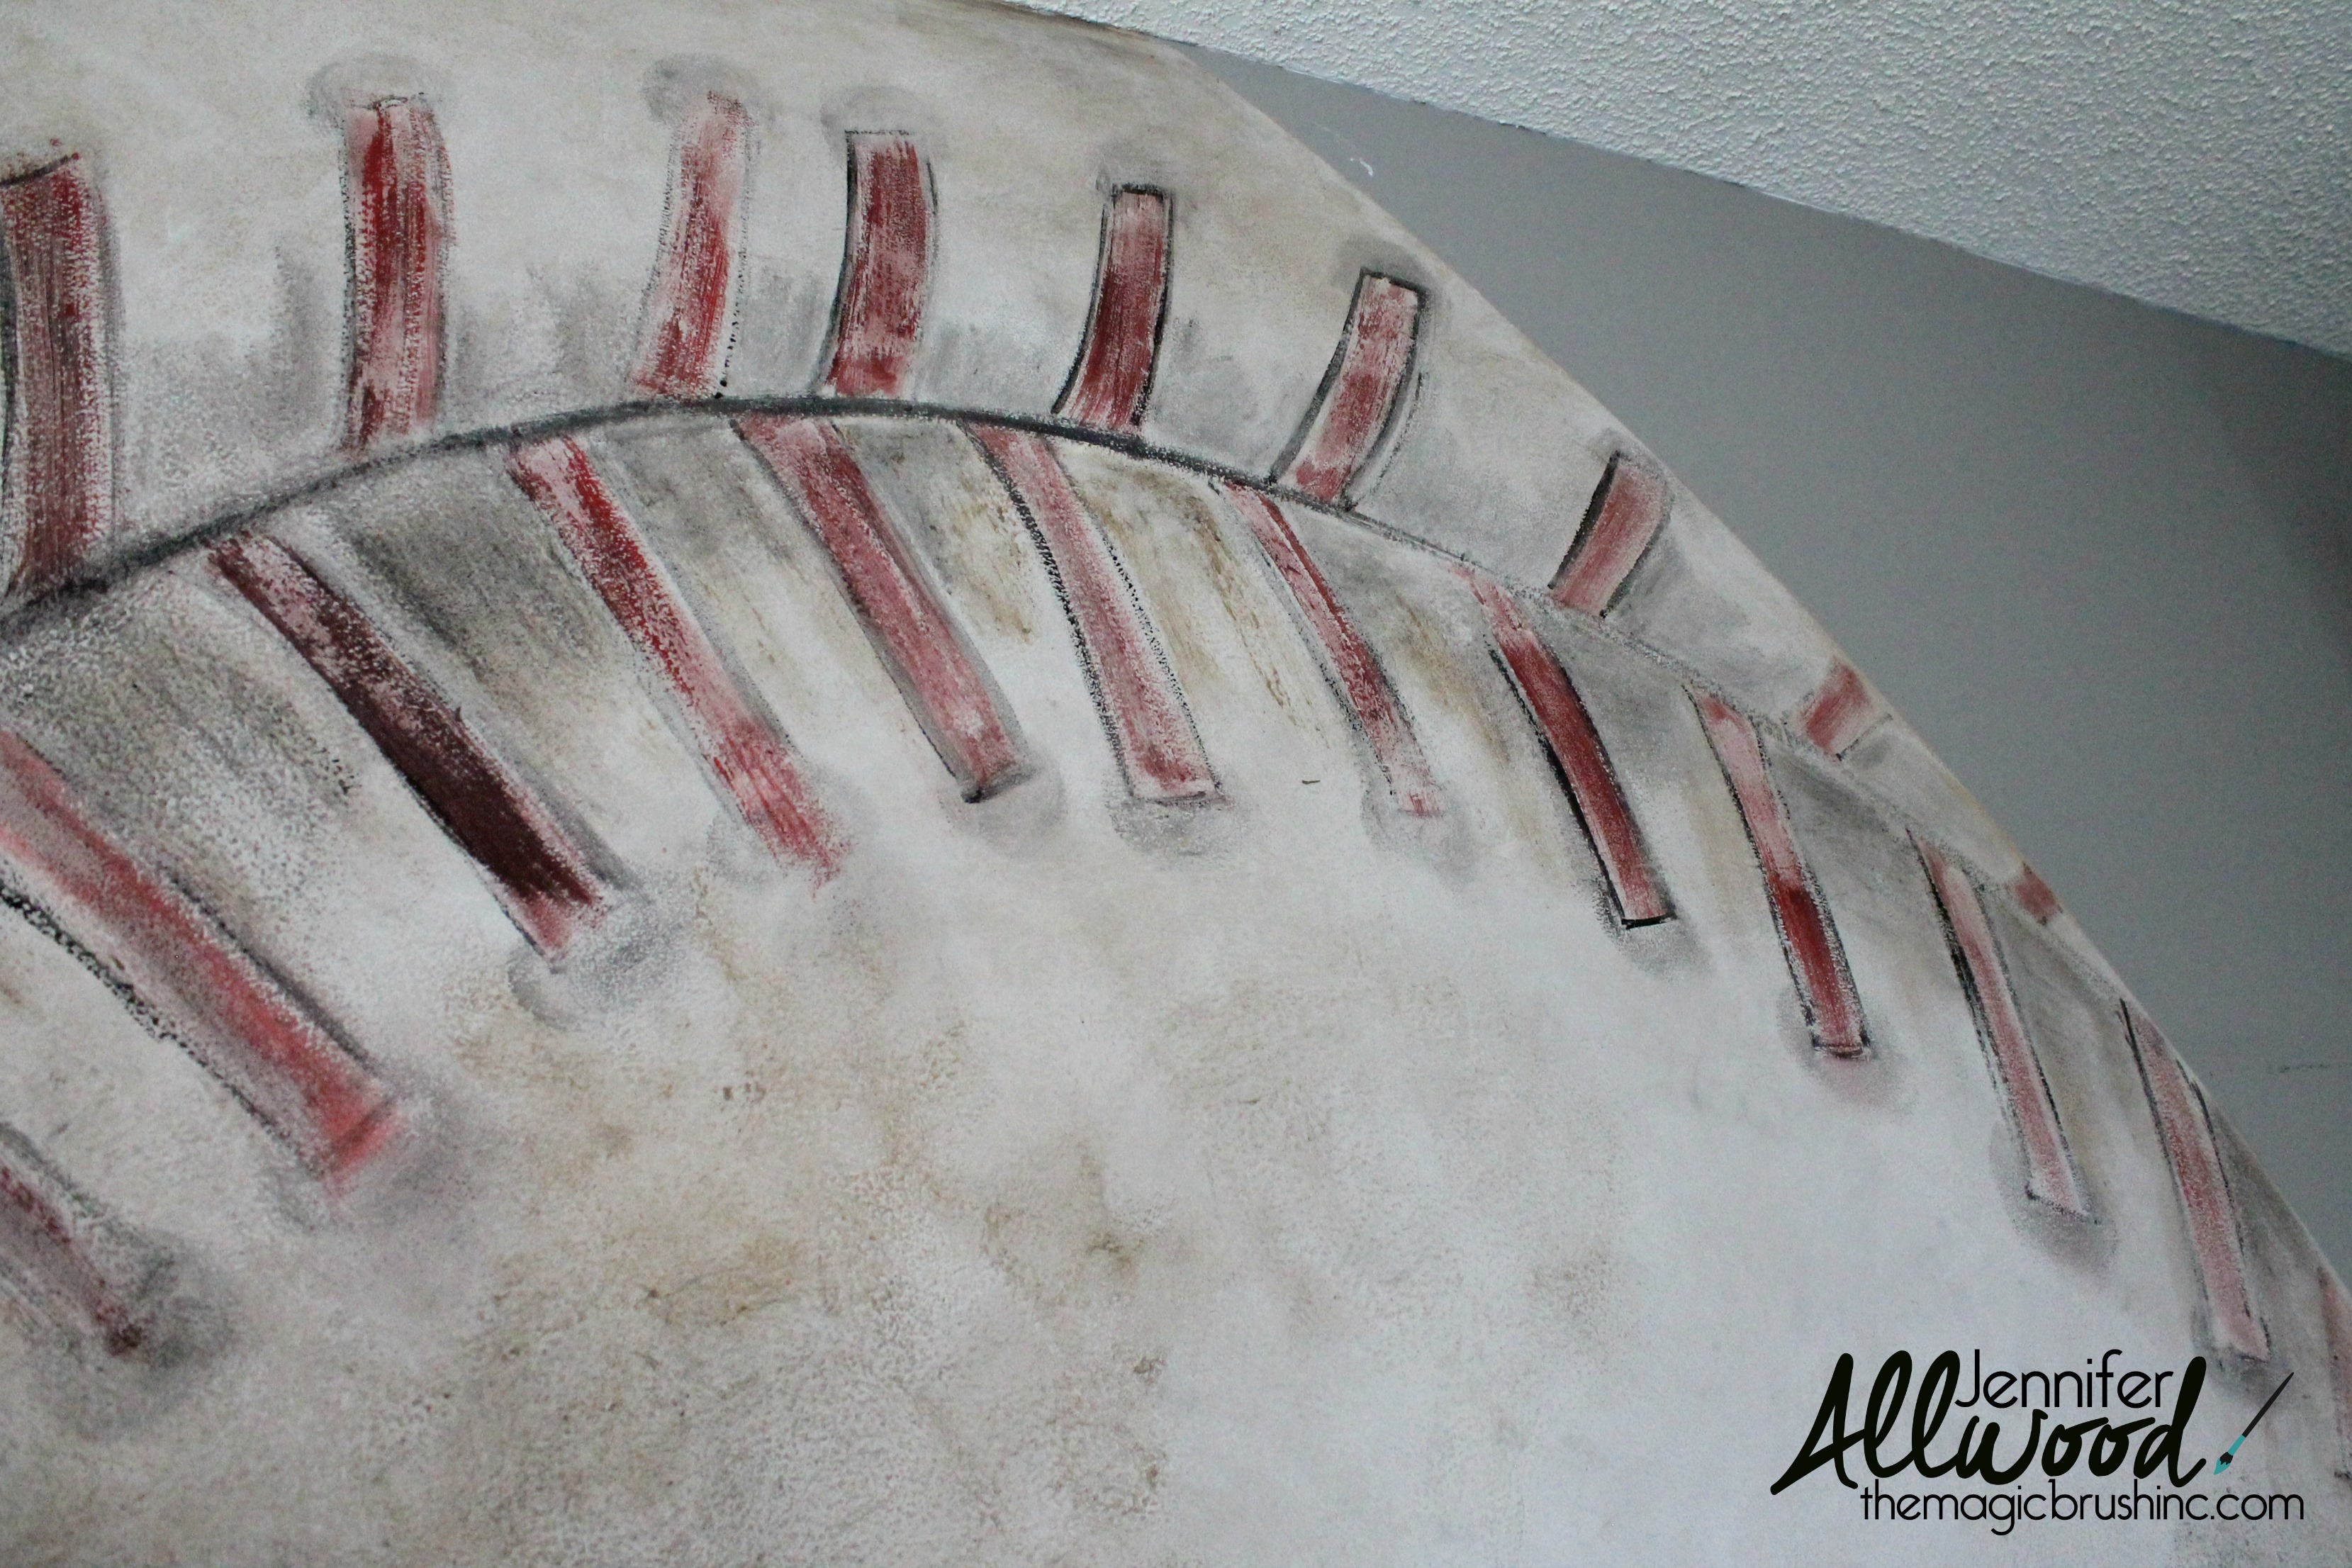
Up close it looks more like a hot mess. So just don’t look close.
And in areas where I got the wax too heavy (in the shadowed areas), the wall is still sticky, but I don’t care. Just know that if you decide to use wax on a wall it’s meant to be applied thin.

So here is the paint product list for your convenience:
- French Vanilla (mixed with water and sponge and rag over the beige paint)
- Clear Soft Wax (to seal the chalk-type paint)
- Muddy Pond Soft Wax (to add the brown tint to the ball)
- Jet Black Wax (to do shading around laces)
- True Sponge Applicator (to apply the paint and the waxes)
And there’s more to his room – we also made these baseball finials for his curtains! Get the lowdown how we did it HERE.

I am super happy with how the wall turned out and our baseball player is thrilled. I do have a ton more DIY baseball projects for you also! Check out my Baseball Wreath, this Baseball Home Plate front door hanging, baseball cuff bracelets and my Royal’s front porch decor – perfect for fall decorating.
I would love it if you would pin the baseball mural photo below and be sure to follow me on Pinterest for more DIY project inspiration!
You can see my other soon’s room here. Surprise, surprise: it’s NOT baseball-themed! A totally different rustic industrial look
Happy painting,
Jen

Jennifer this looks great. Makes me wish I had a son. Looks great. So talented.
Hi Jen,
Great job on the wall.
I do have a question that you will have others ask. The jute. You never specified the length of the jute. I can figure it would be how far you middle of the ball on the wall to be. But most people will ask this question how long of a piece di you use.
Thank you
Lucille
I am curious about later in life when your son no longer lives at home and you don’t want that amazing baseball on the wall. Will the wax you sealed it with prevent you from painting over it with wall paint? Will Kilz work over the wax?
I followed your tutorial for my grandson’s room. He’s 2 and when he walked into his bedroom he said “Wow Nana, can I touch my baseball?” That was sooooo worth it. Thank you for the paint suggestions too. They worked like a charm. I wish I could show you the picture of my baseball.
Linda, that is PRICELESS! I’m glad Jennifer’s tutorial helped you! We wish we could see it too! Send us a picture at [email protected] if you can! We love seeing those! All the best, Vicki Silvey, Administrative Assistant to Jennifer Allwood