I love, love, love, love the tissue paper faux finish I just did in my master bedroom ceiling. I learned how to do tissue paper 9 years ago and I still love how it looks. There are very few faux finishes I can say that about.
I mentioned in an earlier post that I was over.my.Ty.Pennington.paper. It was too dark. Too heavy. Too masculine for my master bedroom ceiling.
I was not paid to write this post or use these products. This blog is my own opinion and I only recommend products I use and love! This post contains Amazon affiliate links and Faux Effects Store affiliate links of which I make a small commission at no charge to you. Thanks for your purchases.


So I went about the business of tissue papering over it. One of the nice things about a tissue paper faux finish is that it covers a multitude of sins on your walls. So, if you have bad sheetrock, or bad wallpaper… it can cover both. Just oil prime over those walls first.
Let’s begin.
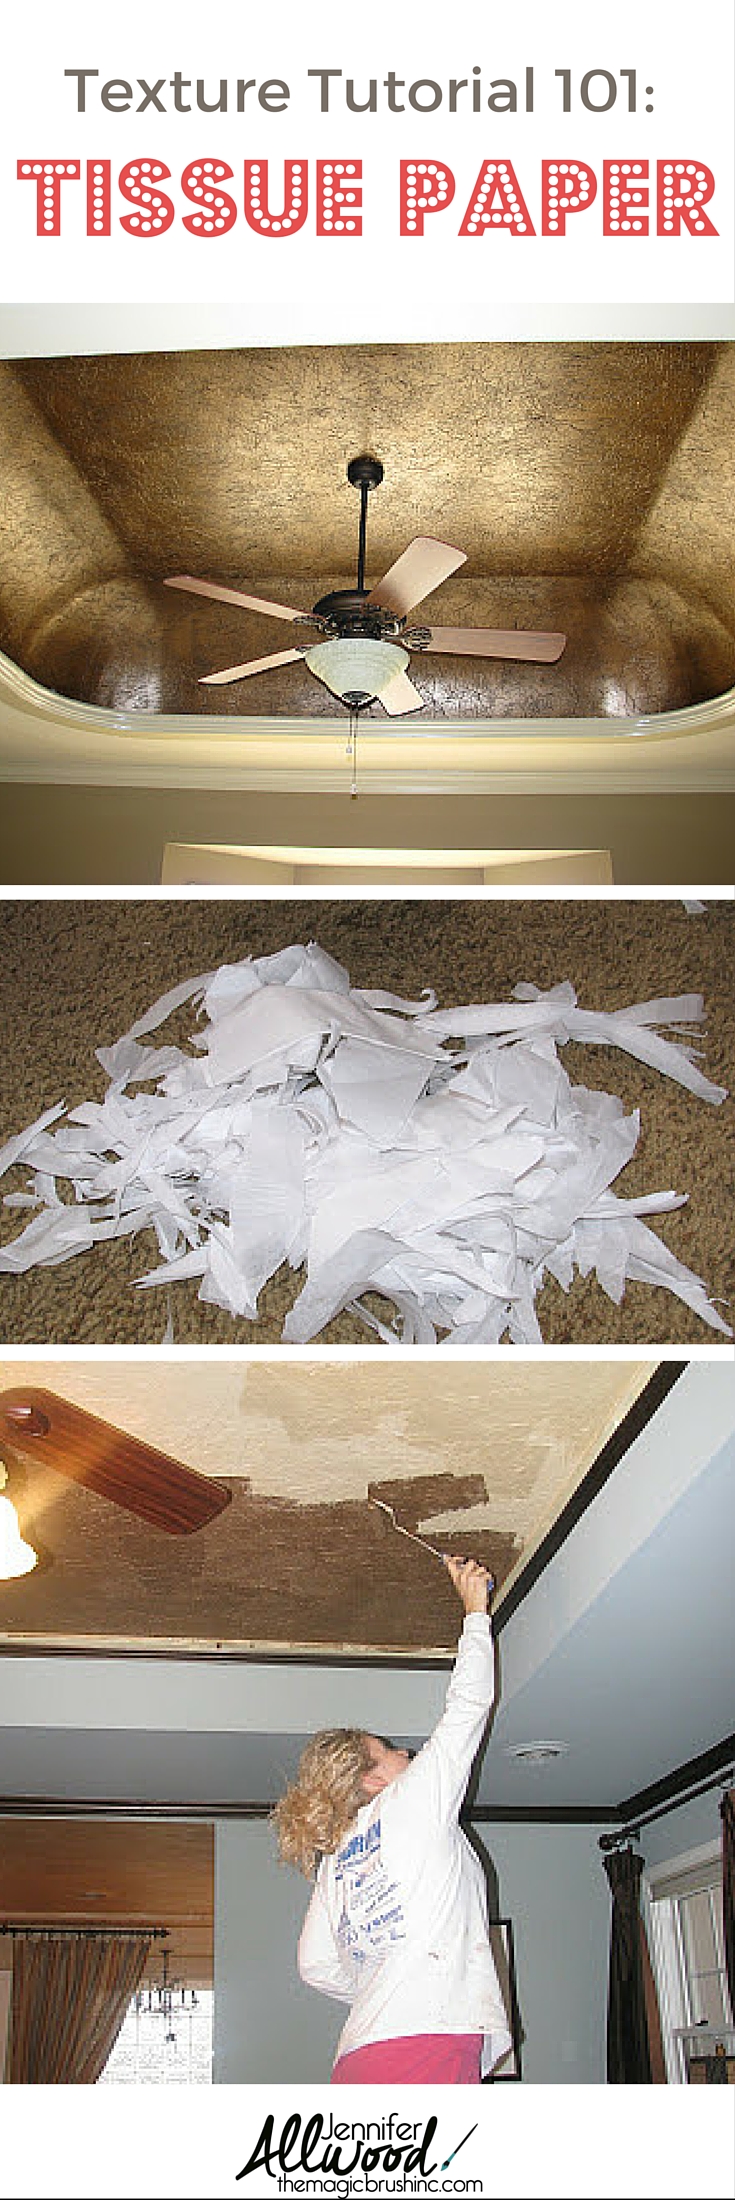
How to Paint a Tissue Paper Faux Finish
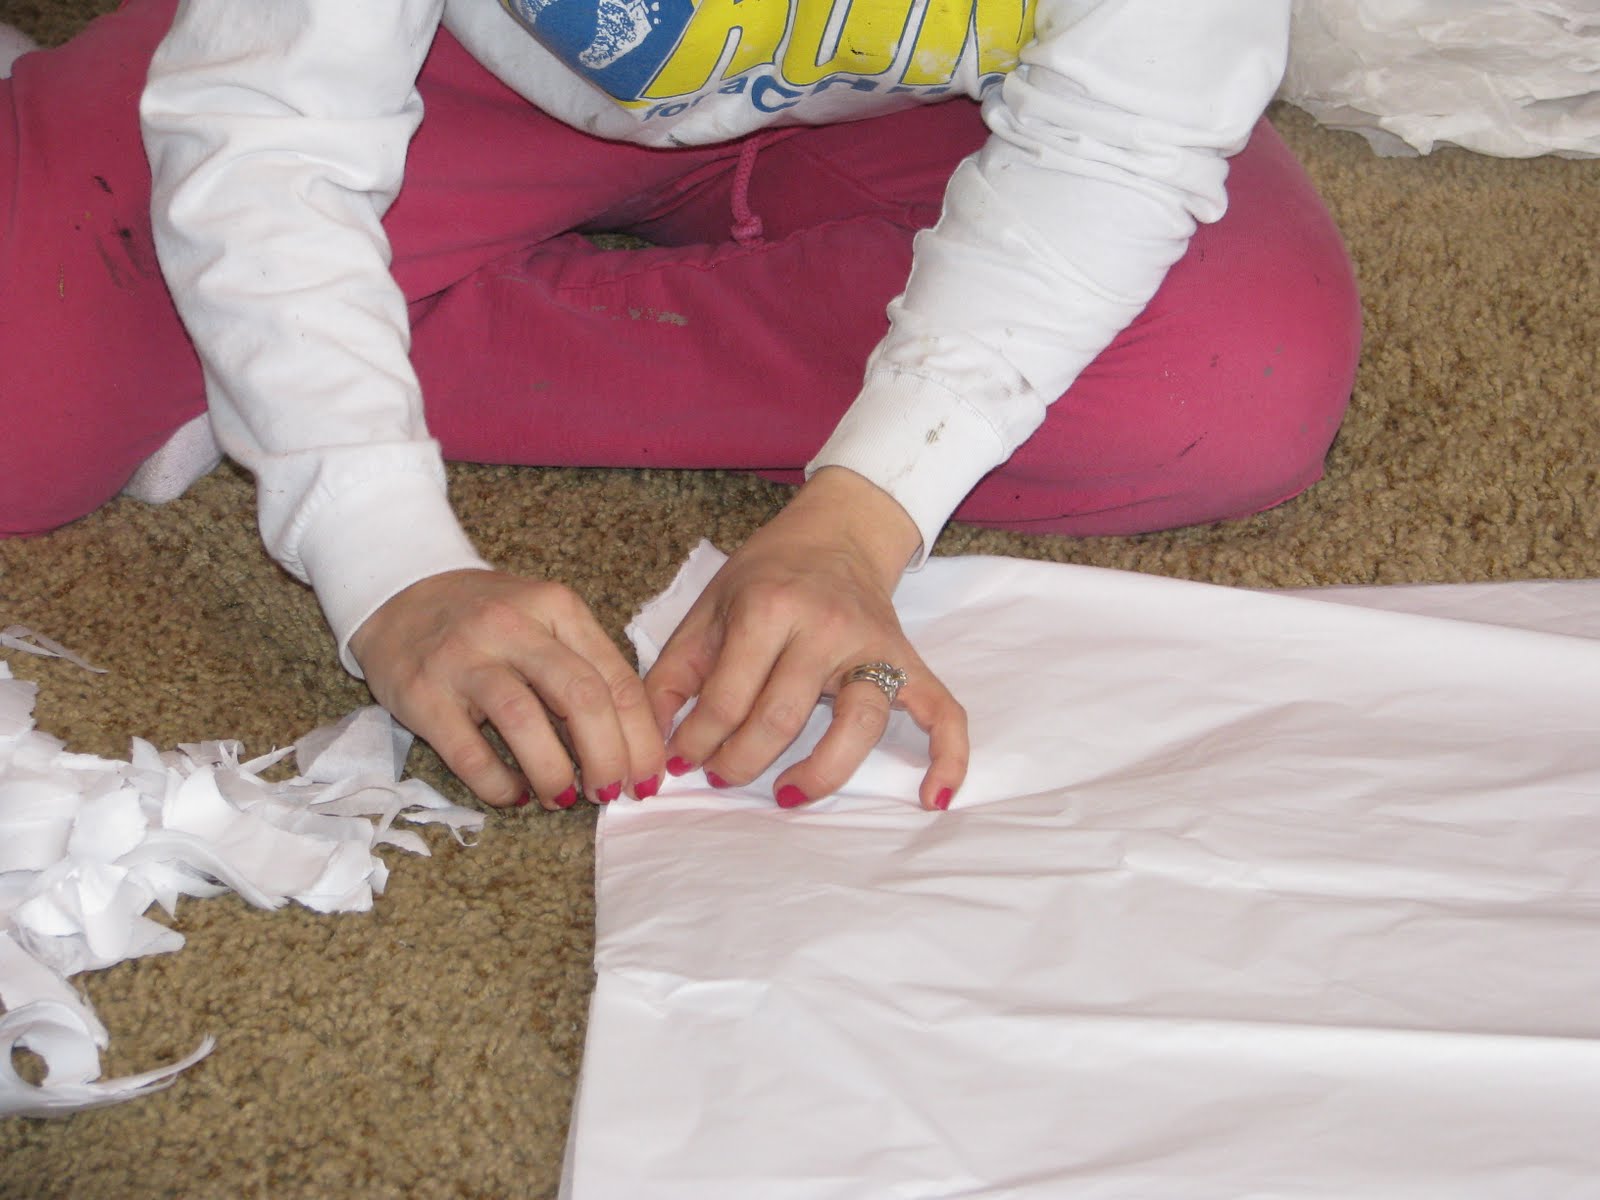
First, you need ALOT of tissue paper. I suggest Hobby Lobby. They have 100 packs available. In stacks of 3-6 sheets at a time, rip off the squares edges of the paper. This way you won’t see squares all over your walls!
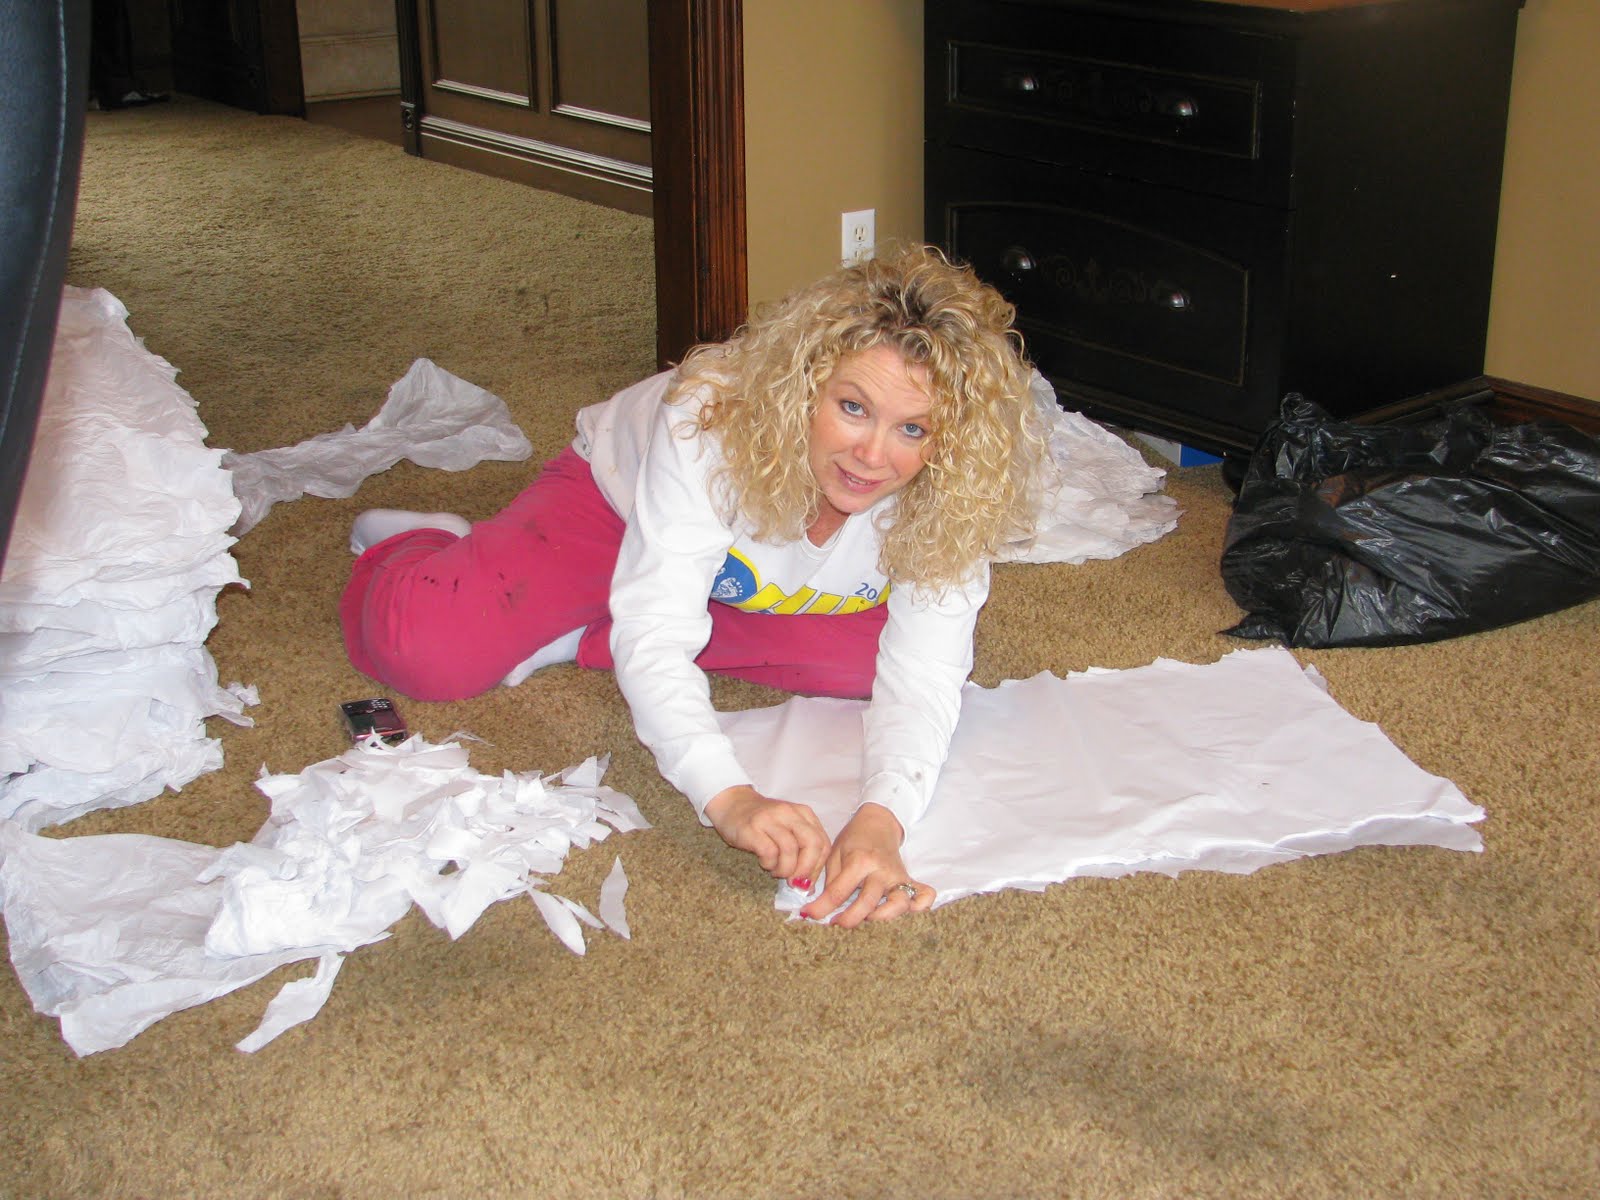
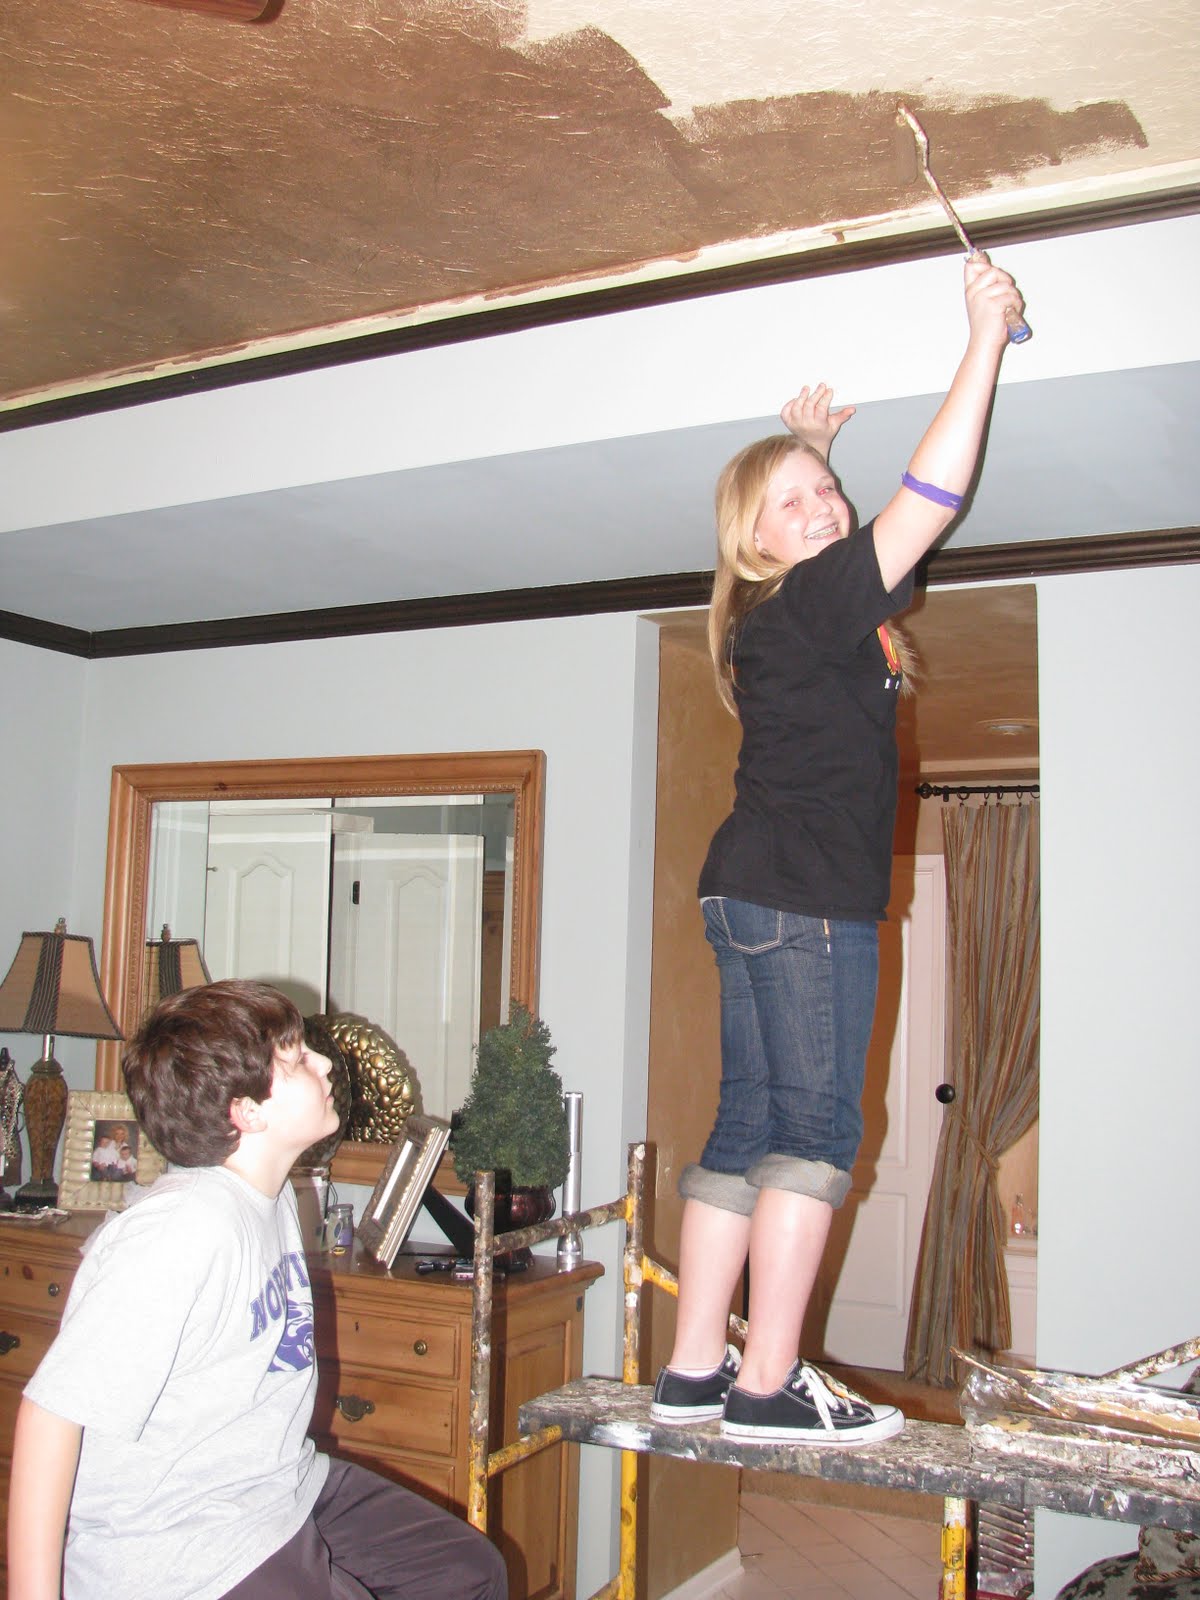
It will take awhile. Get your kids, your hubby, your friends to help.
Your pile of rippings should look like this.
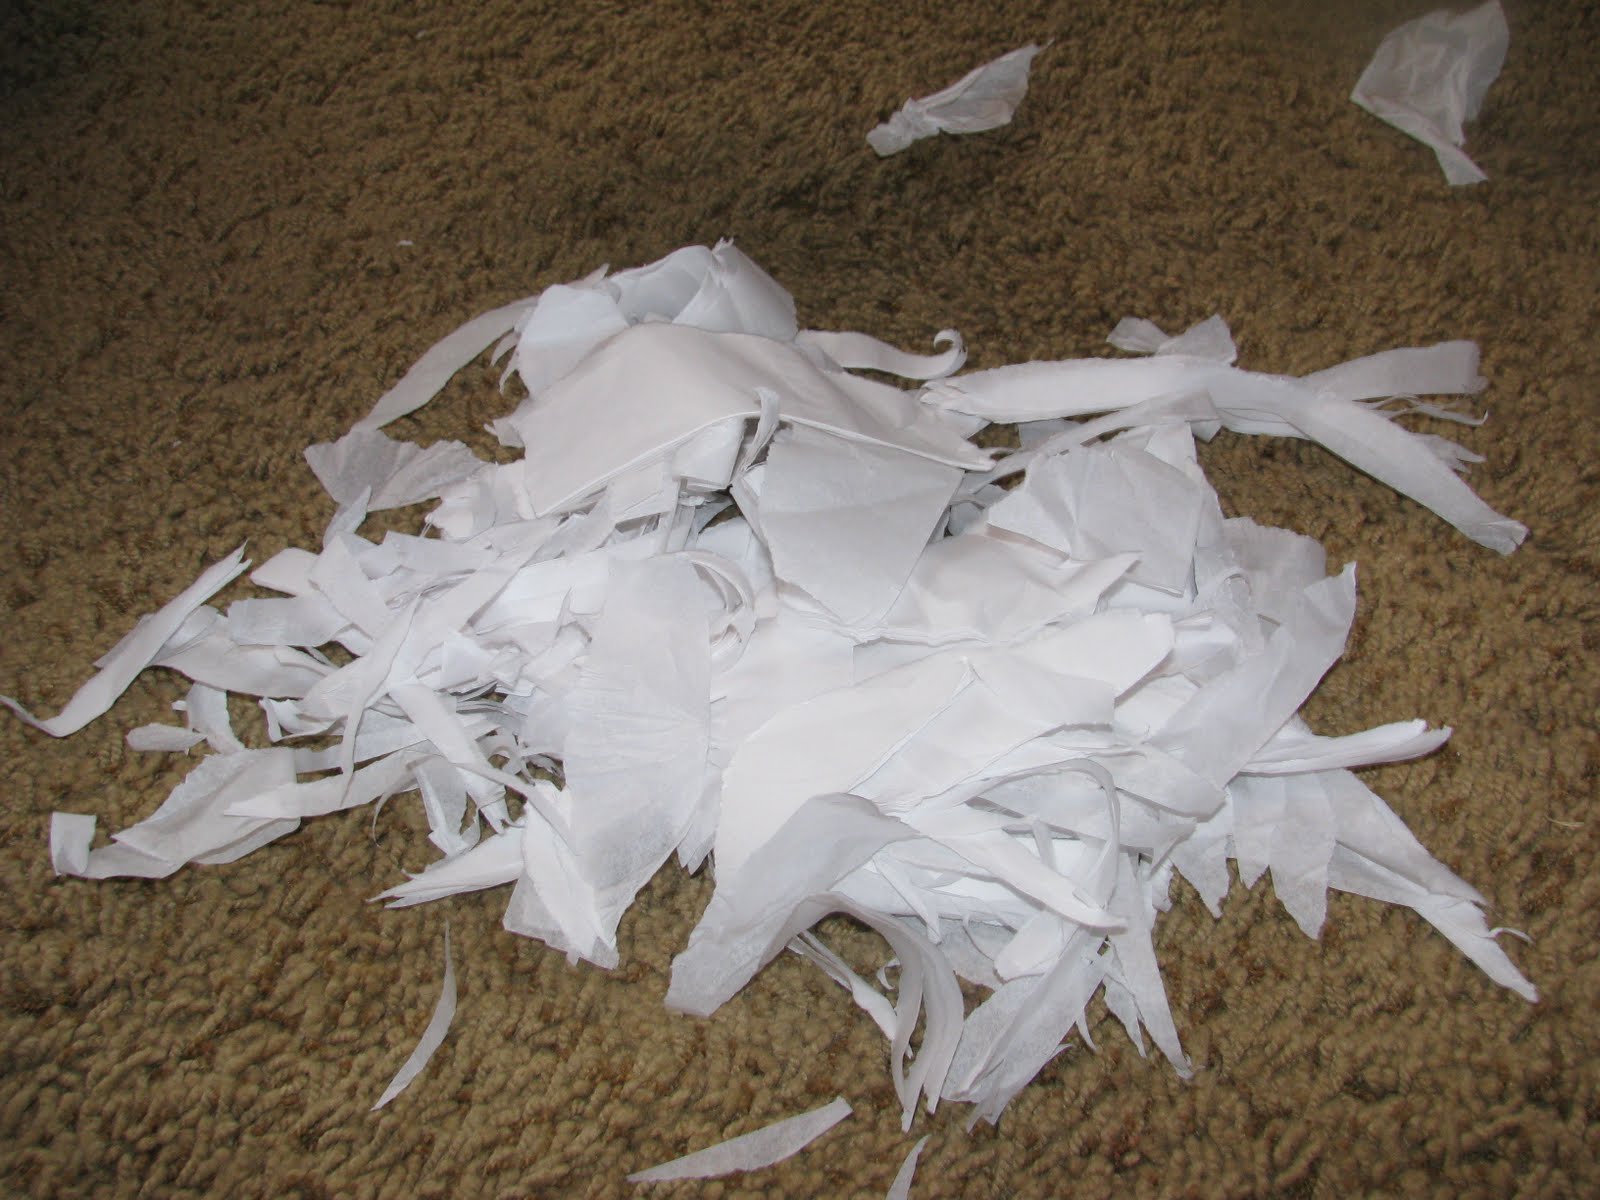
I like to keep one pile of tissue paper with only 3 of the 4 edges torn off. These are the pieces I use to edge my room around the baseboards and the crown molding. They will have one edge that is unripped.
After ripping edges (that is the worst part in my opinion)…. you need to individually ball up every piece of tissue paper.
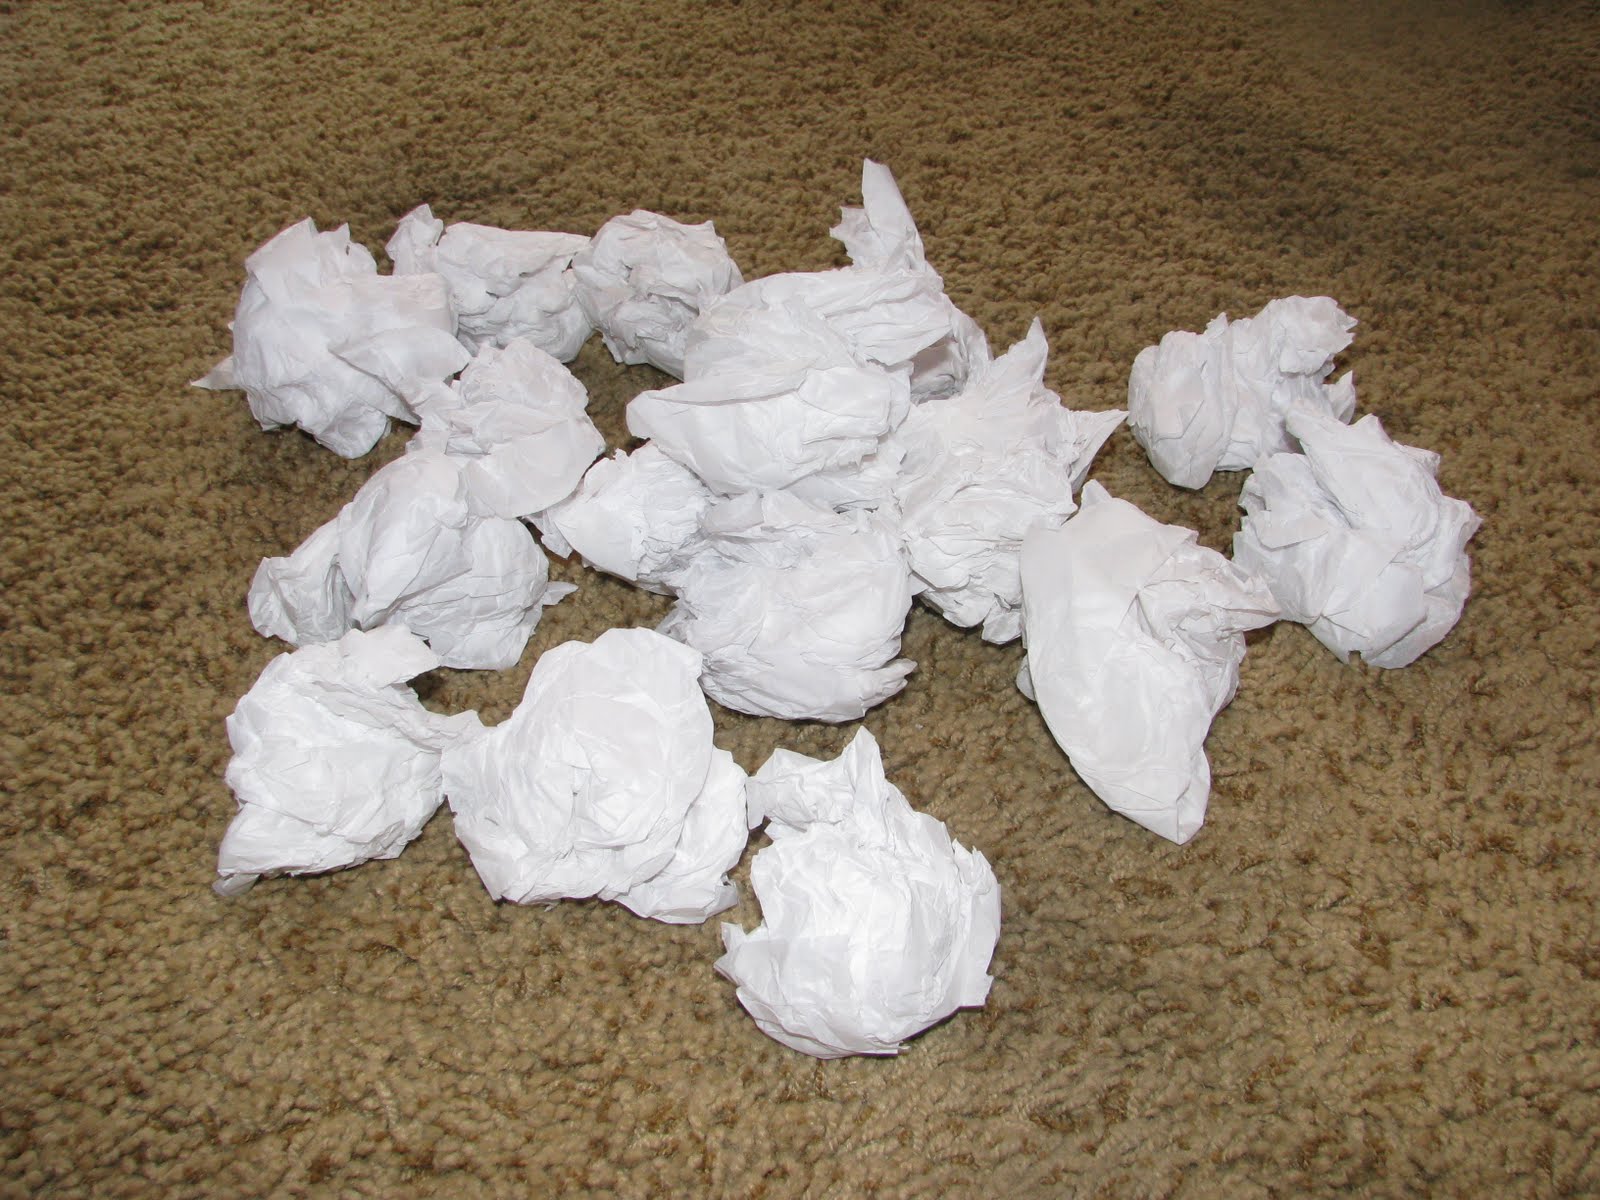
Then un-ball each piece and put them in their piles.
Ok, so I ALWAYS use an eggshell or satin sheen paint to roll my tissue on with. If you try it with flat paint you will email me crying. I know some people use wallpaper paste to hang up tissue paper, but in my opinion… wallpaper paste is heavy, messy and can crackle paint. Plus it’s colorless. Stick to satin paint. You will thank me later when painting your tissue paper faux finish.
I prefer to do all my edges first, then fill in the center of the wall….like a puzzle. But you can do it any way you want.
Roll a section of paint bigger than your piece of tissue paper onto the wall. Now loosely press a piece of the paper immediately onto the wet paint. You can smooth the wrinkles down with your hands. You don’t want to get rid of the wrinkles, you just want to get out all of the air bubbles.
Immediately roll back over the tissue with your roller. Each piece will take no longer than 1-3 minutes to put up.
Then move on to the next piece. Always overlap the edges of your paper. If you miss a spot on the wall, you will be able to go back and “piece” some tissue in.
If you get an air bubble that’s unsightly…. scrape that piece off before it sets up and try again. This finish is sooooo forgiving. If you have a spot that is too flat, lay another piece of tissue right over it to add more crinkles. You’ll never be able to tell.
I did have my son make a video of me putting up one piece of tissue. If you are really visual, this should help you alot.
But, if the sight of 7 kids in a video with an open paint tray makes you nervous, please don’t watch.
And, if you wonder if my hair is always this big…. yes it is. I have just learned to go with it.
Roll the tape.
The secret to tissue paper looking great in 2010 is using metallic paint.
I use eggshell or satin paint to hang my tissue up with, but…… after it dries, I always paint metallic paint on it. I don’t hang the tissue up with metallic just to save money because metallic paints are so expensive.
Normally I always try to get my eggshell/satin paint to be very close or darker than my metallic paint color. Ignore that I didn’t do this on my own ceiling. I had alot of the satin, golden paint that I was trying to get rid of.
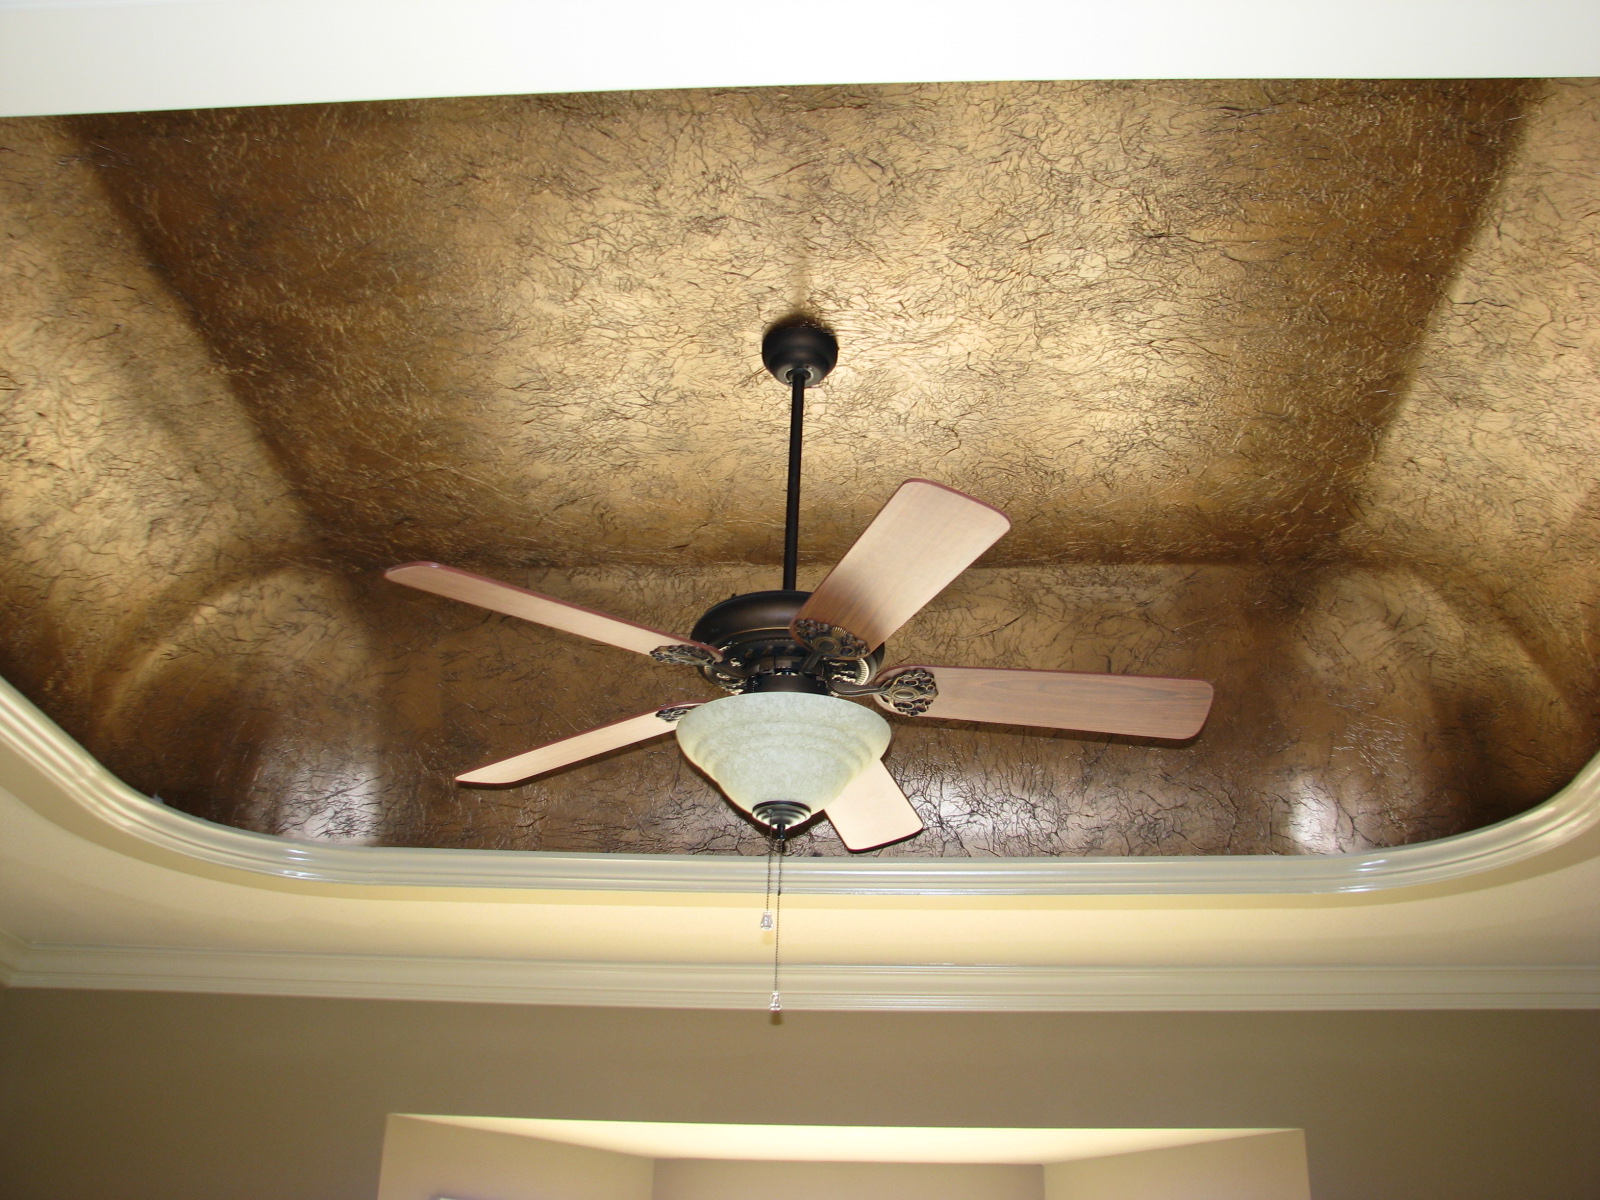
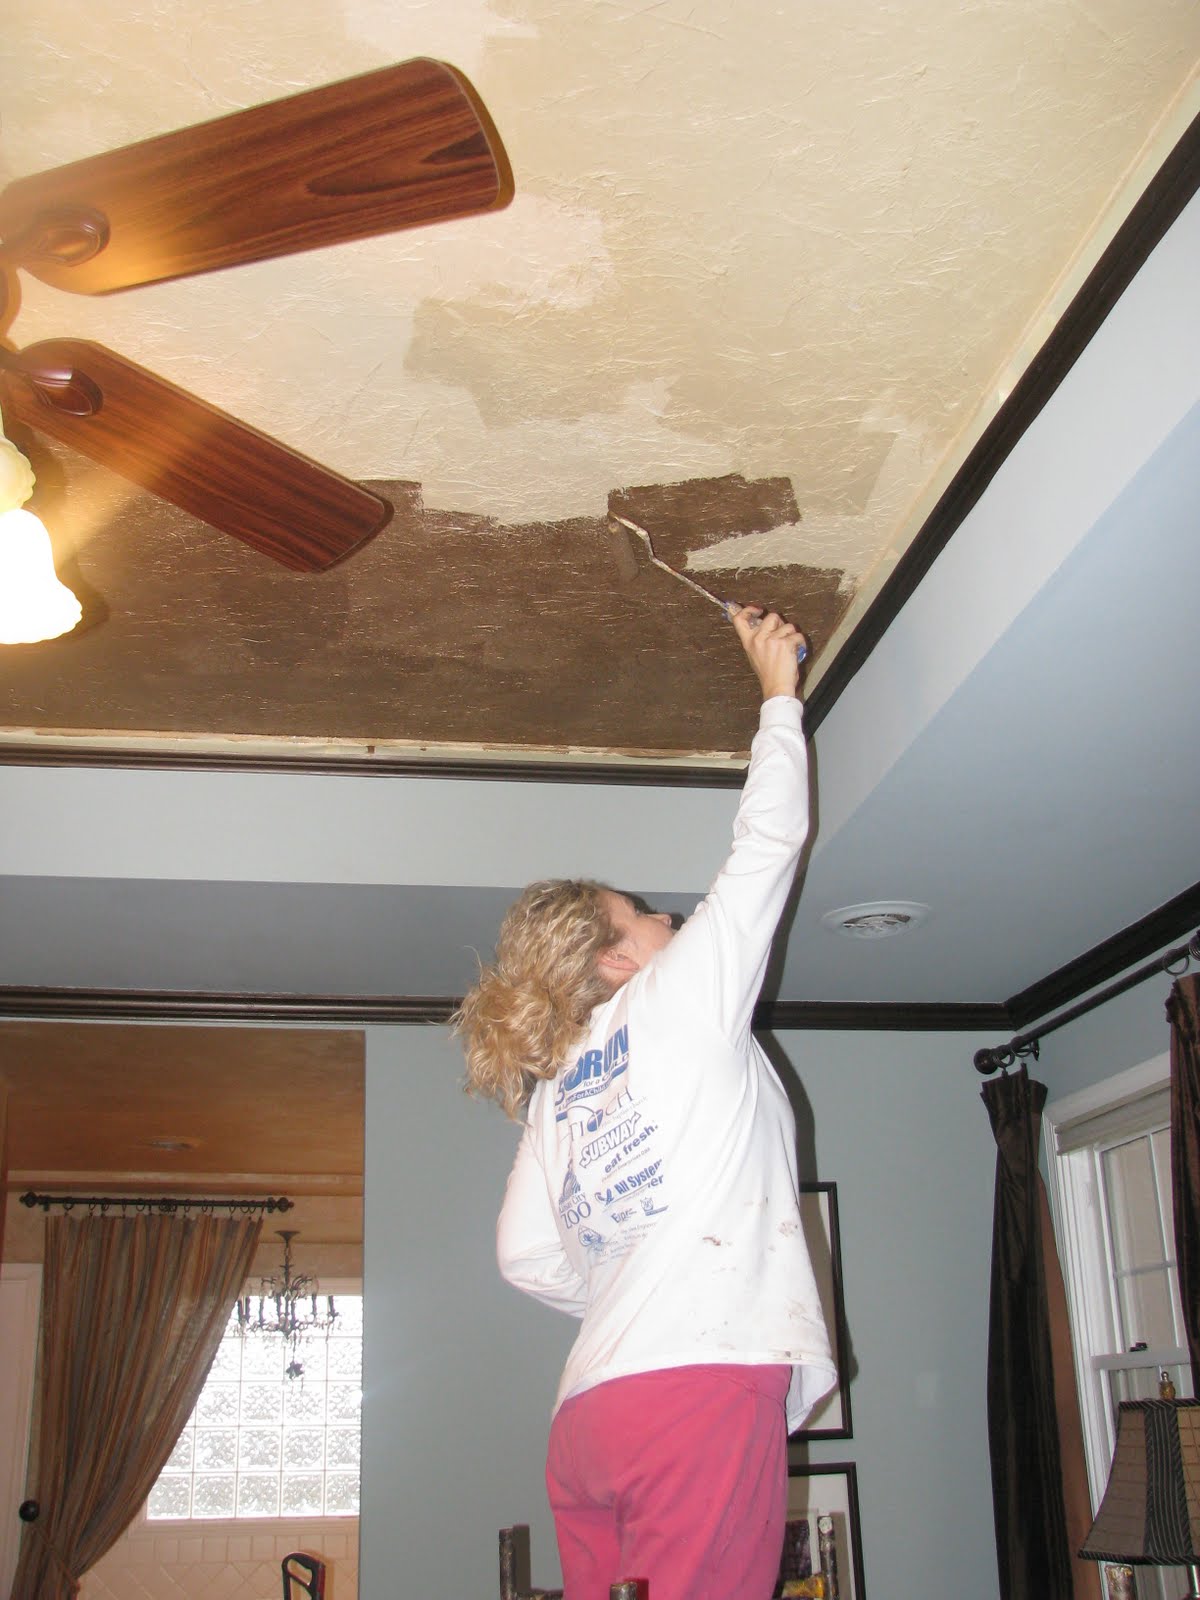
For my ceiling’s base color over the dried tissue paper, I mixed Modern Master’s Pharoah Gold and Modern Master’s Antique Bronze. Roll it on and let it dry. This is my sweet, sweet neighbor girl Mary who loves to help me! You go, girl!
Then the next day (ok…. I lie…. 2 weeks later)… I mixed Modern Master’s English Brown with Faux Effects Aqua Creme and rubbed it on with a cheap car washing sponge from WalMart. The sponge helps to get the glaze to hang up in the crinkles, which is what accentuates the tissue texture. You MUST glaze it. I like to use Aqua Creme because it has an incredible open time and it is the best “glaze” for keeping your metallic paint looking “metallic-y”.
You may need to use a utility knife to cut the tape off with.
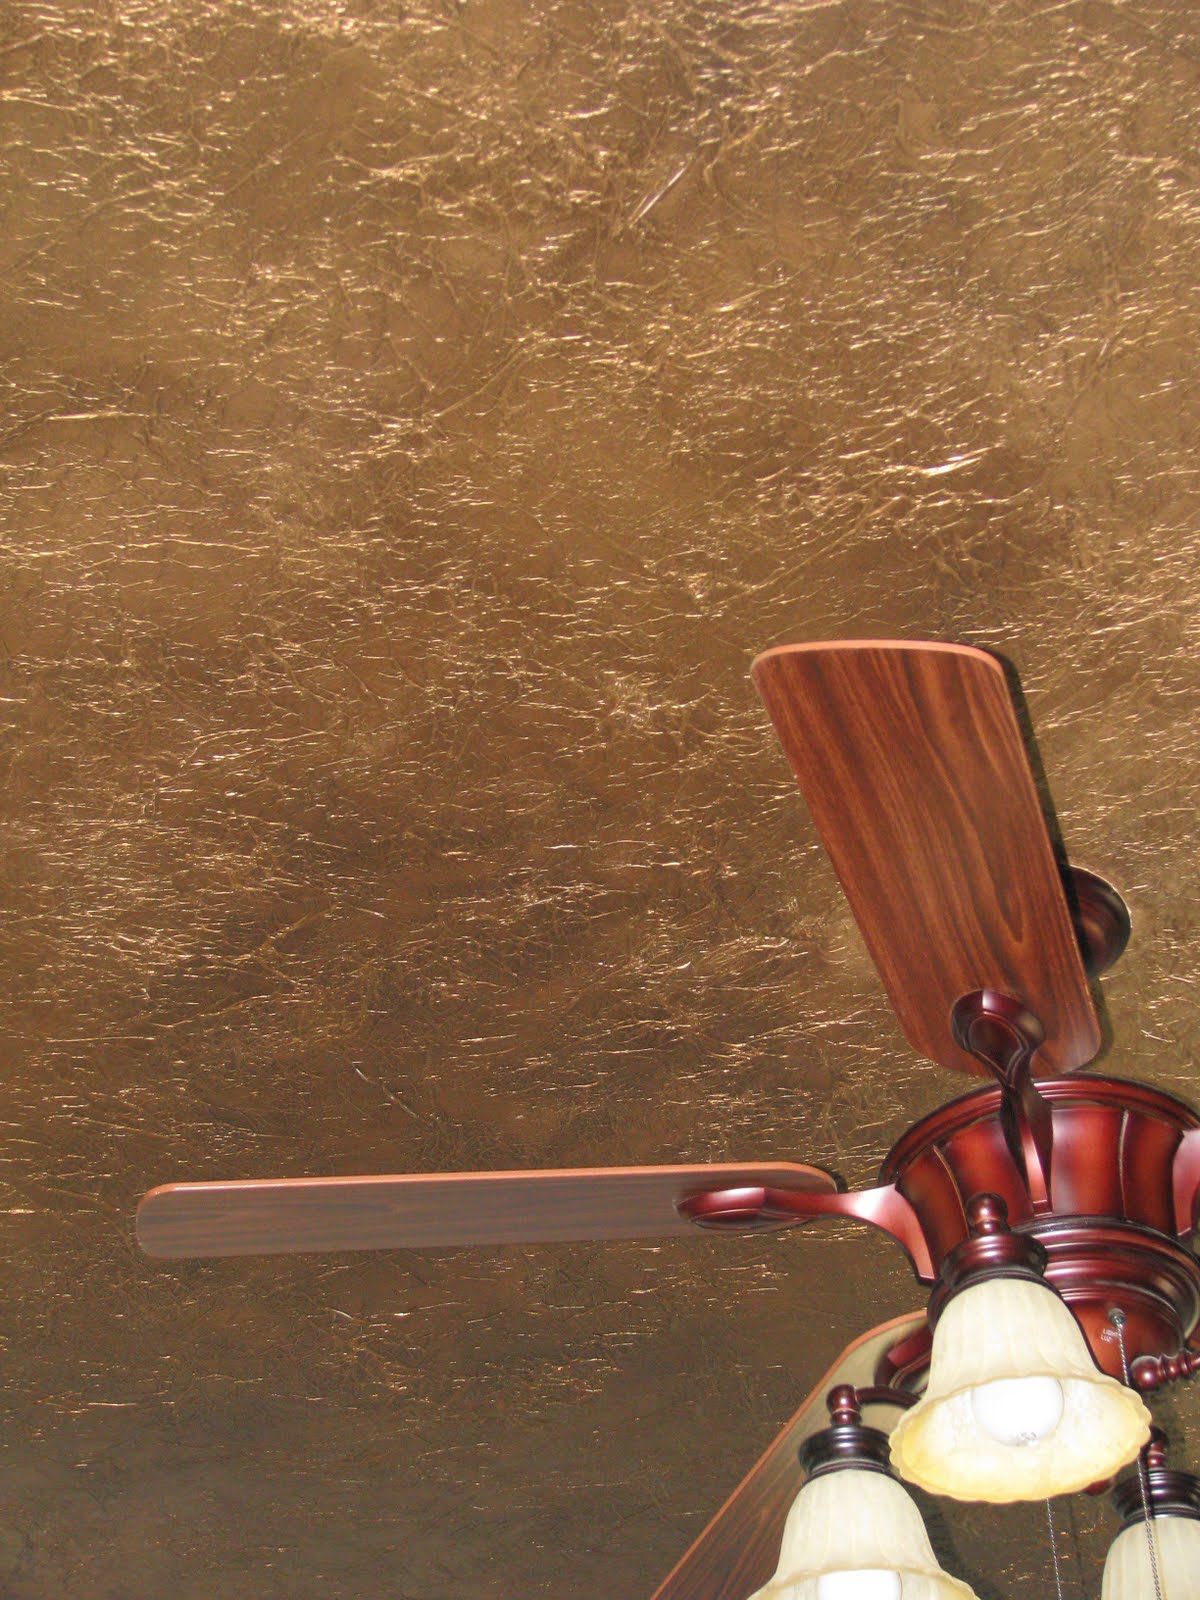
And that’s it! I do hope you will try tissue paper. I feel like my pictures just don’t do it any justice at all!
Or…. I just need to invite you all over to see it in person!
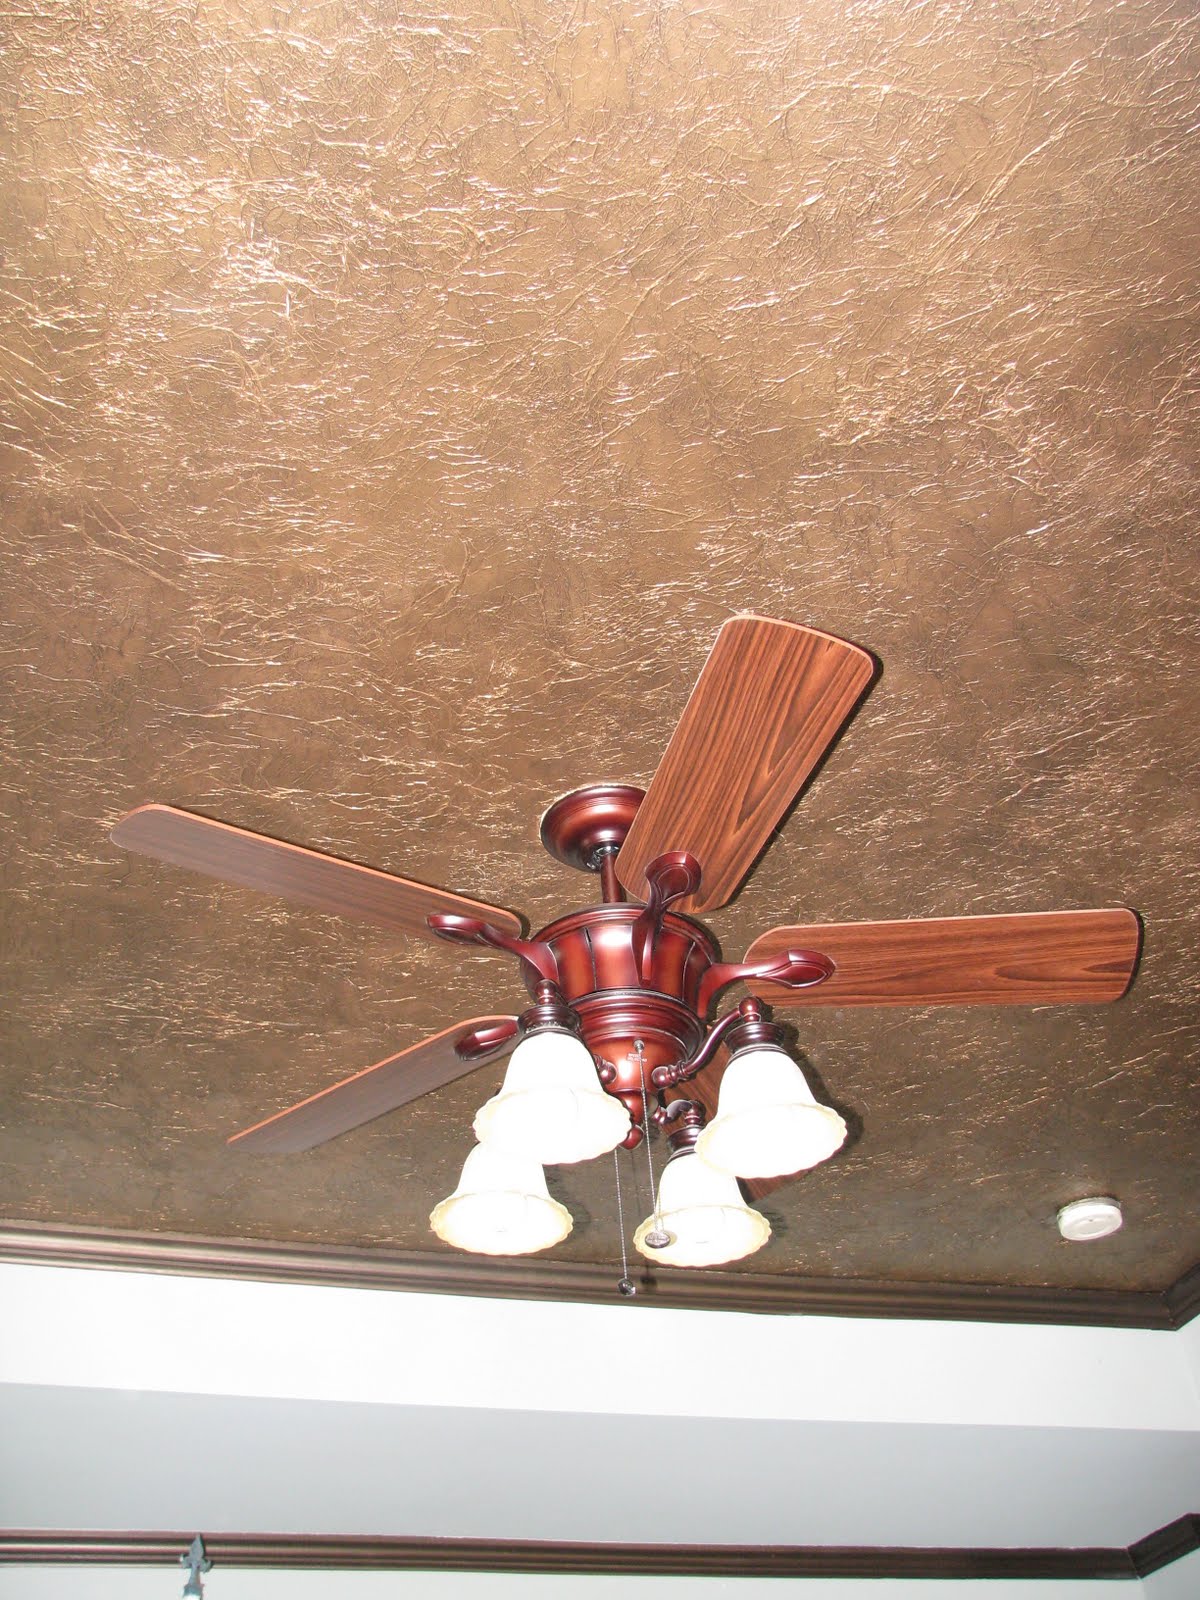
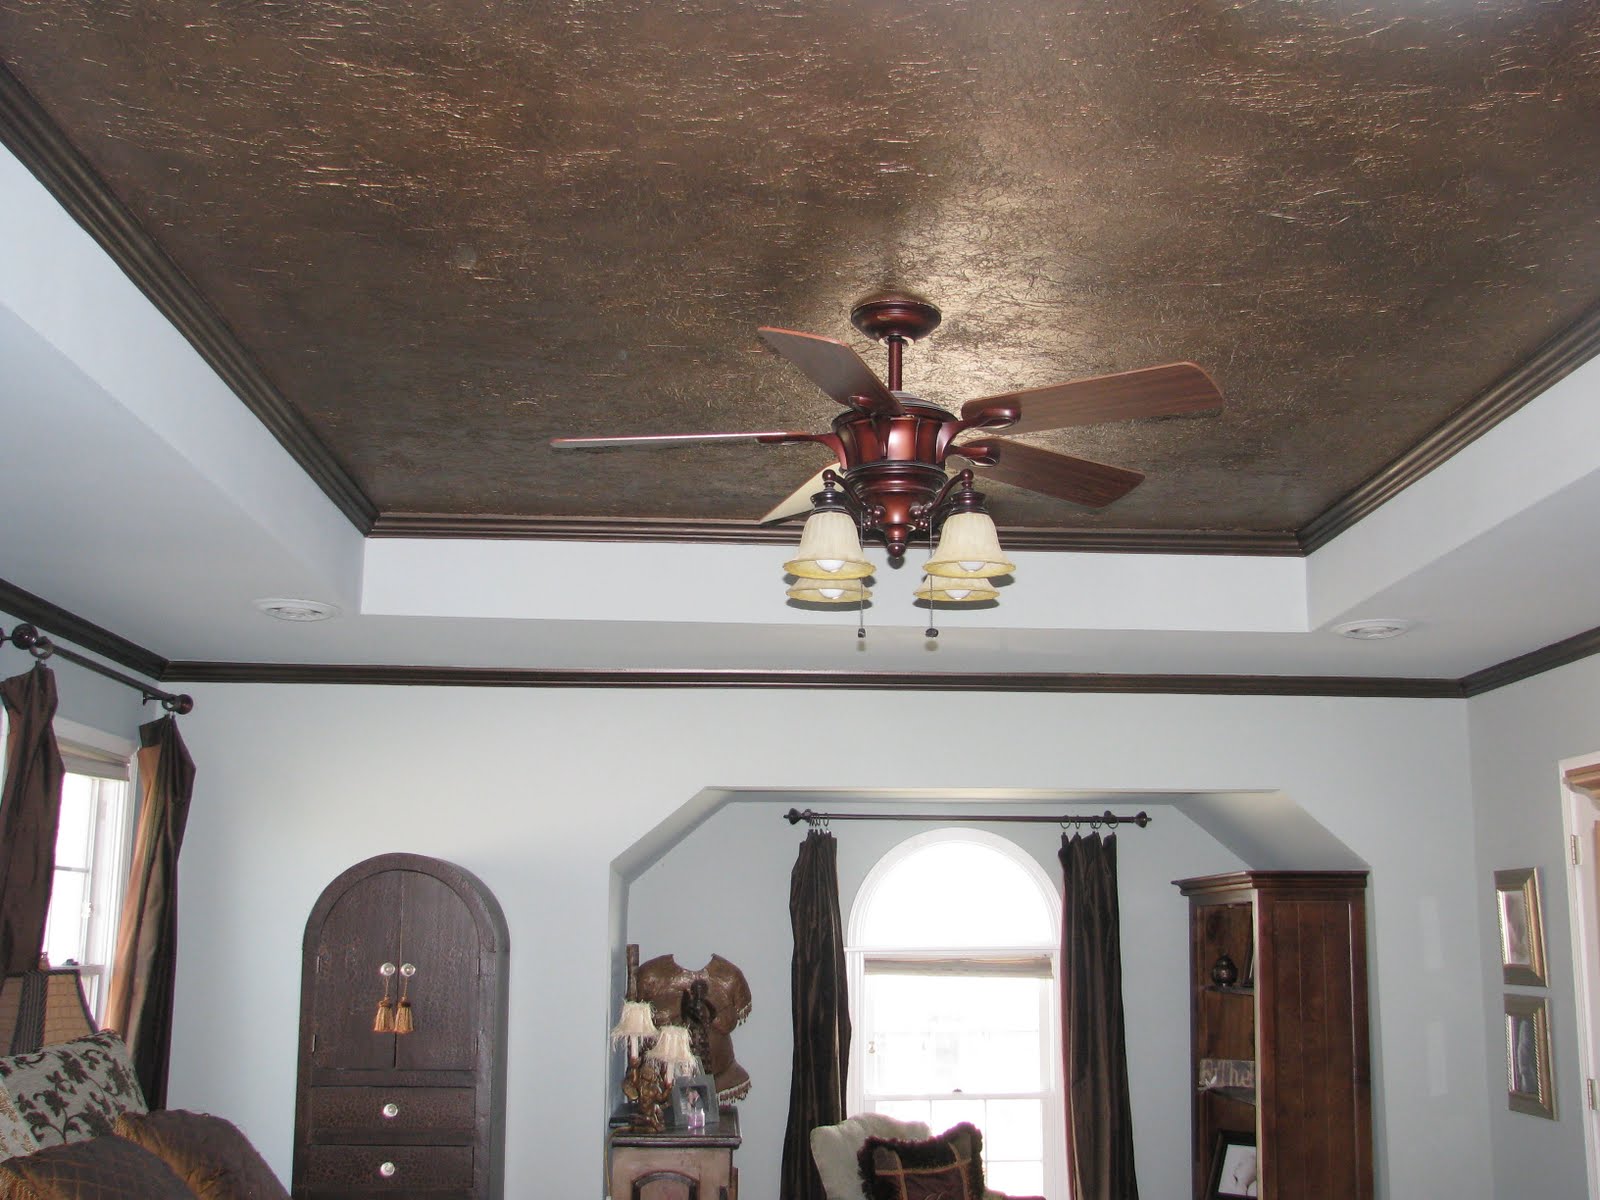
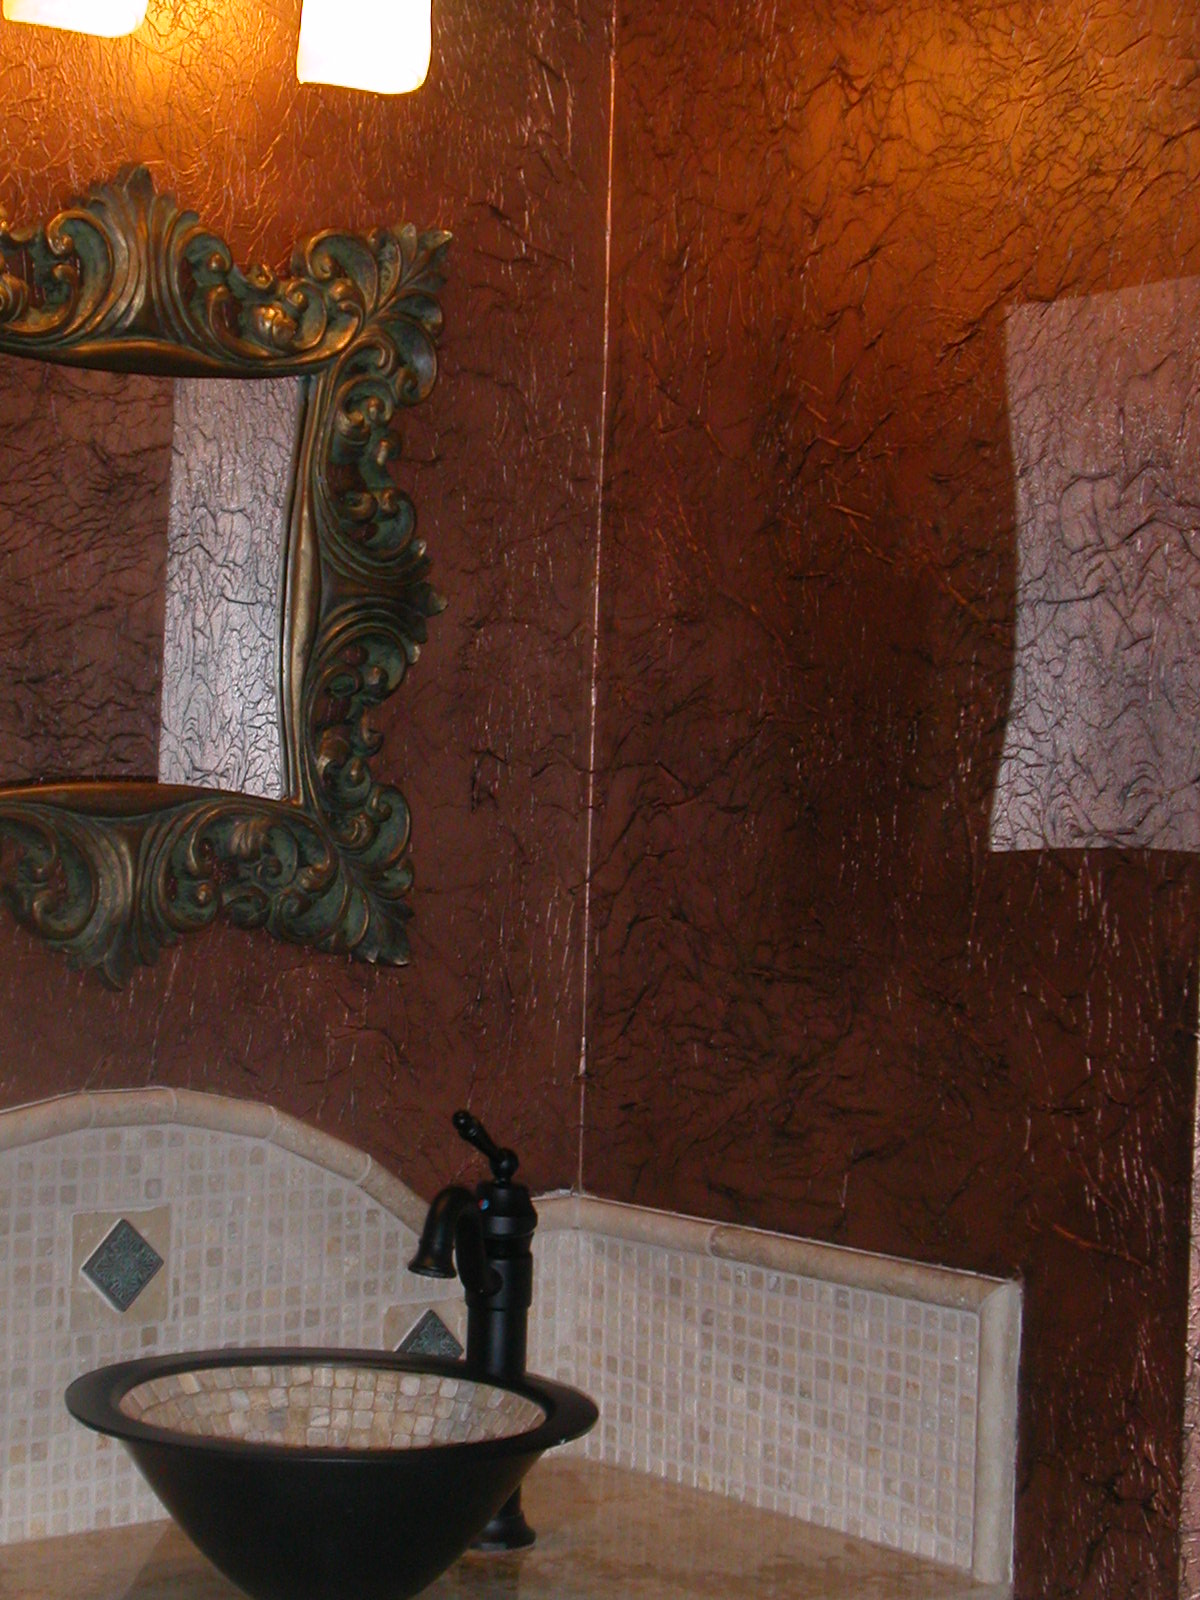
Here are a few pictures of other tissue paper faux finish color combinations:
(MM Antique Copper with English Brown and Aqua Creme glaze)
(MM Warm Silver with MM Smoke and Aqua Creme glaze)

(MM Blackened Bronze with English Brown and Aqua Creme glaze)
One question I always get asked is about “removing the tissue paper later on down the road”. My cute answer is that I say “just move”. But the real answer is that the paper COLOR can be changed anytime. Just roll a different color of paint right over the tissue paper faux finish.You could also texture over it or scrape Lusterstone over it.
But if you want the tissue paper faux finish completely gone, you’ll need to find someone to skim coat over it. Or, I have been told you could “SIZE” your walls like you do under wallpaper and that it should strip off nicely. I’ve never done it though. If ever I want it gone, I will move. Hahaha….
If you love this tutorial, I have a few other faux finishes for you to check out -my Showhouse Foil Finish and Gold & Silver Leafing Finish both look fabulous on ceilings and walls — they add a WOW factor! They are both elegant and EASY to do. I show you how to paint them in my DIY videos library as part of my Paint Finish of the Month Club! You’ll get access to 22 of my finish tutorials plus learn two finishes from guest instructors each month that you are a current member!
I also have a fun blog post about how to design a gallery wall of old windows. It creates a visually-interesting feature wall of textures too!

This is technique is Beautiful!! Thanks for sharing!
Gorgeous….just gorgeous! I should have done that in my guest room!! I love your projects!!
LOL You’re funny. 🙂
That last ceiling shot is to die for! What a beautiful technique! Then again, you make everything look flawless and easy. Love how the light catches the texture. It’s an amazing effect.
Donna
Just STUNNING!!!
Thanks for the tut! I need to find a space to try this one.
This is so beautiful! 🙂 Noah is too funny, he reminds me of my son. “PEACE OUT”!
This is gorgeous! I can’t believe you are sharing this gem of knowledge with us. I never thought about doing this, EVER!
Thank you soooo much for sharing this. I LOVE, love, LOVE this technique and I so badly wanna try it. Maybe for a backsplash?? Could that be sealed or something? Hmmm… And, if I ever want it gone – I’ll just move. 🙂
This is beautiful! Thanks for stopping by and commenting on my tassel. Sorry I didn’t come by earlier. I love what you have done!
Love your blog!
Have to comment here Jennifer. Thank you so much for sharing your technique-and paint colors! Beautiful work! You are a brave soul to let the kids tackle that with you : )
maybe this is what I’m looking for for my dining room walls. Beautiful, Thanks.
This look is awesome! Thanks for sharing the tips. I may try this on my bathroom wall-the one we’ve patched and TRIED to tape and fix – I’m too cheap to hire a sheetrock guy! But, I want to do it in something other than metallic. Would it look as good?
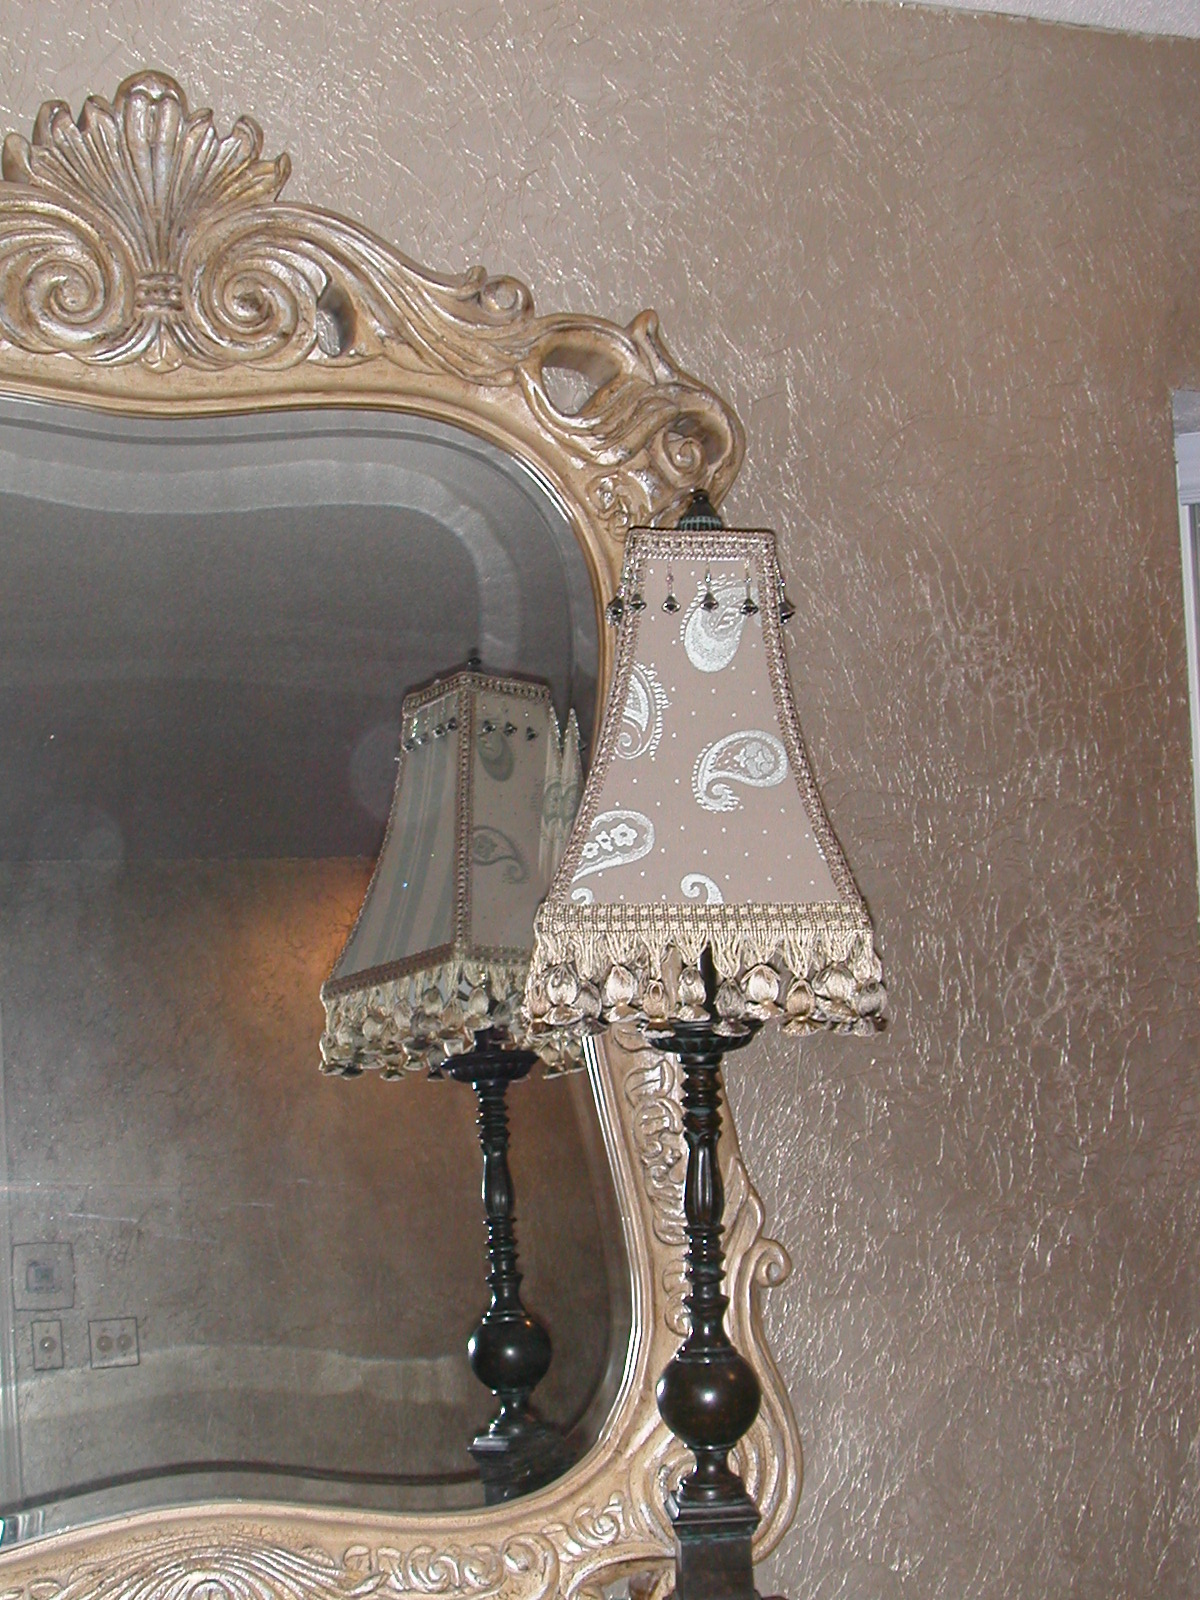
Hi Jennifer this project looks great…love the colours you chose and I looooove that mirror!
LL Nat:~)
I use this same technique in my art… but haven’t been brave enough to do it in the house. It looks gorgeous in your room!
I love your photographer… the video is SO cute! 🙂
Love it, I did this in my bathroom years ago (we live in a really old house and the walls were horrible) I still love the way it looks. Your ceiling is amazing!
Gorgeous! You are so talented. Love the color!
Wow, I love how reflective it is!
Have you ever tried this on a piece of furniture?
great tutorial, I’m going to do this in my master bathroom. Stay tuned.
What a great look. I will enjoy visiting your site again. Thanks for checking mine out.
Have a great weekend!
I LOVE this!! We are buying another home soon and I can’t wait to decorate all over again! I too am allergic to WHITE:-)
Thank you for stopping by my blog, I am now following you and I’m a fan on Facebook…I will be stopping back by soon..
Oh and your Family is beautiful!!
Can’t wait for an excuse to try this one out! BEAUTIFUL!
~Bridgette
Oh Jennifer, I really love the tissue paper effect. I’m in the middle of deciding what to do with our reno walls and thought I would brush on velvet paint over a satin base but now you’ve got me thinking. I love the texture of the tissue and I’m nuts for all things metallic. Hmmm…..what to do?
Love the effect you got on your ceiling. Cute video too!!
Love all your tips. Thanks.
Jennifer, that was fabulous! The tutorial and video were so helpful! How perfect for my powder room. Ohhhhhh — I want to do this!!!
Hi Jennifer! Thanks for stopping by my blog – much appreciated. Funny thing about that is I was actually on here yesterday and reading this exact post and thinking I was going to use your tissue technique on a smaller scale, for my outdated and ugly ceiling fan blades. I’m one to not commit to a texture that I may want to change in a near future but on the ceiling fan I can live with it. You do a great job!
Holy cow, That looks wonderful! But just doing it would make me cry!
Oh I want so much to try this out now. I love how it looks with the metallic. I think I’ll do this for my living room walls. I was already planning on using metallic paints. thanks so much for the tutorial.
lol gotta love your camera man!!
THis is something I have never heard of before! I am so tempted to try it somewhere! THanks for sharing!!
Beautiful! as is all your work. Quick questions, does it work over the ugly, cheap paneling?
Angie – it would still show the seams in your paneling unless you spackled them all flush with the paneling before starting and then primed over the whole thing. Even then there is a chance it could show…. but I doubt it! Best wishes!
WOW! This is absolutely beautiful! I have been looking for something interesting to do in my master bedroom! I have an inset ceiling similar to yours. Great job!
Wow Jennifer! That looks amazing! What a fabulous technique! I’ve never heard of it! Looks great!
GENIUS! I accidently stepped onto my drywalled ceiling from the attic above and put a huge crack in. I was looking for a way to cover up the crack without having to re-drywall the whole section. Plaster is too pricey for such a small job but your technique will be perfect, perfect, perfect! Found you on Funky Junk Interiors and I’m so glad I did!
I’m late to the party but I just wanted to say thanks for posting this technique! Your examples are beautiful.
Thanks for posting this! I’ve been going insane trying to figure out a way to cover up an annoying monkey mural that was painted over an entire wall by the previous owners. The monkey outlines just keep seeping through the paint! The texture of this technique should fix those darned monkeys for good!!! 😀
*pinned*
Very creative. It has style in it.
If you want to make your home really look really beautiful , paintings are the best way to do it believe home looks very well decorated . If you are looking to find Oil Paintings Reproductions at very economical price or cheap rates, you must visit wahooart.com
This is beautiful!! I have a bathroom that I need to cover a multitude of someone else’s sins in our house!! I cannot wait to try this!!
Thank you!! Lori
Is it possible to do this technique on cabinet doors? I have some pretty boring storage closet doors in my bathroom and would love to give it a some pizazz.
Is it possible to do this technique on cabinet doors? I have some pretty boring storage closet doors in my bathroom and would love to give it a some pizazz.
Billie – yes! You can tissue on everything! Just remember to prime first, then tissue! Good luck!
what about on swirled plater walls and ceilings?
Very informative!
I love your work and thank you for so much inspiration! Where can I find the video your son took of you putting a piece up……would love to see it. Also can this be put over wallpaper? Thank you!!!!
It’s such a helpful tutorial stuff. Keep it up…..do I say girl?
Hello, I know this post is old, but I just found it. I’m desperately trying to find an inexpensive, DIY way to hang onto my UGLY, UGLY, UGLY, formica white kitchen cabinets. Did I mention they’re ugly? Anyway, if I didn’t have a ton of them, and each one apparently was specifically made for that area, I would replace them all but just not in the budget. So they are stained kind of grey due to steam in the kitchen, oil from kids skin, dirt, etc. and just other day to day activities. These cabinets get used a lot. They have been cleaned and a lot of grime has been removed, however, I just hate them, I would like to do this tissue paper process to the cabinets. I thought I would use Gripper Primer, let dry and then put the tissue paper on, but can I do a metallic white in a kitchen or a metallic pearl? What are your thoughts. I have purchased all new handles that are modern, I just need a fix on these cabinets to last about 5 years to buy me time so that I can splurge for the real new kitchen. Let me know your thoughts please!
Ikea has amazing kitchen cabinets at amazing prices. We have a very large kitchen with double ovens and ours is only going to cost roughly 3500.00 with sink and all. They apparently have a big kitchen sale every year where you can come out way ahead of your budget. There always the chalk paint option too. Very little prep.
I am excited to have an Inspired technique that will cover my den wallpaper…a flower garden from the ‘40’s blew up and covered all of the walls from 3’ above the floor (that area …below…is a highly unattractive deep mauve!)
I have a 100 year old bathroom that has white beadboard walls. I want to cover the ceiling with tissue paper and I noticed the other day that Menard’s has turquoise metallic paint. Would tissue work with that?
Yessss!