So lately I have been getting tired of some of my heavy looking, bronze colored chandeliers. I still like the SHAPE of them, I just want to lighten them up…. both visually and how they feel in the room.
So we painted several of our chandeliers! So much better! I will teach you how to become a master at painting light fixtures!
This post may contain affiliate links. If you order from the post, I will be given a small commission that will help me to continue doing projects like these to share with you. I only recommend products that I already use and love!

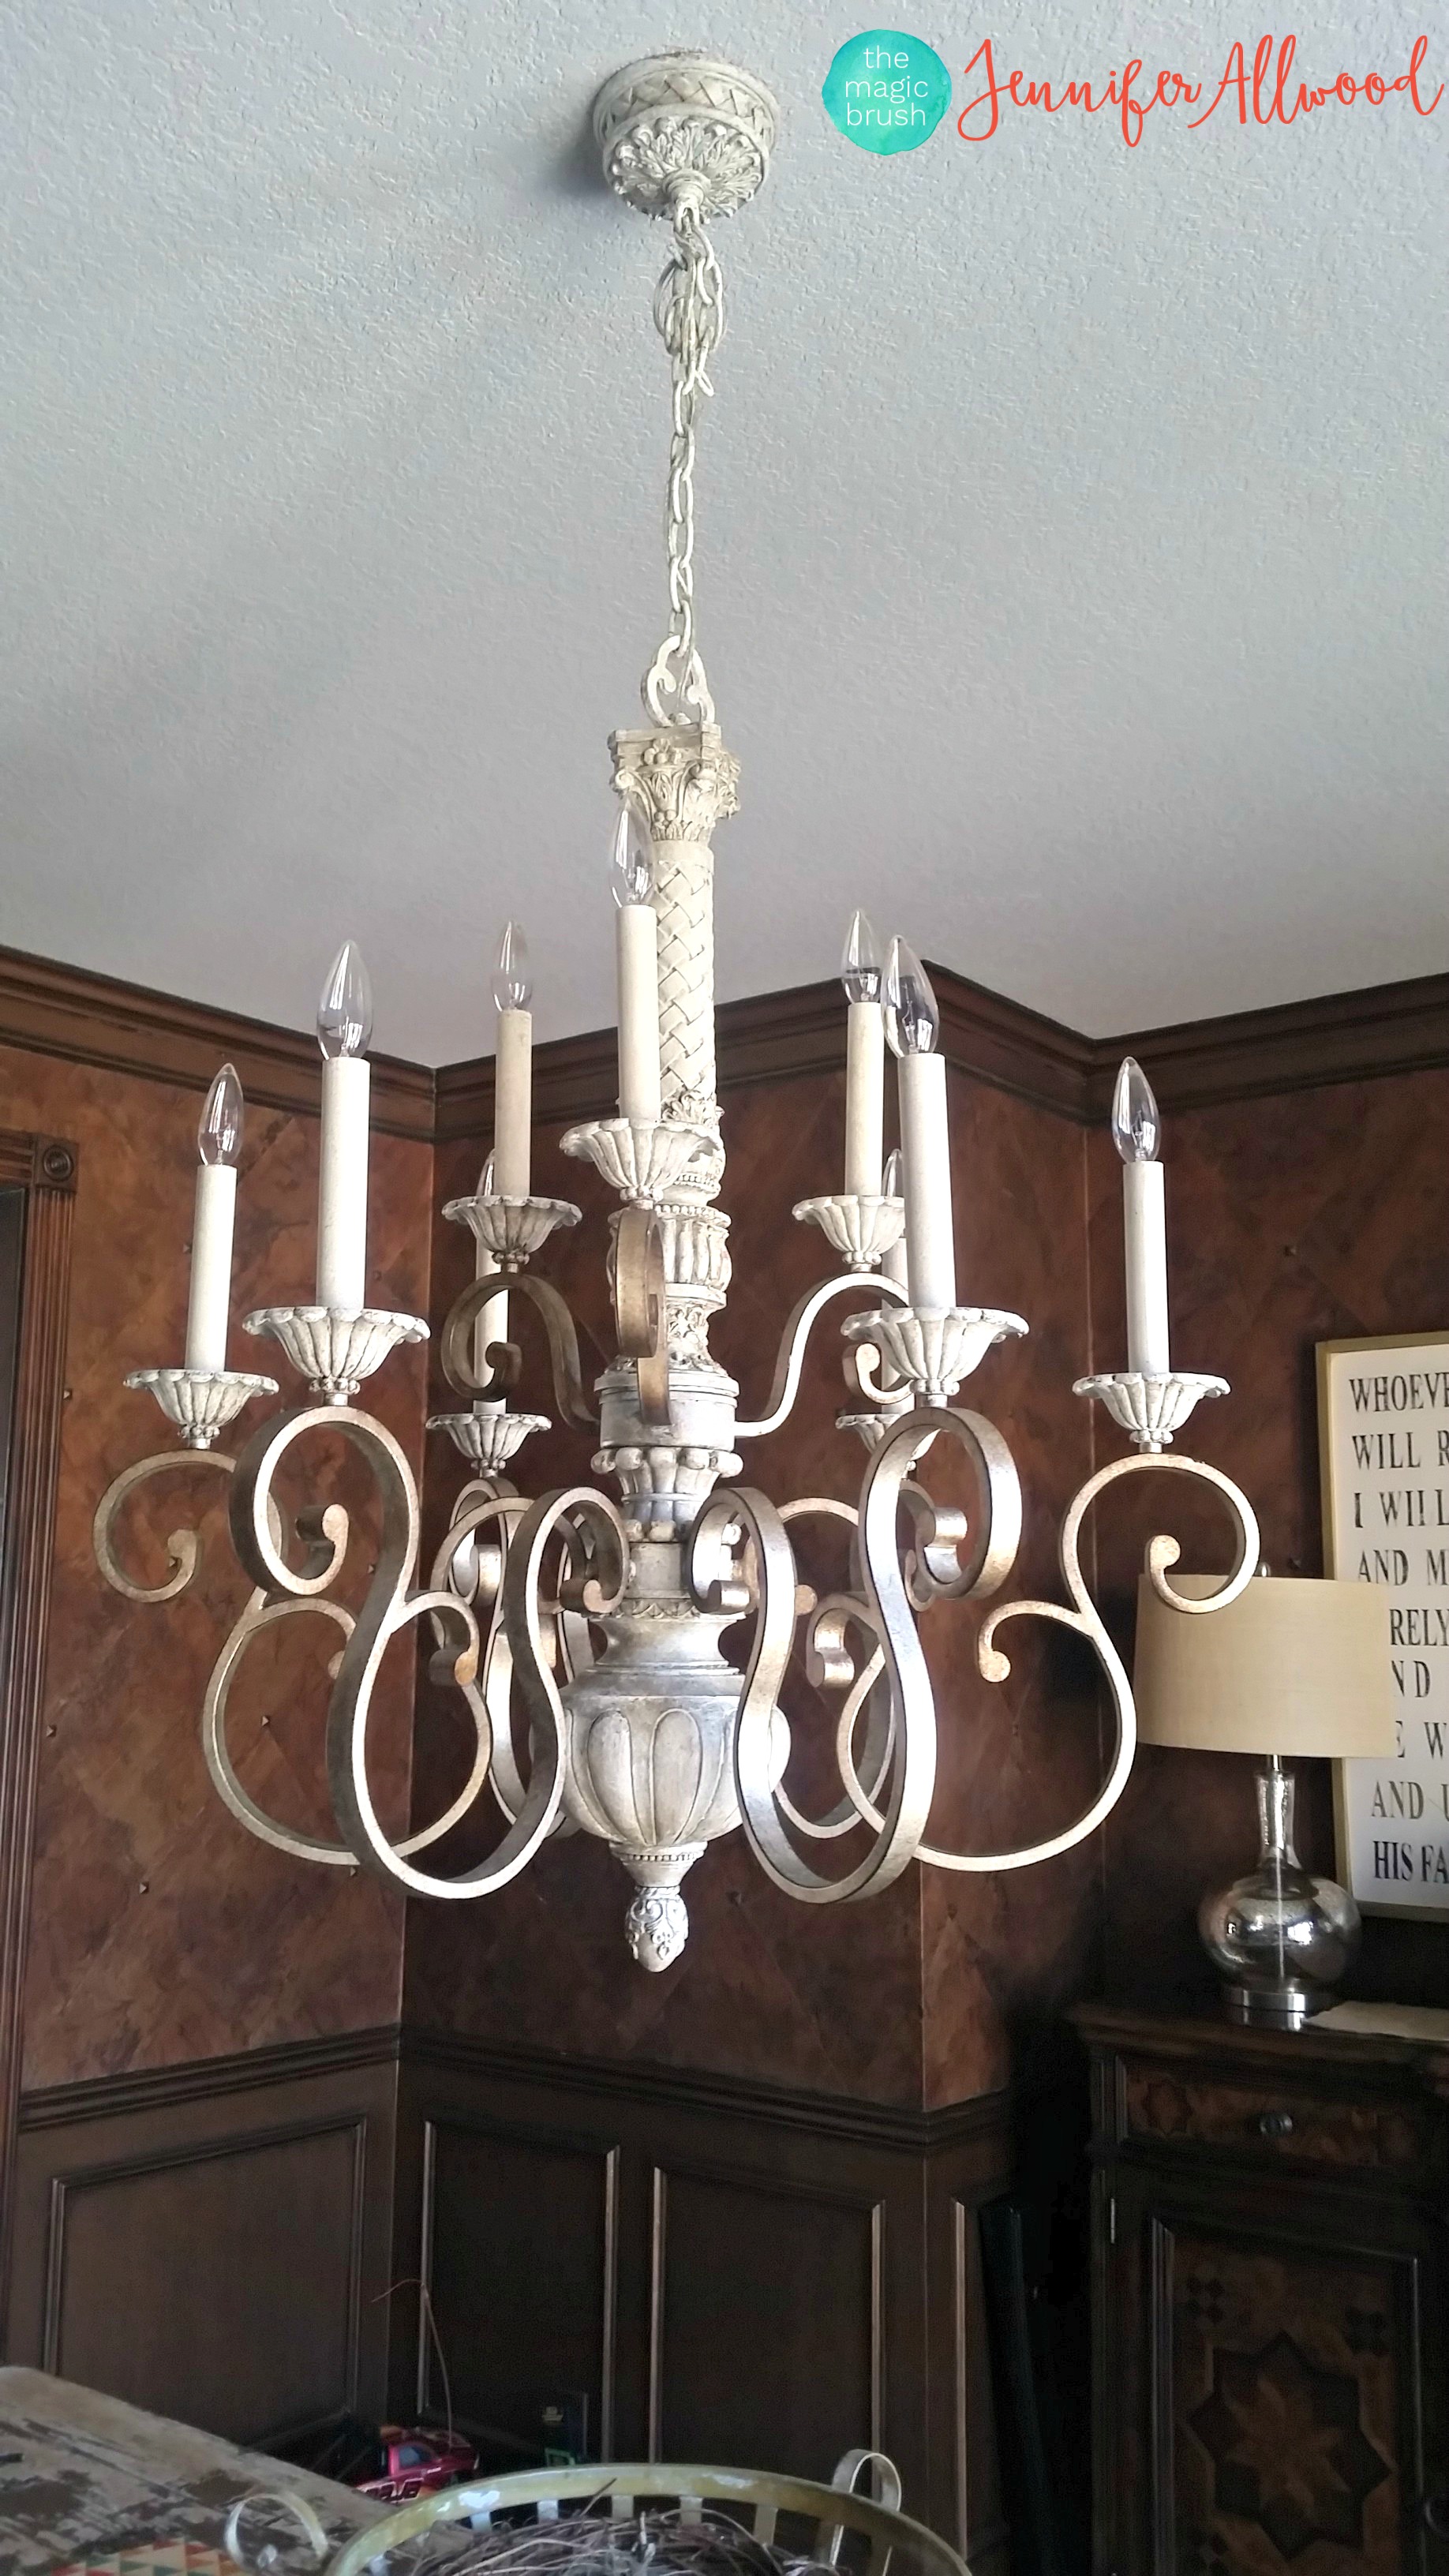
So I decided to paint this one which I think made my main man wayyyyyyyyyyyyyyyyy happier than me buying a new one and him having to take this one down and rewire another. I remembered to take the “before” picture AFTER we already started painting, so oops. But this is 90% before…..
I had Julie, one of the lovely, talented girls who works for me, use a primer tinted to Sherwin Williams color SW6126 to paint it with. The reason I used primer is not because I was worried about it sticking, but because I wanted a matted, dry look to it. And the reason I used that color is not scientific…. it’s just one I already had (cause ain’t nobody got time to run to the paint store) and it wasn’t too white-white.
If you don’t have any cream primer at your house, you can use my affiliate link and order the French Vanilla chalklike paint that I use for these painting light fixtures.
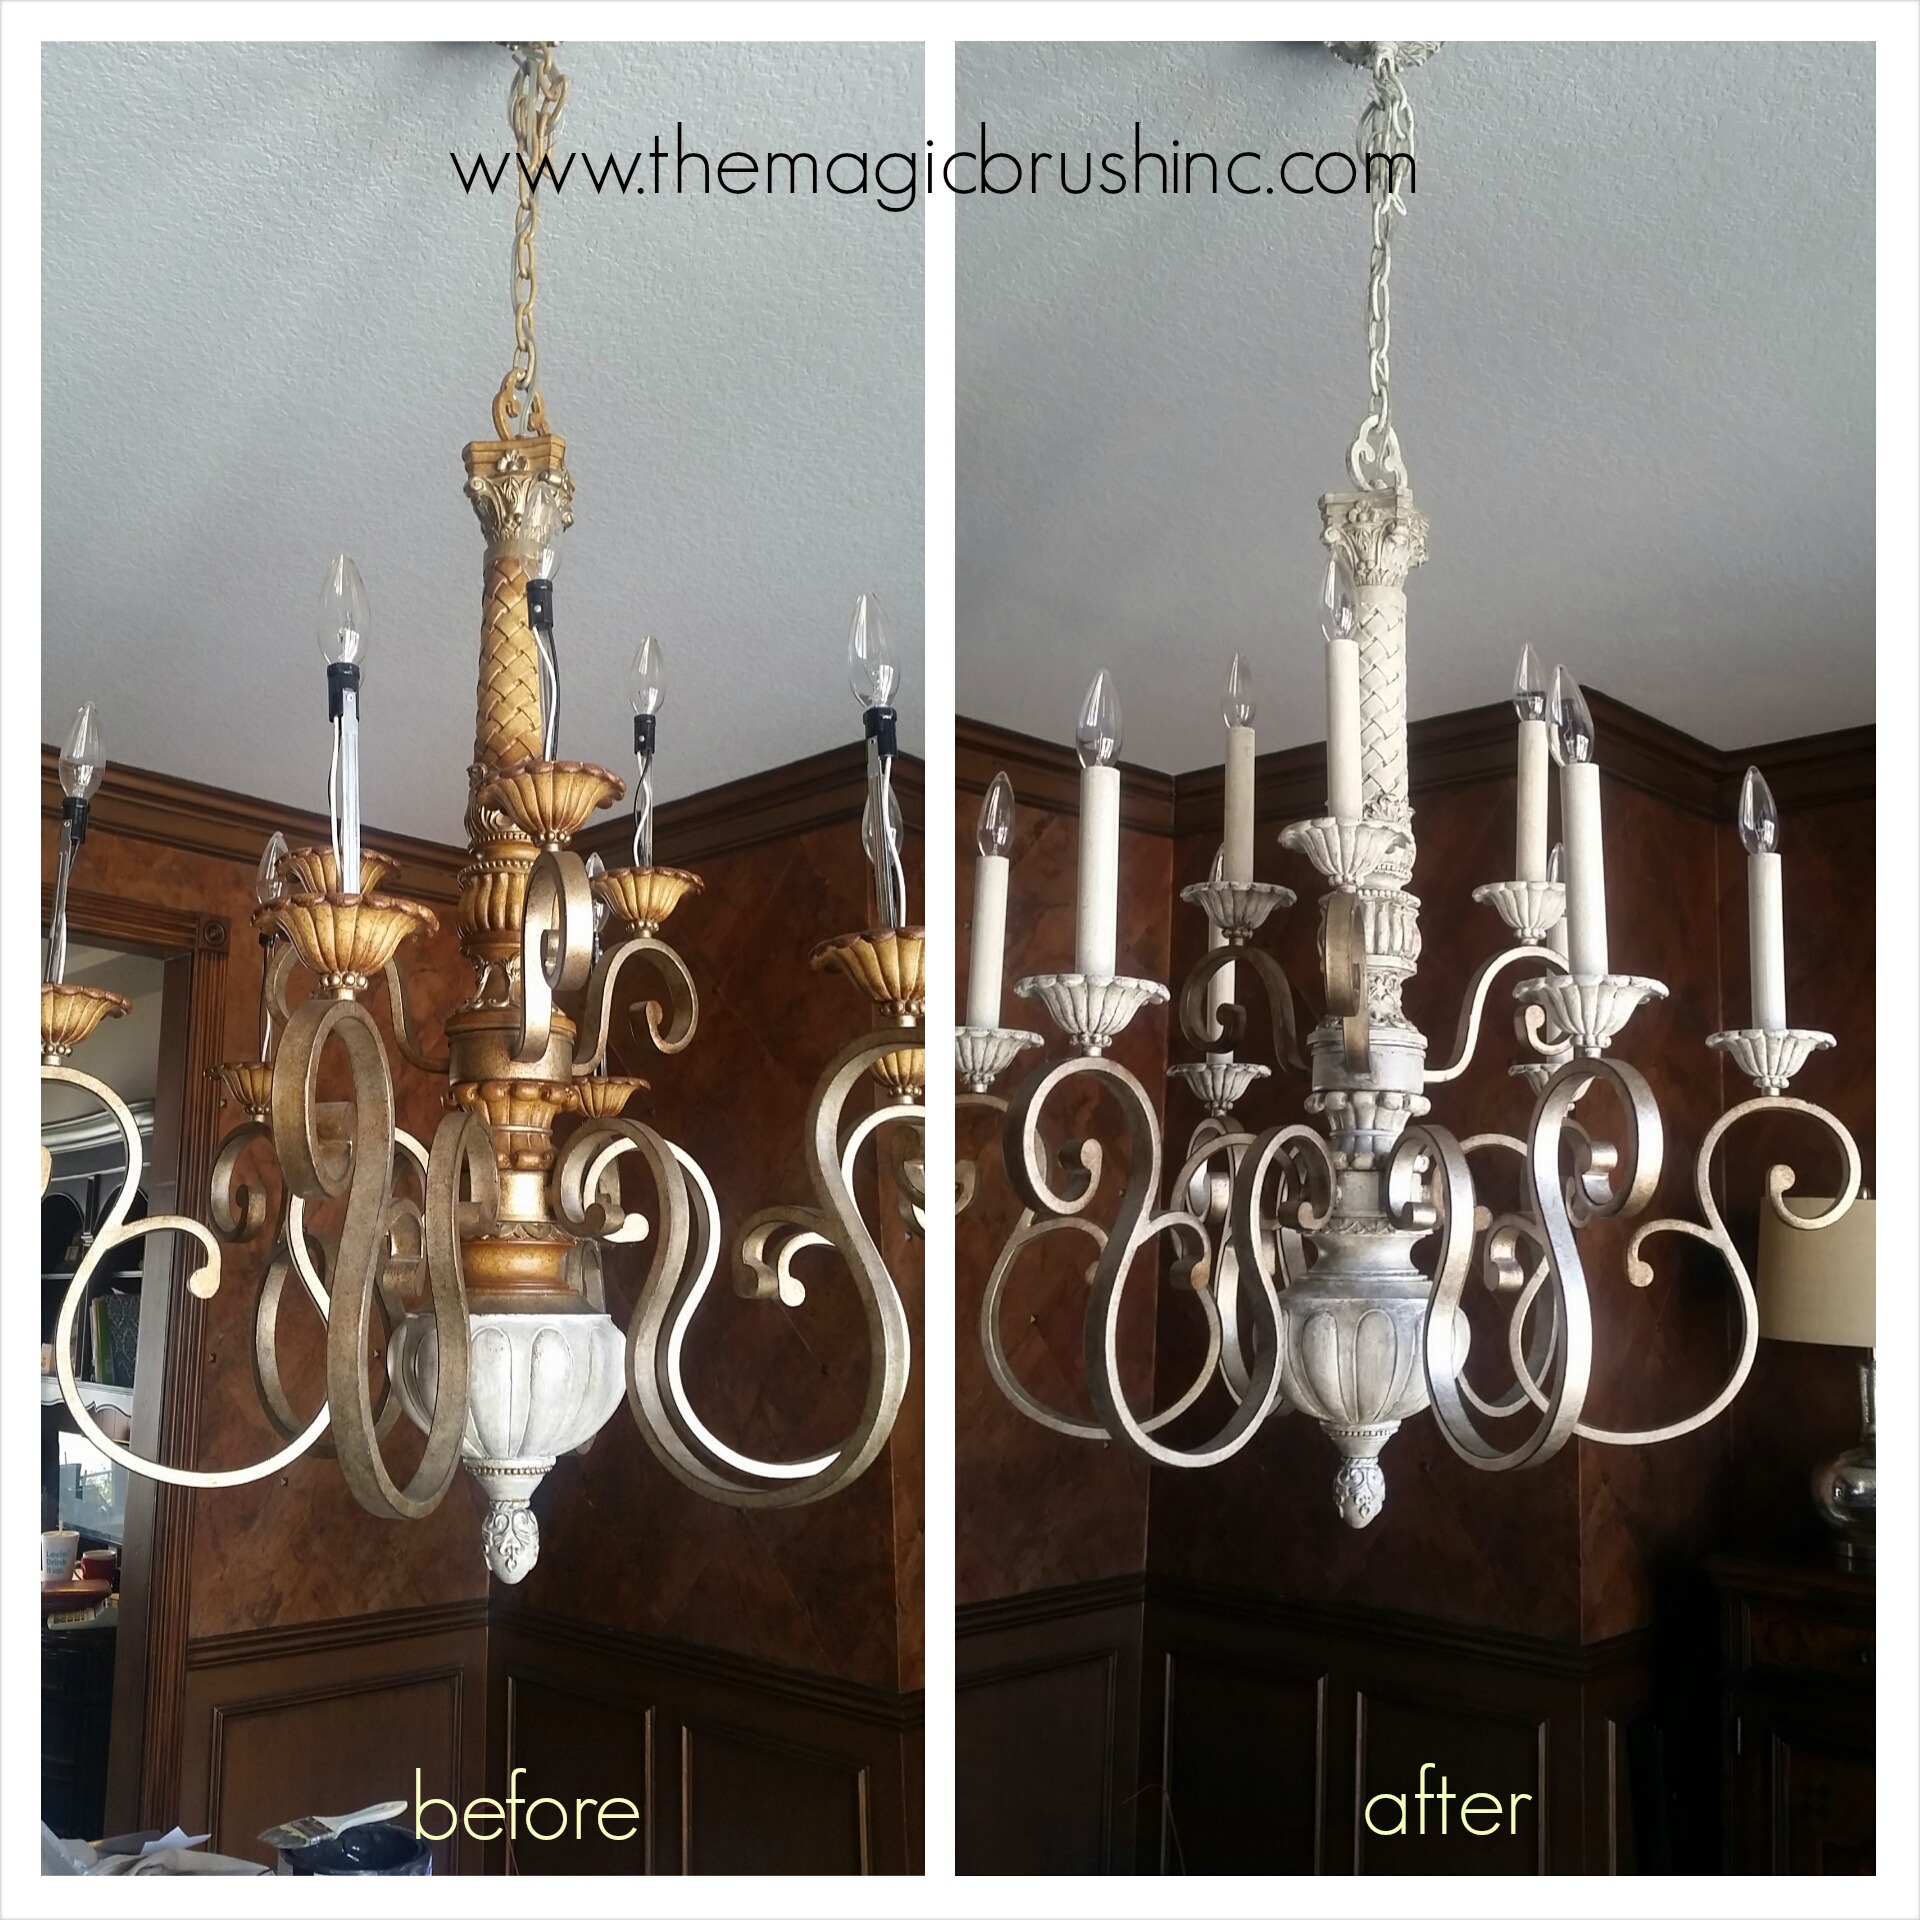
Julie stippled the white on all of the goldy/bronzy areas and she left the metal alone for me. Note, we also painted it while still hanging cuz’ aint nobody got time to be taking down light fixtures. I am a lazy painter, remember? And as a side note, the old fashioned men’s shaving cream brushes work GREAT for projects like this.

Painting light fixtures is easy. I had Julie paint the chain, the base, the candle casings and all but the metal. She was dabbing and blotting a little, she wasn’t trying to cover 100%. Then I had her tone the white down and “dirty it up” with a charcoal glaze that I just had at the house. That’s what gives it the old, kinda crusty look and details the cracks.
If you don’t have charcoal glaze “laying around” ….lol. I would suggest you use Espresso stain from Minwax. Just rub it on with a sponge. Easy breezy!

Here is a close-up! Julie is a rock star, isn’t she???? I’m thrilled with it and love it again! And may I mention this is not supposed to be a PERFECT project. The reason sometimes we shy away from projects is because we are perfectionists….. well this project looks good LESS THAN PERFECT. Brush stokes, missed areas, non-consistency is all accepted here. You can do this in a few hours, while it’s hanging and drop cloths over beloved farm tables are optional. Just get it done.

In other news, I got these chairs this week to go with my farm table that was made by Jazzy Chalks, and sits in front of my Psalms 91 print from The Shabbiest Chick. Don’t ask The Shabbiest Chick to make you a sign this big though, apparently it didn’t play nicely with others when she was making it. Or maybe just give her a minute????? Perhaps it’ll be like childbirth and she’ll forget the pain after a few months? Lol. I’m in love with it and so grateful she made it for me! (It’s the premise of my ebook devotional, “Covering your Business in Prayer”.)
xoxo,
Jennifer
If you loved this simple update of painting light fixtures, check out my FREE video where I’ll give you 10 easy updates you can do to your home before dinner! These improvements will make such a different in your living space!

Hello,
I googled how to upgrade a black light fixture while still hanging, and your tutorial came up…cause I’m a lazy painter too!!
And then I saw your chairs. Ha, I have those same chairs, except I have six. Wow oh wow, love your black ceiling.
I plan to paint my chandelier tomorrow. Thanks for the inspiration.
So you primed, did espresso and then painted? Can u use a handled sponge brush and did the wire on the chain get painted also?