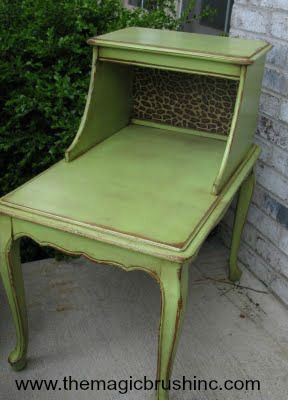
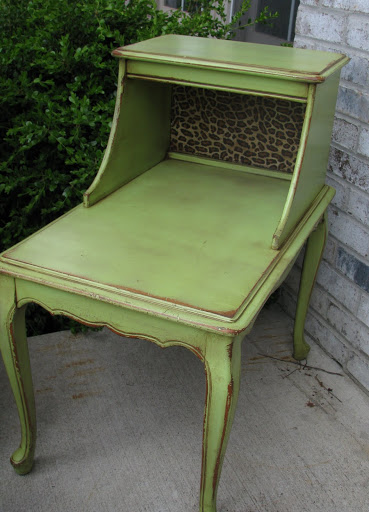
I may have had a little trouble in the past with picking a “perfect green” paint…..but I think I nailed it this time with my green side table!!!!!!
*This post contains affiliate links for ONLY products I use and love! Your purchases help support my DIY adventures.
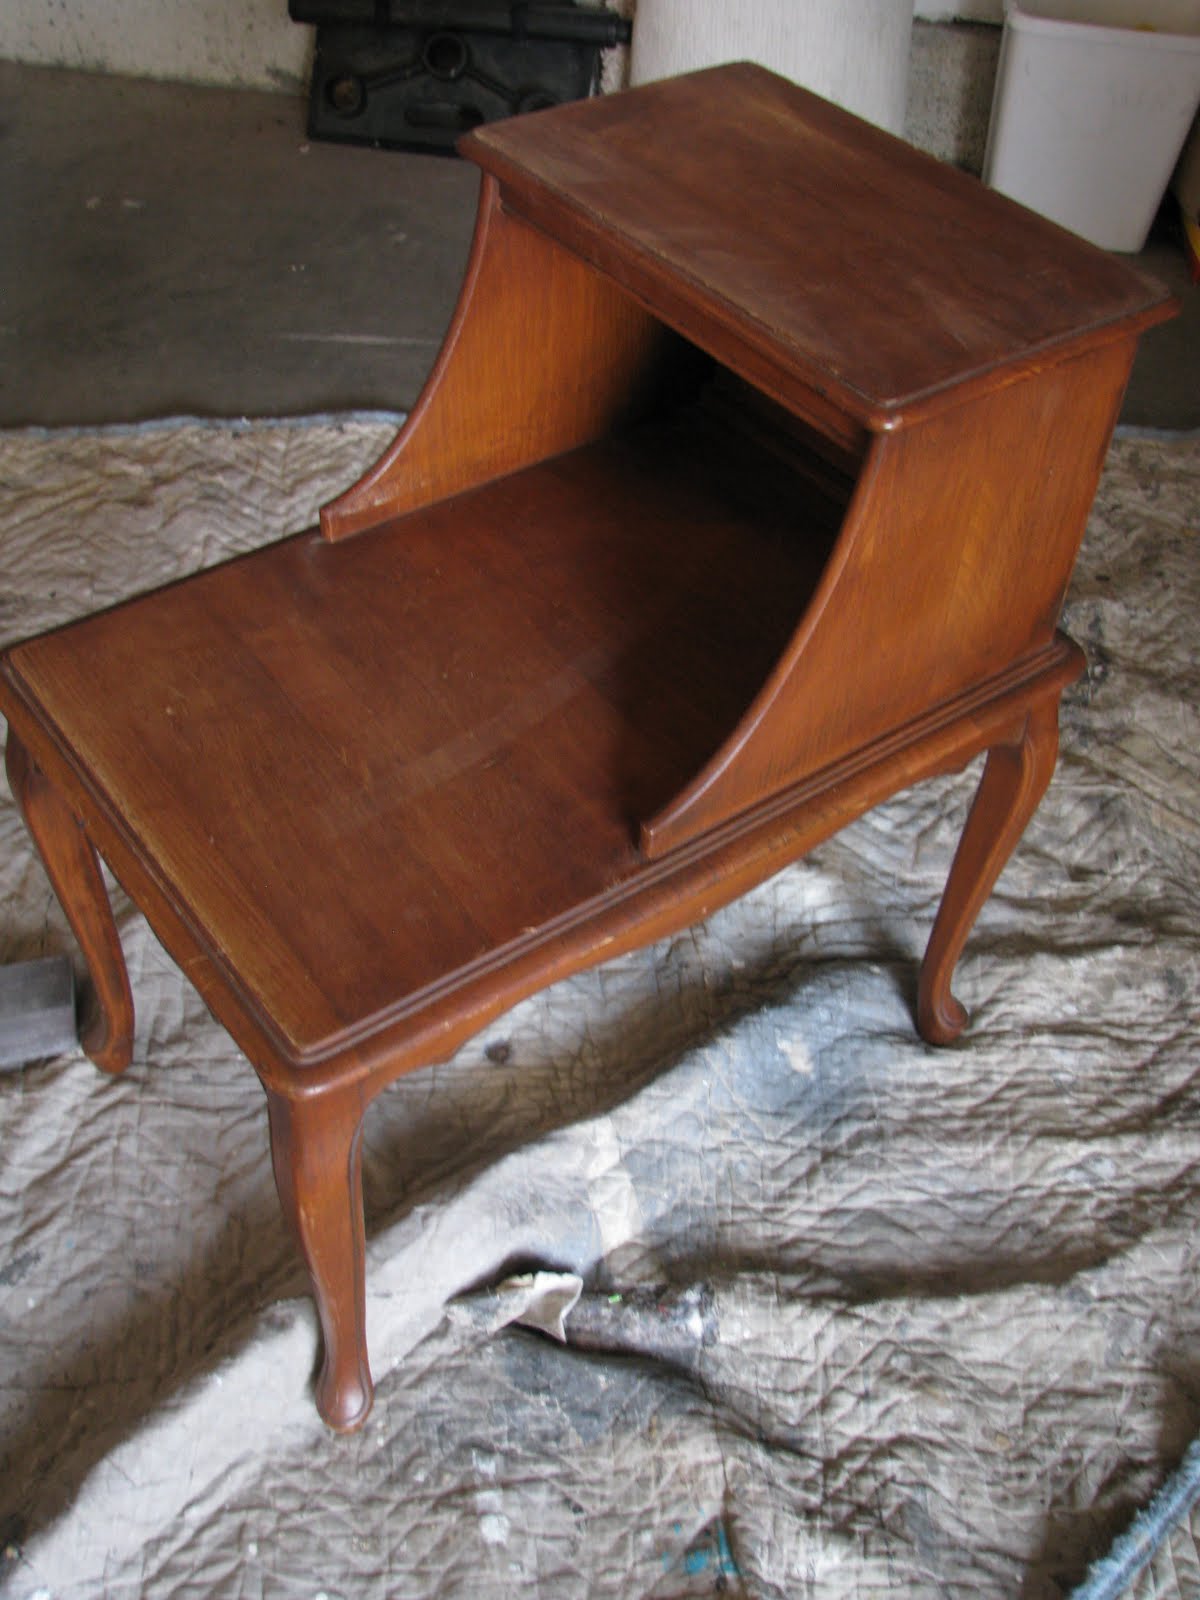
Here was my cute ‘lil table before…..
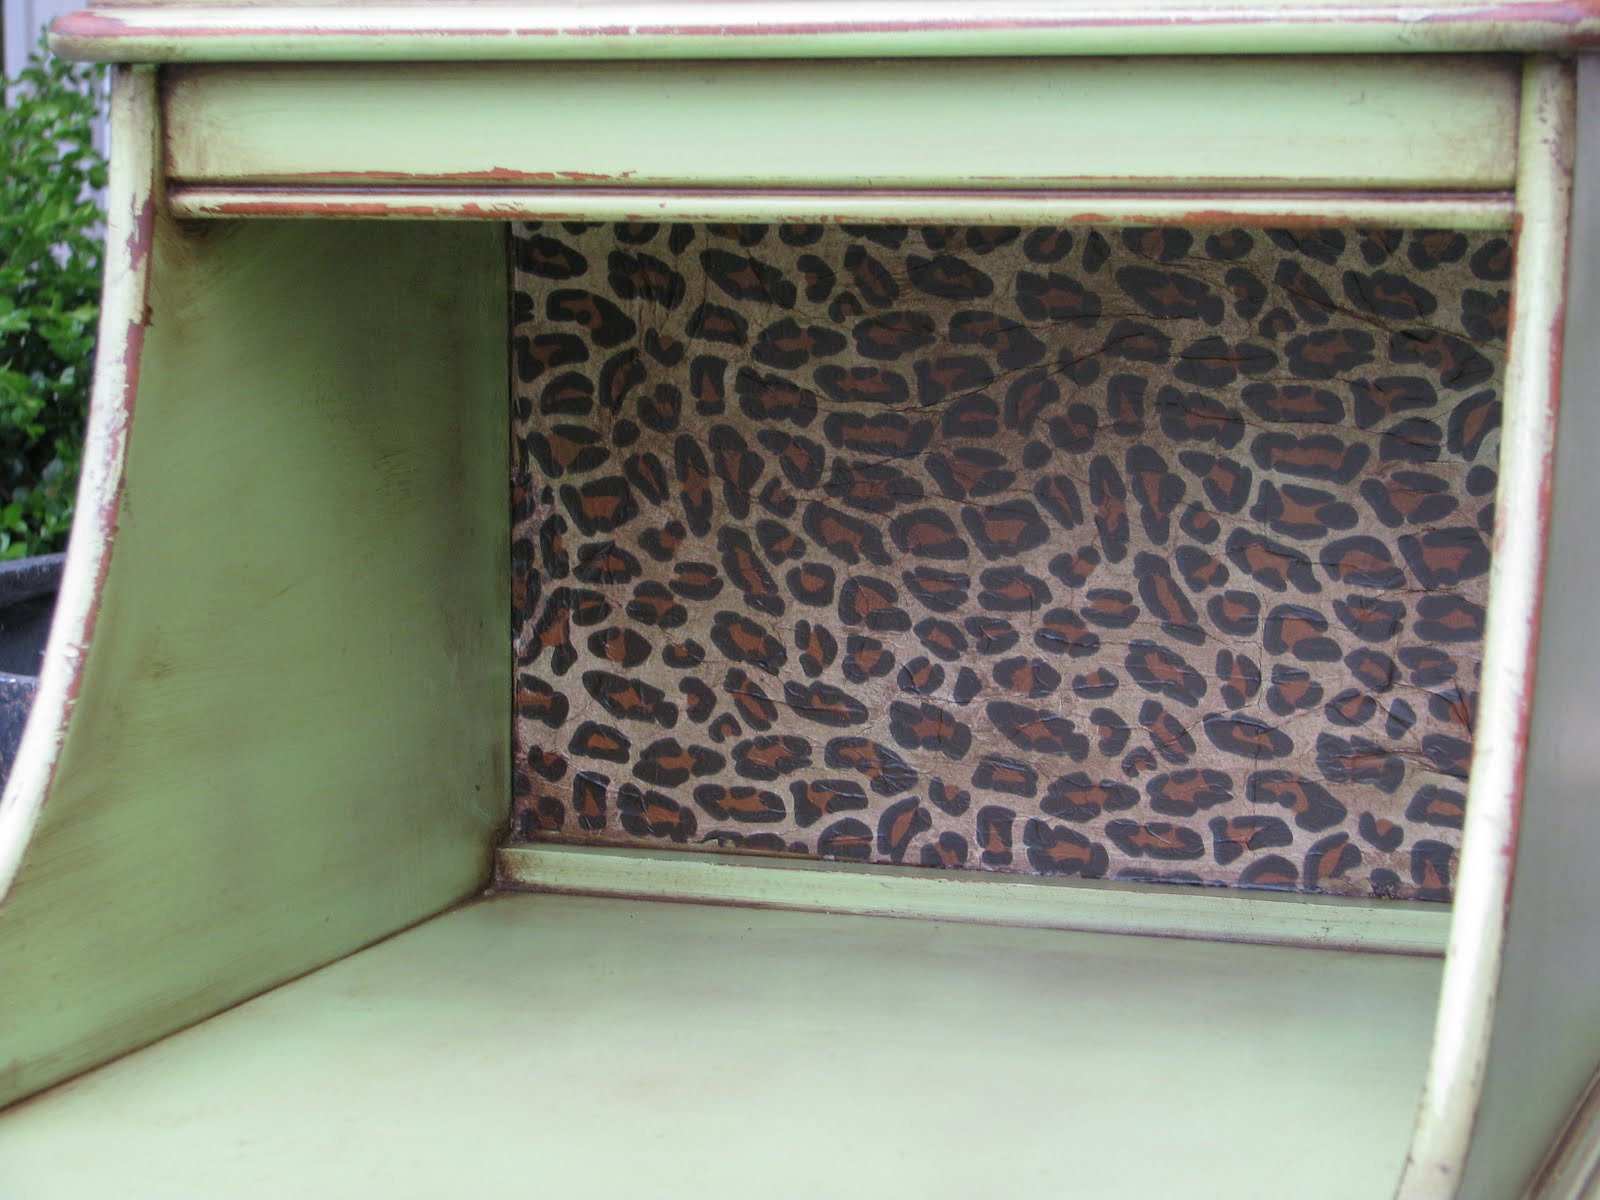
Never one to leave things alone…..I had to add some animal print somewhere on my green side table!!!!!
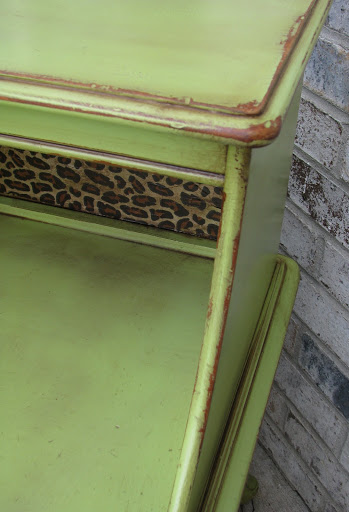
This is tissue paper (yes, the kind you use in a gift bag.). You can easily adhere the paper with Heirloom Tradition’s 1Gel …. my decoupaging product of choice. I also LOVE LOVE Heirloom Tradition’s tapered fiber brushes when painting furniture with chalk-type paint. It’s my favorite chalk brush!!!
First, you cut a piece of tissue paper in the exact size of the spot you will be adhering it to. Then, apply that 1Gel liberally and immediately lay your tissue paper on top of it. Smooth out with a sponge quickly to get any big air bubbles out. Let dry overnight. Go back over the tissue paper with another coat of the 1Gel the next day a
d you are done!


I love this table,the color is perfect and the print on the back just makes it!
Cute table!
Chic Modern Vintage
love it and of course love the touch of animal print!
I love it! It’s always good to add some animal print ~ makes it that much better.
Happy Easter!
Pat
Um, I’m in love with that green! Please do share the color 🙂
I love that color green! And that little pop of animal print is so cute! I typically hate these style tables, but you always make them look so cute! I love it!
i love the green and i LOVE the animal print!!
love it!!!!
Okay girl so you find the perfect green and don’t share what it is!!??;) So really what color did you use? I LOVE this darling little table!
PLEASE tell me you’re going to tell us the paint color. Right? RIGHT?
‘Cuz it’s PERFECT! I need me some green paint! 🙂
Seriously, will you share?
Best,
~Angela~
P.S. You’re a genius!
The color is “Green Apple” spray paint that I got at either Lowes or Home Depot!!!! Of course I will share colors!!!! =)
I have to agree, it’s a great shade of green!
I saw a table just like this at a thrift shop, and did not buy it! Wonder if it’s still there? You did an amazing job on yours. Love the color. I’m your newest follower.
http://altered-artworks.blogpost.com
That is the perfect shade of green and you did an awesome job with the distressing.
If you have a moment you would really appreciate it if you would stop by Vintage Revivals and vote for me. I am one of 5 finalists in her HUGE room makeover giveaway. Thanks Vote #3 🙂
http://vintagerevivals.blogspot.com/2011/05/top-5-plead-their-case.html
Great table! Did you decoupage the leopard print? tissue paper? thx!
Love the green and the print! And I really want one of those tables! Nice!
beth
Love the table! How did you make the glaze?