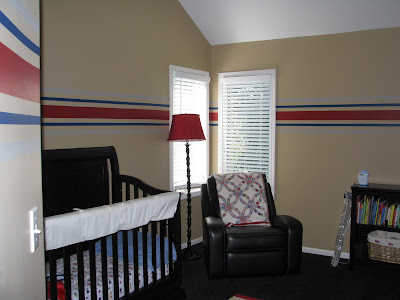
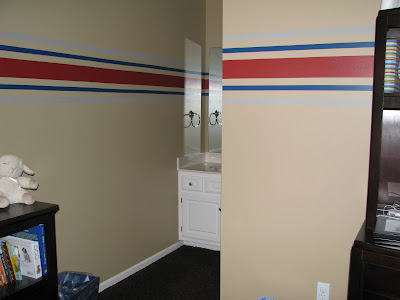
We have had several stripe jobs lately. Horizontal stripes are my FAVORITE!!! So much more interesting than the traditional vertical ones.
I often get asked how our stripes are so perfect. I have several tips:
1) stripes are a 2 person job.
2) we use my kid’s sidewalk chalk and a tape measure on every stripe job (make sure your chalk is similar in color to your stripe color or base paint color)
3) on most jobs we use a lazer level, but sometimes we snap a chalk line
4) we use low tack painter’s tape (blue tape)
5) and my #1 tip is…….(drumroll)…. after taping, we either paint the basecolor of the room or a clearcoat over the tape seams first. Because you WILL have bleeding when you paint stripes….but this way the bleed is the exact same color as the base paint on the walls. This step take a bit of extra time, but you will NOT, I repeat NOT need to be using a small artist brush after you pull your tape to fix a jillion little bleeds.
#6) and for my final tip….notice how the space inbetween my stripes is either an inch, an inch and a half or two inches. That’s because it is the width of one piece of painters tape (depending on the width you use). So for instance on this photo….I had inch and half tape above and below the red stripe. Which looks perfect after painting the next stripe.


